
New Year’s Day was dark. Really dark.
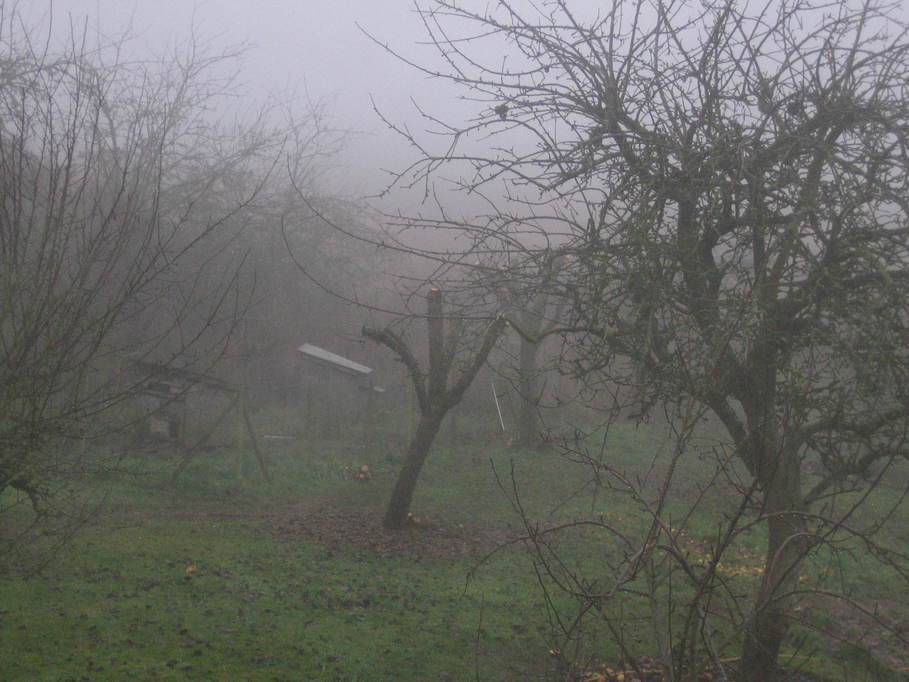
New Year’s Day was dark. Really dark.
And only once more…
Shortly before Christmas it became clear that an old beech tree at the end of our garden was rather more hollow than we realised and in fact has started to rot off at the bottom, presumably as a result of years of moisture getting inside. That part of the garden is quite exposed to the prevailing winds and should the tree have fallen it might quite easily have landed on our oil tank and/or the house itself, so there really was only one way it could end 🙁
I did at least collect the beech mast this year and scatter it around our hedgerows in the hope that more beech trees will grow.
Once the tree surgeons had done their work, this is what was left (they wouldn’t take it any further because there was fencing wire tangled up in the bark).
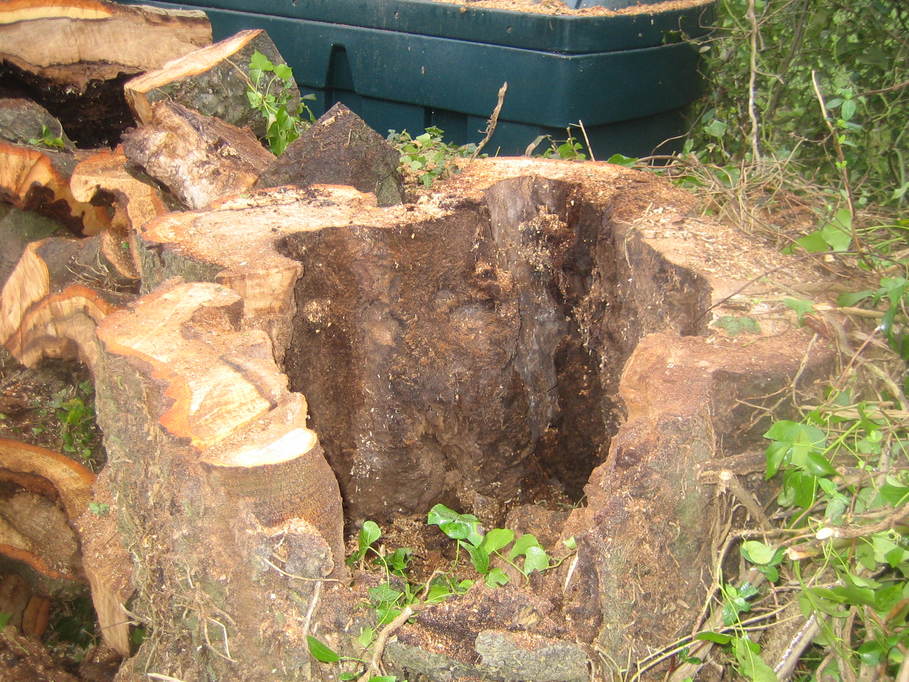
Not a great deal to be holding up what was actually quite a large tree…
One of the problems with a rain gauge and I think something that had prevented it working properly last time was that it forms a nice little perch for birds who then, err, contrive to block up the holes that let the rain through.
I decided to resolve this by adding a ring of vertical “spikes” around the top of the gauge so they can’t land on it. I had some suitable plastic dowel for the spikes, but needed some way to fix them, so yet again the 3D printer came to the rescue and I made a ring to fit around the top of the gauge that holds the spikes in place.
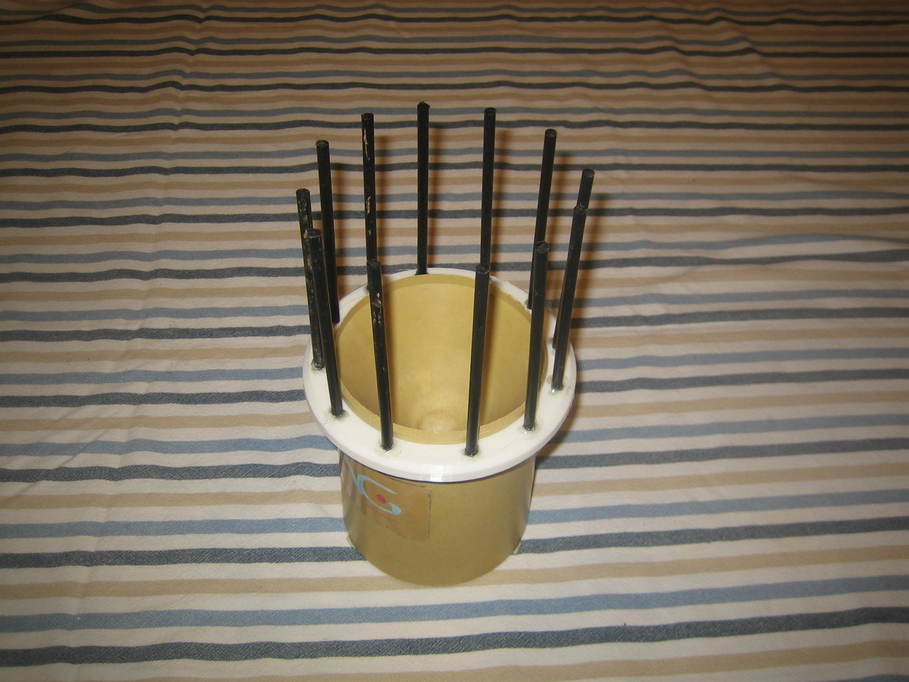
After putting the spikes in I decided that a little hot-melt glue wouldn’t go amiss just to make sure they didn’t come loose.
The printing process was a little nailbiting towards the end. I thought I was about to run out of filament…

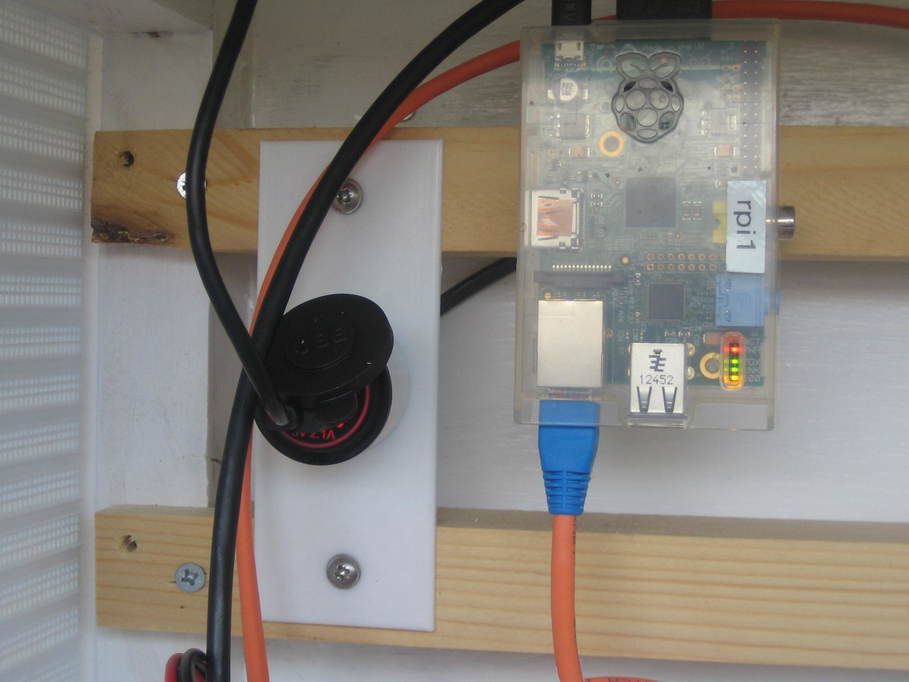
My Stevenson screen has a 12V supply to it for powering the 1-wire hub that has all my weather sensors attached to it. At the moment the main 1-wire connection runs back to the PC in the observatory warm room, but I decided it would be a little neater if I had a Raspberry Pi in the screen itself and used that to collect the 1-wire data. The question was, how to power the Pi?
After turning the idea over in my head for a while it occurred to me that if I had a 12V USB charging device I could just plug the Pi straight into that. And then a little more searching revealed the existence of sockets presumably intended to fit in the same sort of holes as car lighter sockets that provide USB charging points and take a 12V supply. From there it was easy.
I bought such a socket and a splitter cable for my 12V supply. One side of the splitter went to the 1-wire hub. The socket I bought came with spade connectors, so I connected them to the other side of the splitter. A quick bit of 3D printing gave me a bracket for mounting the socket and then it was just a case of plugging the Pi into the socket output.
The Pi seems quite happy to run in this way, though I did need to replace the original USB cable with a better one so the Pi didn’t get reset when the cable moved.
My AAG weather station lived on a post in the field in front of the house until it was blown down in a storm a couple of years back. The plastic of the housing had degraded quite badly in the sun, so I’d not really got around to checking it over and setting it up again.
Now I have the Stevenson screen for other weather sensors it was clearly time to get it up and running again so having tested that it still actually worked I took it apart and gave the two halves of the housing and the anemometer cups several coats of white gloss paint which will hopefully mean it can see out a few more years before I really need to replace it.
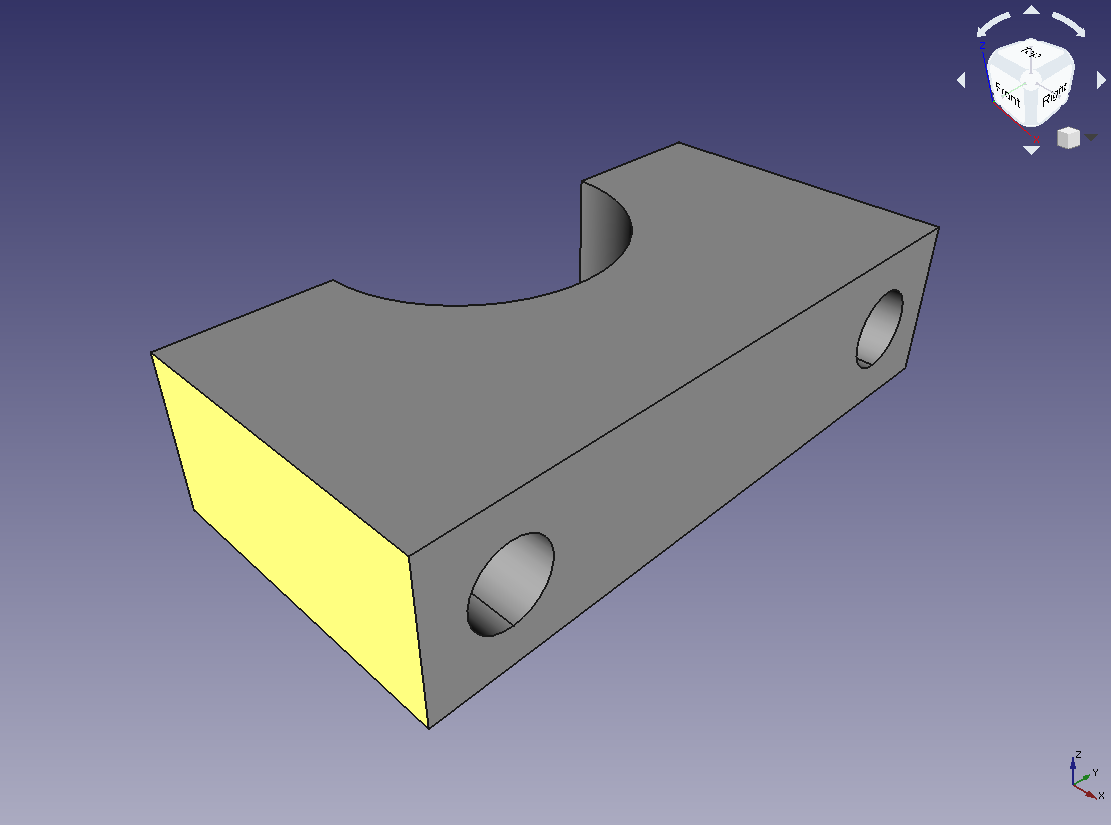
I had a pole that I wanted to try fixing it to, but I needed some additional parts to do the fitting. I decided it was easiest to 3D print them, so broke out FreeCAD which I am slowly learning my way around and printed a couple of blocks for mounting the pole on some brackets fixed to the observatory using U-bolts:
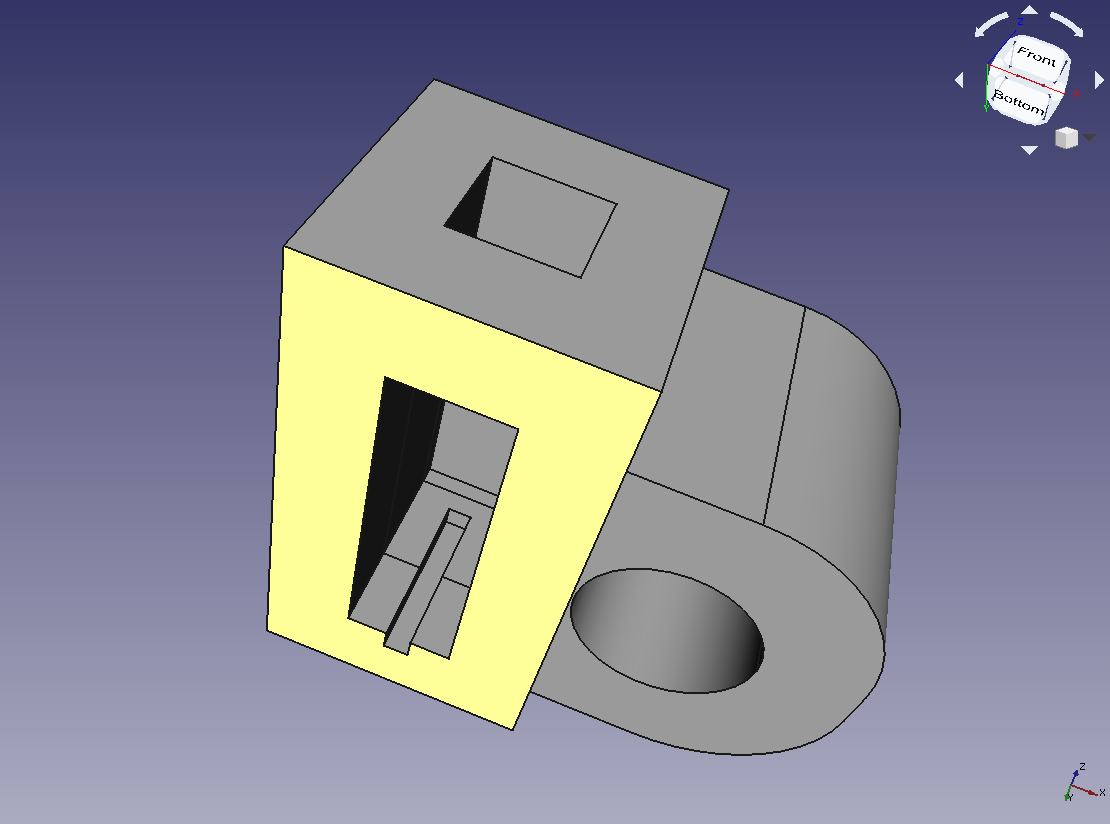
And a mount to fit on top of the post. I deliberately over-engineered this to reduce the chance of it failing and having the weather station blow down again. I also used a screw to fix it in postition on the top of the post.
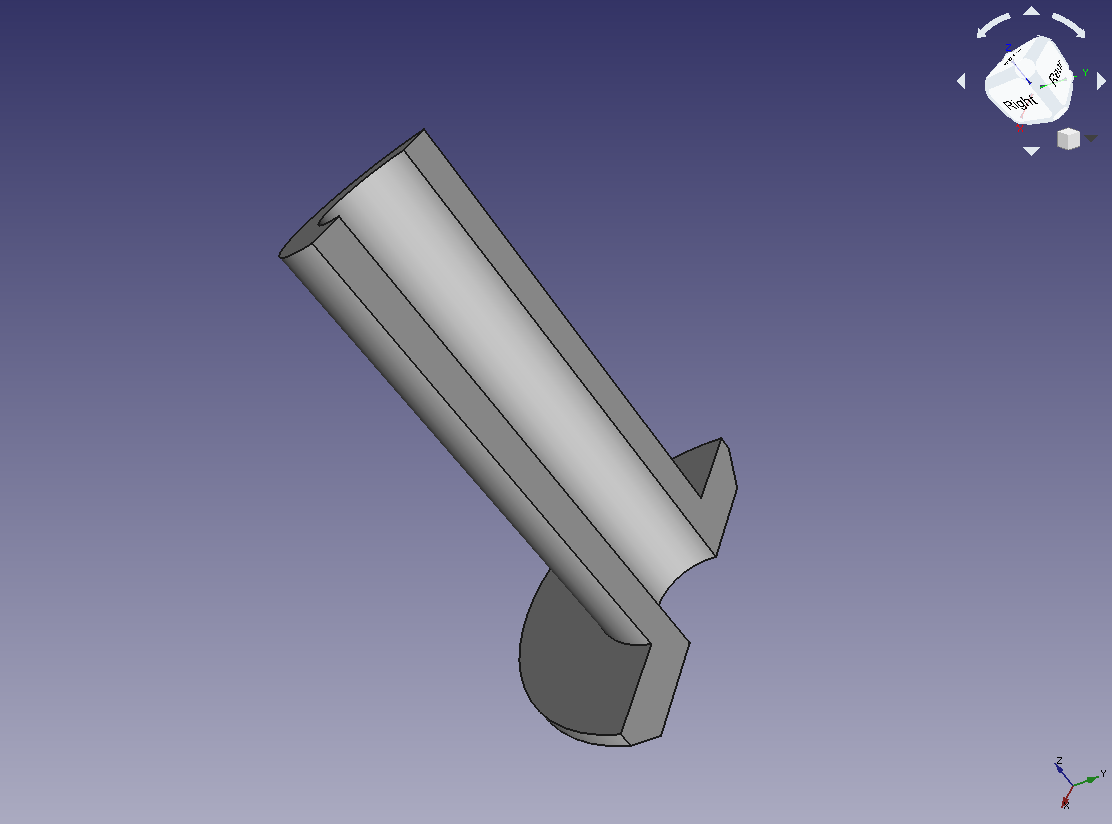
And finally I printed a couple of these as grommets for the cable where it enters the Stevenson screen to get plugged into the rest of my 1-wire kit.
After that it was just a question of fixing the cable in place and plugging it in to see if it worked (which I’m glad to say it does).
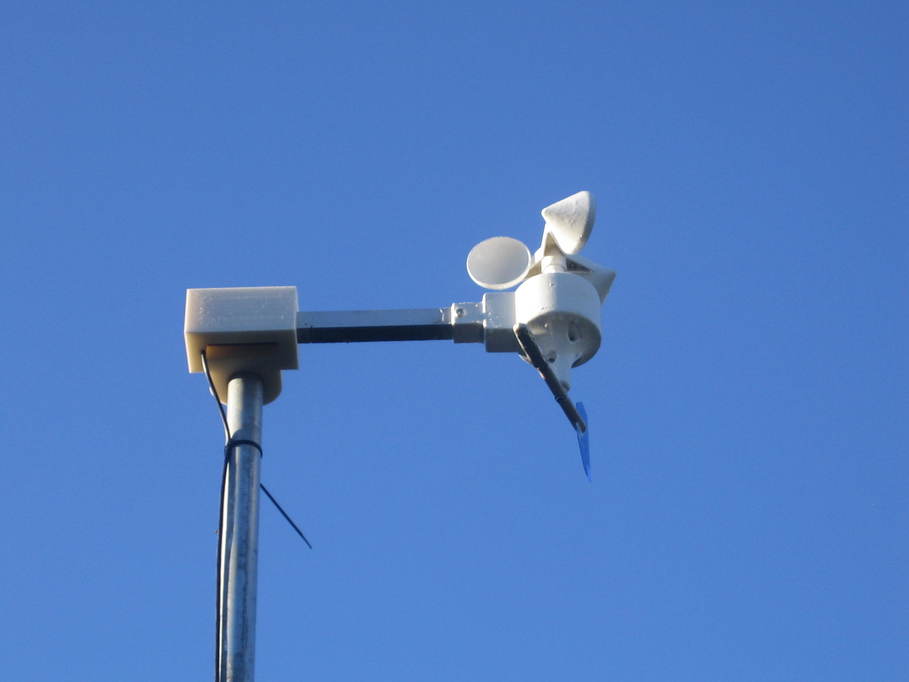
One day I’d quite like to build a solid-state wind gauge, but for now this will do the job nicely.
A while back I posted an image of M27 and it was suggested that I grabbed some OIII data which would show up the outer wings of the PN. As almost no-one in the UK will be unaware, the weather has not been kind, but I managed to get a couple of hours worth of OIII in ten minute subs which I have now added to the data I originally captured.
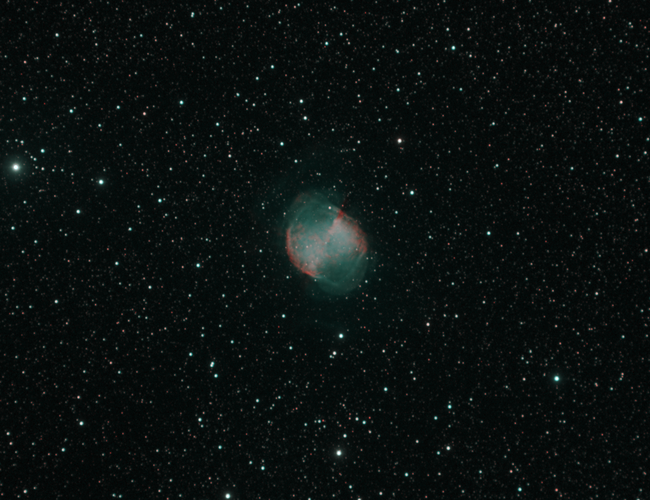
This is showing the outer wings, but they’re really quite faint. Like the image of the Crescent nebula that I posted earlier, I think I need to get into separating the stars from the nebula so I can pull more out of the data without the star colours getting completely messed up. More data to work with in the first place would probably help too, though it’s a bit late for that this year. It’ll have to keep until next summer now.
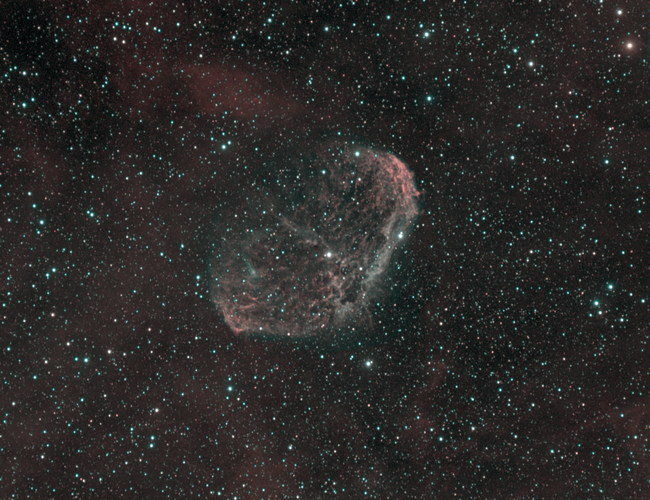
I’ve had another crack at this and I think it’s better in some respects, but I’m coming to the conclusion that I really have to get rid of the stars and process them and the nebulosity separately as trying to pull more out of the OIII to bring up the green/blue of the nebula just messes up the star colour.
Actually, I think I probably need to remove the stars and then mask off the nebula itself so I can just work on that and pull up the colour without messing up the surrounding Ha, but my Photoshop skills don’t extend that far yet…
With all the miserable weather we’ve had I’ve finally got things organised to do a bit of processing. Well, organised to do a bit of learning about processing really. When Photoshop-wrangling is required, I am only an egg.
So, this is a first pass at processing my data from the Crescent. Something of a motley collection of files, with five hours of Ha, four hours 45 mins of OIII, three hours of luminance, one hour 45 minutes of each of red and green and an hour of blue, all as fifteen minute subs, using my Atik 314L+ and 80ED. There was more blue, but it was awful so I threw it away, and in the end I didn’t use the luminance data (which is what I captured first). So, this is actually HaR for the red channel, OIIIG for the green and straight blue, reusing the HaR as luminance, totalling fourteen hours and 15 minutes integration time, scaled to 50%.
(I’ll put a larger image linked from the DSO section later).
I’m not exactly unhappy with it, but not entirely happy either.
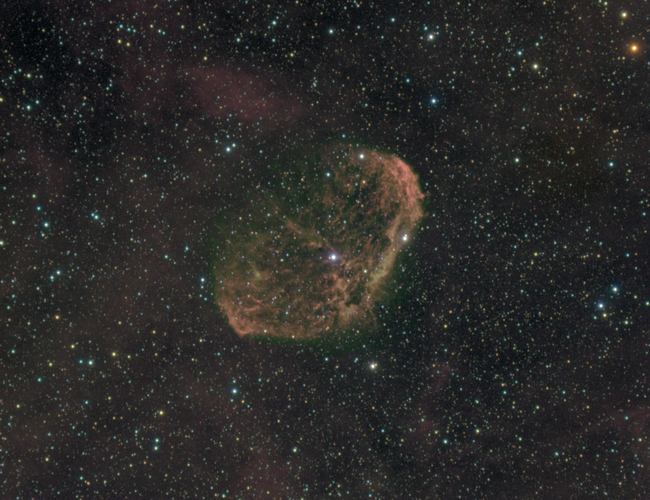
There’s no sharpening and I think I need to get my head around that. I did try some deconvolution, but I wasn’t happy with the results. I’m wondering if I should perhaps have combined the OIII data with the blue channel as well as the green. I think there’s more there than really shows up and perhaps that would make it stand out a little better. At the moment I think the green shell looks like an artefact when I’m pretty sure it’s genuine data.
It would be nice to have the stars a little better controlled, too. Sharpening might help with that, I guess, but it’s something else to work on.
As ever it took longer to get around to this than I’d hoped, mostly because we’d been somewhat short of weekends with suitable weather. However, eventually I had the opportunity to assemble all the various bits and pieces required to press the apples and cleaned them. Then the children and I got to work.
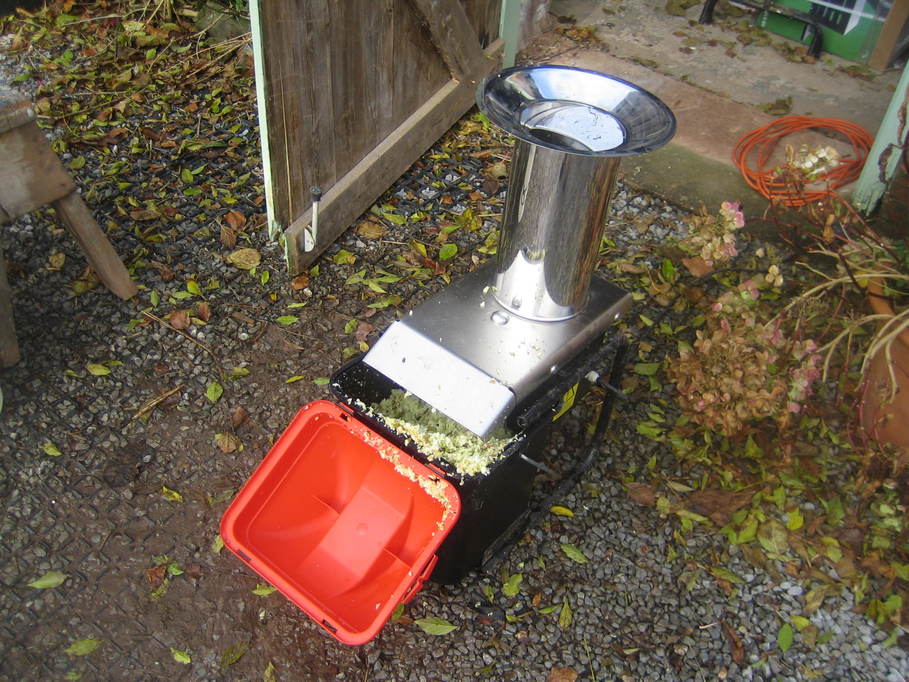
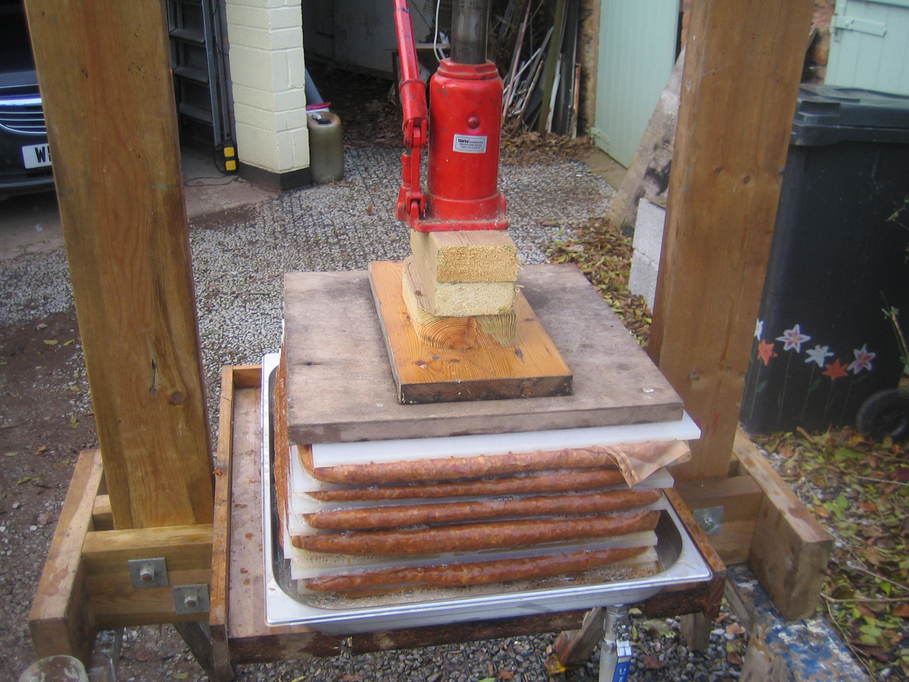
The first stage is to chop the apples up into small pieces, for which we use what is little more than a stainless steel garden shredder.
The apple goes into my home-made press (though I bought the tray and modified it to fit a drain — it’s the sort of thing used for keeping food in canteens and suchlike). The drain fitting is a stainless deck drain as often fitted on boats, I believe, and on the underside is a stainless ball valve.
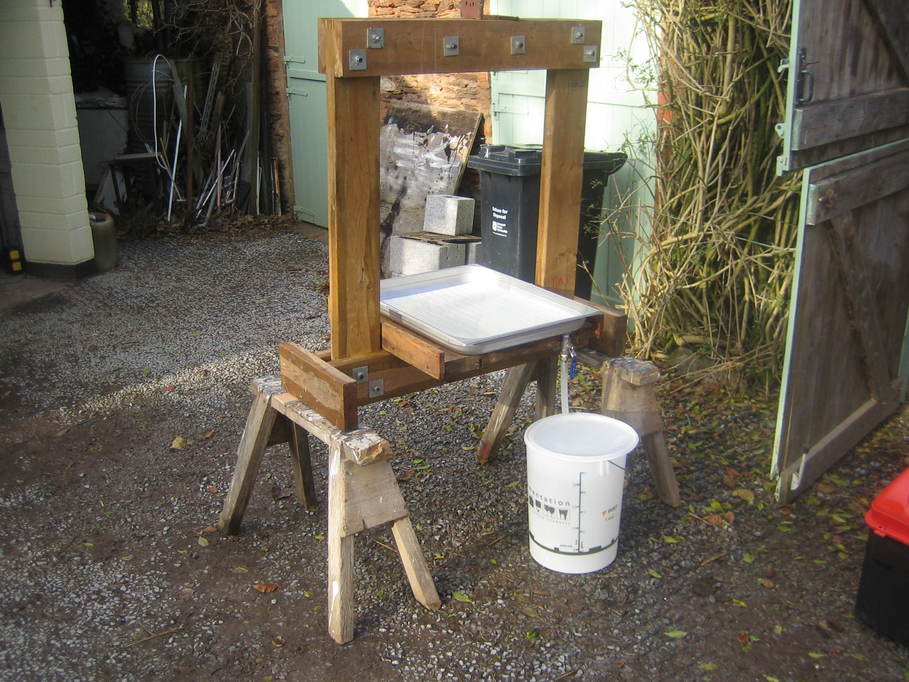
Just like a “traditional” cider press the apple is added in layers inside a “hair”, which in my case is squares of net curtain.
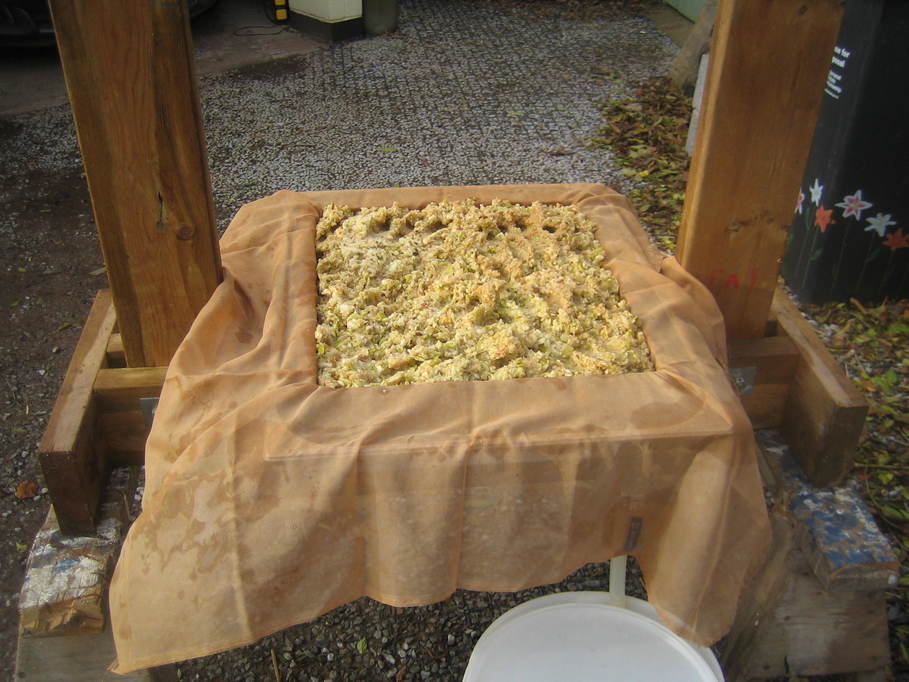
Not quite so traditional are the press boards that allow room for the juice to run out. I made them from squares of HDPE (the same sort of stuff that plastic chopping boards are made from) and cut grooves in each side using a circular saw with the blade depth set to just less than half the thickness of the material.
The grooves allow the juice to run very freely when the pressing starts.
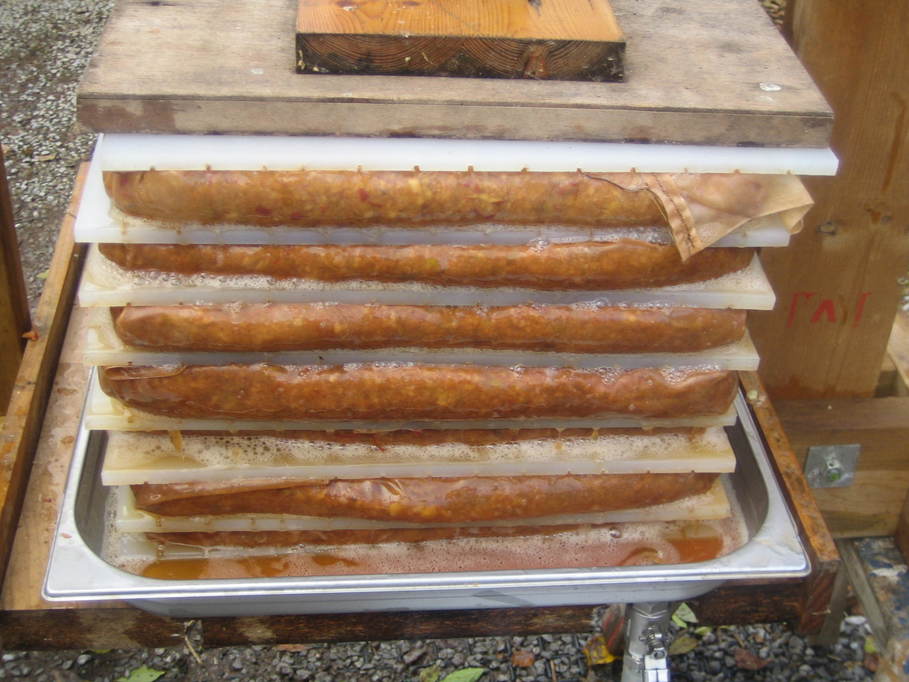
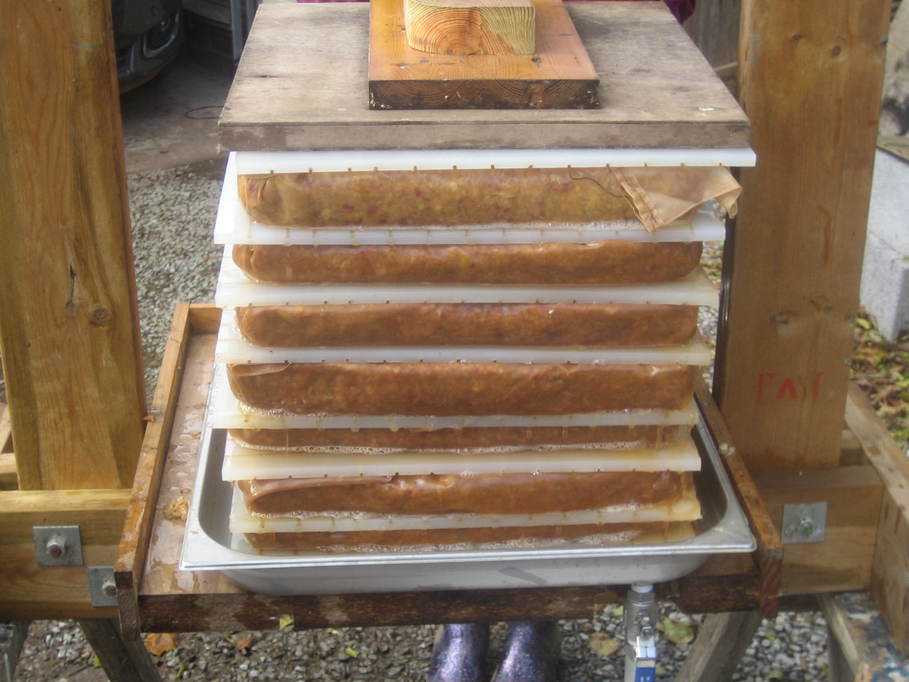
Also not quite “traditional” is the power for the press. In my case a twelve tonne bottle jack. It does a very good job though. The cheese compresses down to no more than half its original size by the end. I reckon I could probably go a bit further, but I’d need a more powerful jack and probably a metal frame for the press. A wooden frame suits me though.
What’s left in the press is this. Like apple cardboard.

And the final product. (That’s only a half pint mug, honest. Not that it stopped my son drinking a couple of pints of it 🙂 It does taste absolutely fantastic.
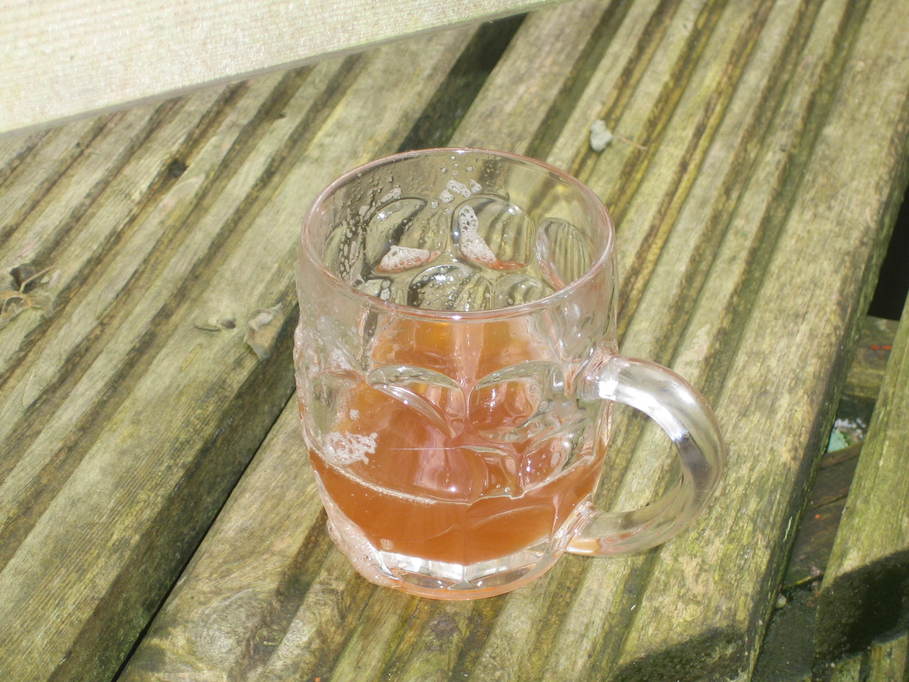
All told we managed to get sixteen gallons of juice from the ten sacks of apples that I collected back at the end of October. We did have to throw out a few bad ones, but considering they’ve been sitting in the sacks for over a month it wasn’t too bad.
The next stage is to bottle and pasteurise it. I don’t have a proper pasteuriser, so I make do with my beer boiler, putting the bottles neck-deep into water, raising the temperature to 70C and holding it there for twenty minutes before capping the bottles. It’s a bit of a hack and I really need to make a proper pasteuriser, but for now it works.
I’ve had one of AAG’s rain gauges for years. I’m not sure they make them any more, but I believe they were someone else’s design anyhow. In the end it gave up because it was bunged up and the electronics weren’t working. Rather than buy or build a new one I decided I’d open it up and see what I could do to make it live again.
As it turns out other than the rocker for catching the drops of rain there’s really not much inside:
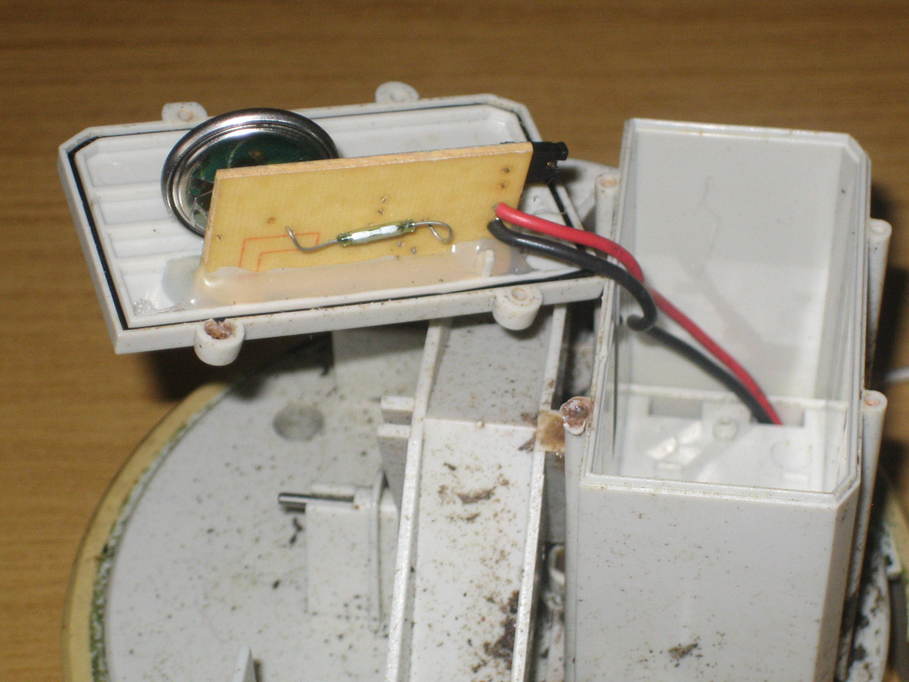
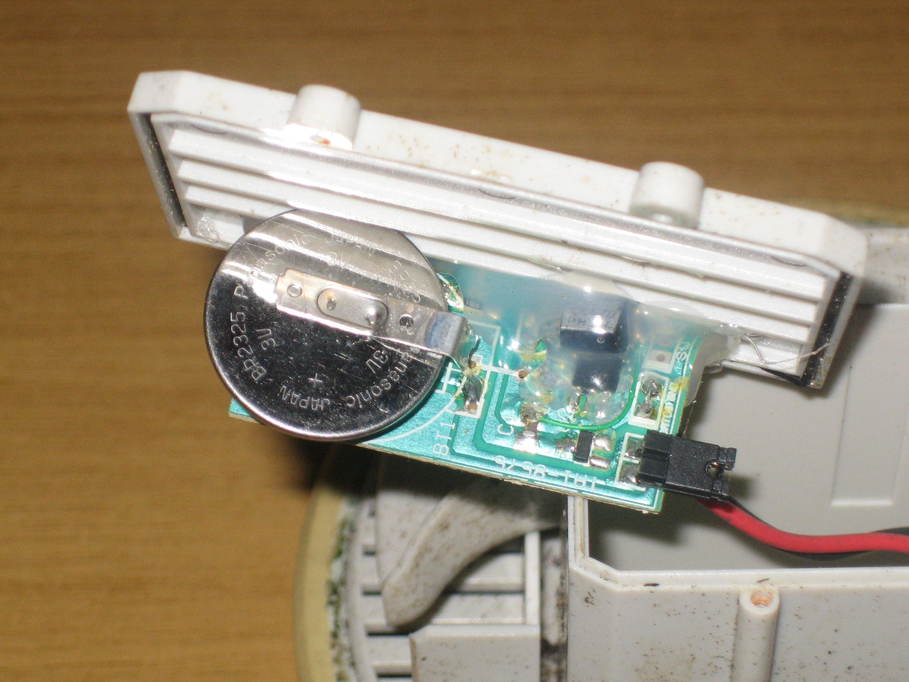
The battery was dead, but appears to be “welded” onto the board so I decided I’d leave it alone. It’s only there to provide a battery backup for the counter memory and I’m hoping I shouldn’t have a problem with power there.
So my refurbishment was mostly limited to completely disassembling all the parts and cleaning them up, then reassembling it carefully.
I also have some cat5e cable with a UV-stable sheath, so I removed the old cable (the red and black wires in the above pictures) which wasn’t going to be long enough anyhow and replaced it with some of the cat5e, in a length sufficient to reach back to the Stevenson screen.
Testing on my desk by flipping the bucket with my finger actually suggested that I might still have a problem with double-counting “tips”, but I decided I’d deal with that later if it was a problem in actual use.