
I posted a few days ago that my Dremel 4000 had died and that I suspected the thermal fuse to be the cause. Here’s how I fixed it.
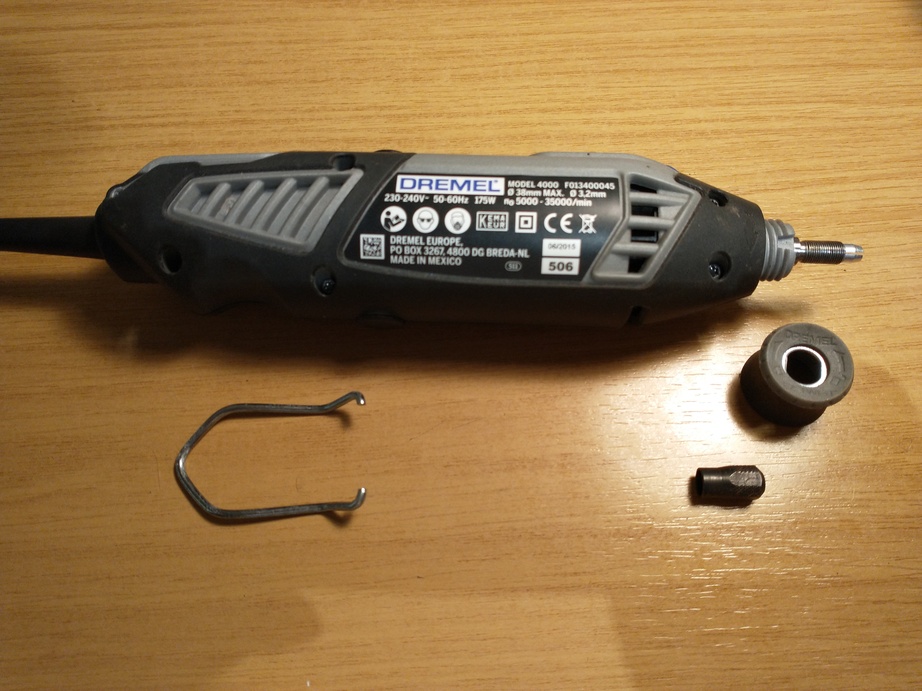
The first steps to getting inside the case are to remove the folding clip, the collet and the collar on the end of the body behind the collet. It may be possible to remove the collar without removing the collet, but when it’s so easy to get the collet off, why make things difficult?
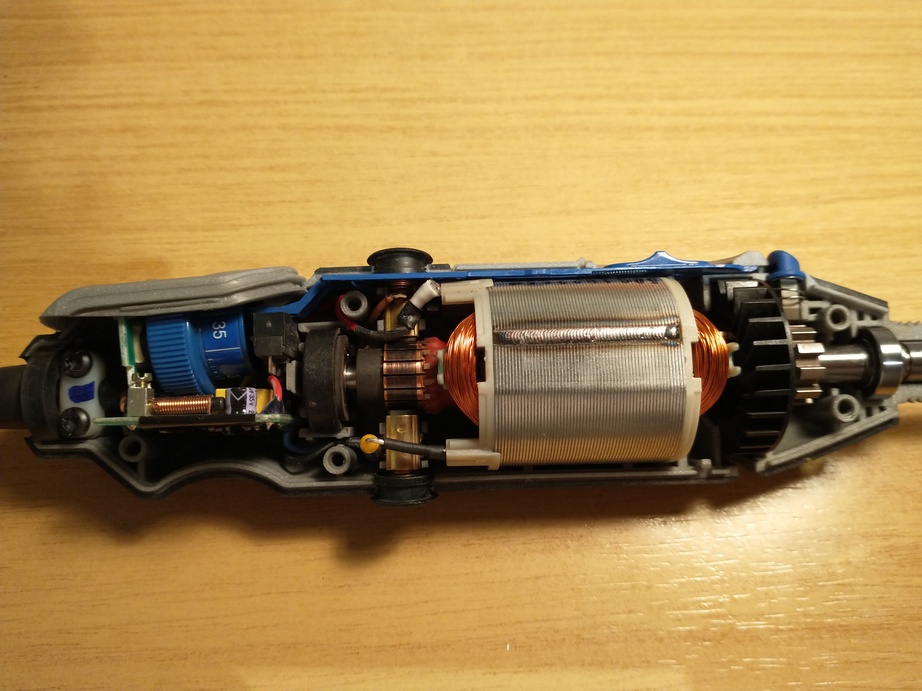
The five Torx screws holding the case together can then be removed and that side of the case gently prised off. There are a few small parts that may go “ping” at this point. In particular the two brush holder covers (small black plastic caps about halfway down the body of the tool) and the brushes they retain, and the locking button for the shaft near the nose of the tool. So a wise person probably does this bit where such parts won’t disappear down the back of a cupboard and never be seen again 🙂
Hopefully that leaves you with a view somewhat similar to this:
At this point it’s probably easiest to remove the lower brush cover and the brush itself (the ones on the opposite side to the speed control and power switch).
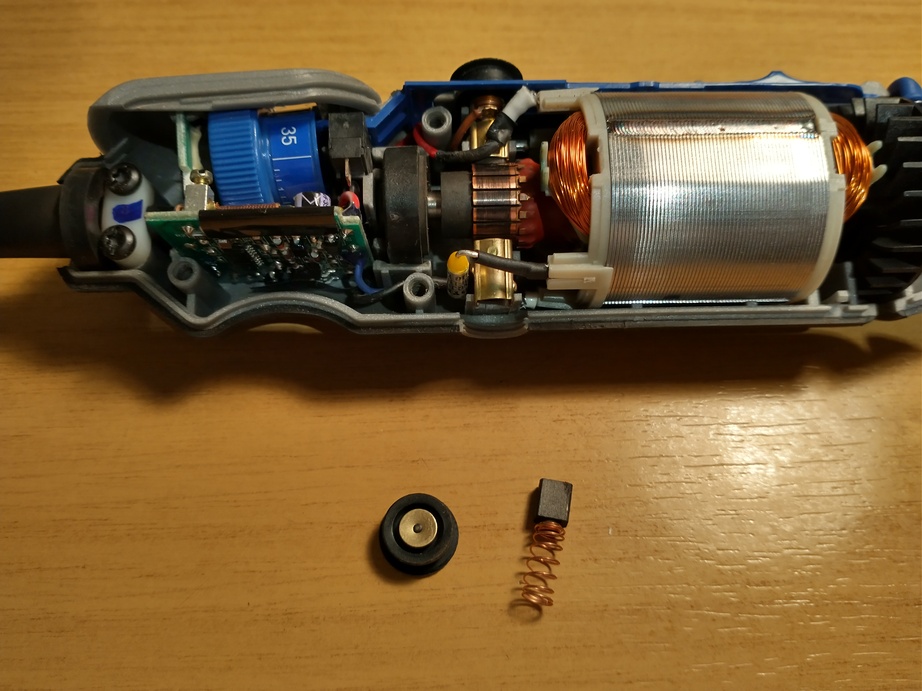
This allows comfortable access to the brush holder and the attached fuse (the silver coloured part with the yellow end in this photo).
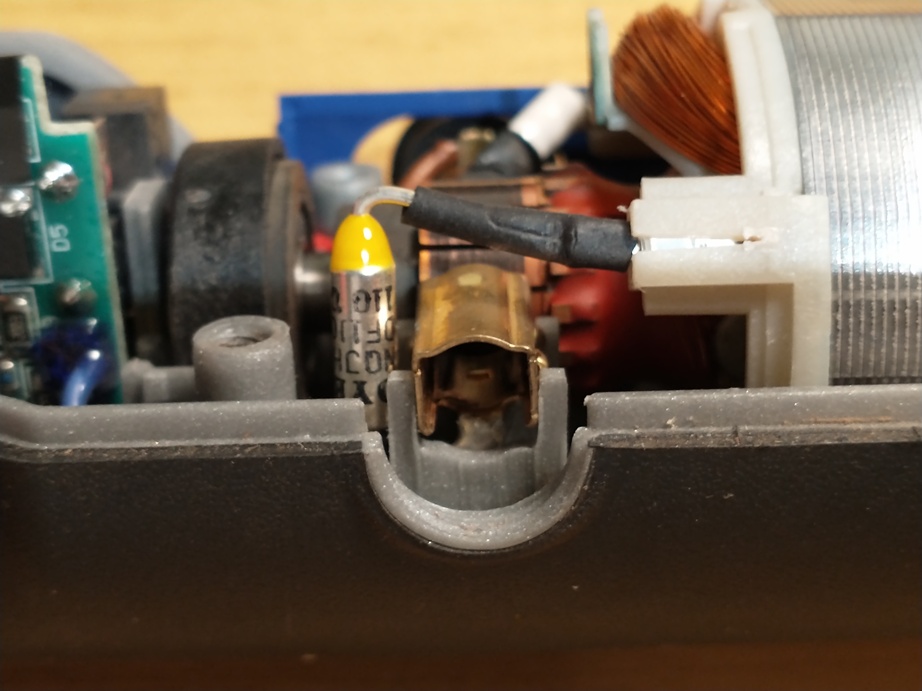
A multimeter placed across the brush holder and the wire coming out of the yellow end of the fuse in continuity-testing mode should indicate whether the fuse has failed or not. If it conducts then the problem lies elsewhere. In my case it didn’t. The fuse and brush holder are supplied as a single part when ordering spares which makes replacement quite straightforward. The fuse connects to the motor with a small spade connector that can be pulled out carefully and then the two parts just lift away.

The spares sites I found for ordering replacements had exploded diagrams of the tool with all the parts numbered. It wasn’t entirely obvious from the description alone that one brush holder just has a fly lead with a spade connector on the end whilst the other has the thermal fuse. They were both just described as “brush holder”. It’s therefore important to use the diagram to make sure you get the right part. Another clue is that the one with the thermal fuse is the more expensive of the two. I’d hazard a guess that the other brush holder might actually work were it to be fitted instead, but you’d end up with a Dremel with no protection from overheating. If you’re the kind of person who treats their tools with care and good sense then that might not be a problem. If you’re the kind of cack-handed ape whose screwdrivers often double as removal tools for oil filters then you’re probably better off keeping the thermal fuse 😀
Reassembly with the new part is, as they say in all the good servicing manuals, just the reverse of disassembly 🙂 Take care not to trap wires between the brush holder and body of the tool though. They should fit into the gaps in the moulding. And be sure to get the orientation of the brush correct when it is put back in, so it makes proper contact with the commutator. The end of the brush is curved where it fits against the surface of the commutator.
Excellent article. Saved me a lot of hit and miss.