Today was pepper sowing day!
I have seeds for a variety of pepper seeds, both chiles and sweet peppers. The sweet peppers are Corno di Toro, both red and yellow, and Tarquinio F1, whilst the majority of the chiles are Cayenne and Jalapeno. I also saved some seeds from a jar of Peppadew peppers. They’ve been pickled and there’s almost no chance anything will germinate, but I’ll give it a go. In case they don’t work I managed to get hold of some seed for a variety of Capsicum Baccatum that’s supposed to be very similar to the Peppadew pepper.
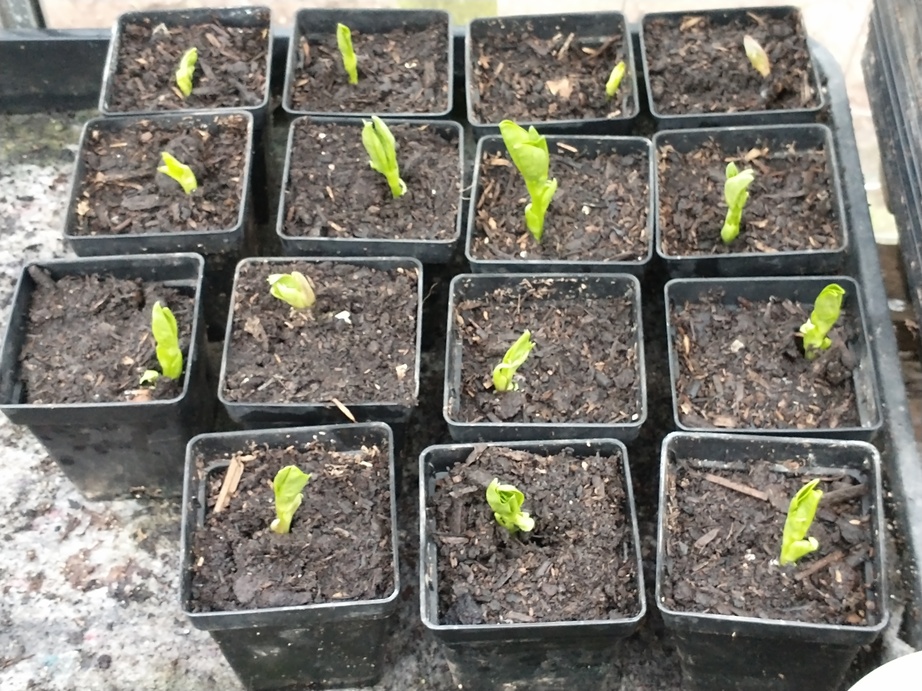
The Cayenne, Peppadew and Capsicum Baccatum I sowed in plain trays with the intention that I will prick out any seedlings once they germinate. In fact I had sufficient of the Cayenne and C. Baccatum that I only sowed half of what I had. The rest were sown a single seed per cell of module trays and a twelve-cell tray was plenty for each variety. All have gone into the propagator and if germination isn’t good for those varieties where I have spares, I’ll give it another go in a few weeks.
I also took the opportunity to sow a tray full of aubergine seeds, one per cell with a few doubled up as I had a few seeds over. These are eventually destined for the “no dig” greenhouse (more later).
I’ve sown twenty-four cells of radish seeds, four seeds to a cell. Once those are up they’ll go out in the veggie plot under fleece. And on the herb front I’ve sown some parsley (both flat leaf and curly), dill, and coriander. Four cells each of the parsley and dill, and a couple of trays of the coriander.
I’ve probably overdone the coriander a bit (is such a thing possible?). The “no name” seeds I had last year grew into plants that ran to seed very quickly, which may have been down to having them in pots that were too small or inadequate watering or could just be that particular variety. I’ve bought a named variety this year (called “Cruiser”) that is supposed to be good for leaf production. I decided I’d plant what I had left of last year’s seed as well as the new one and if it runs to seed this time I won’t care as we’ll just use the seeds for cooking anyhow. The plants won’t be in pots this year either — they’ll go out in the main plot. I didn’t know until recently that coriander plants are actually quite hardy once they’ve established themselves and (in the south of the UK, at least) can even survive through the winter outdoors. I probably will need to sow more later in the year just to keep the supply of leaves going as I’m sure they’ll all want to run to seed at some point.
I had a crisis of confidence regarding the number of red onions I planted to over-winter a few days back, so I’ve sown twenty-four cells with five or six seeds per cell to plant out in late March or early April. Anything more than four onions per “clump” I shall thin to use as spring onions which should hopefully give me close to an extra hundred onions. I reckon that should be getting on for two or even three months worth. We do seem to get through an awful lot of them.