My first 3d-printed object revisited

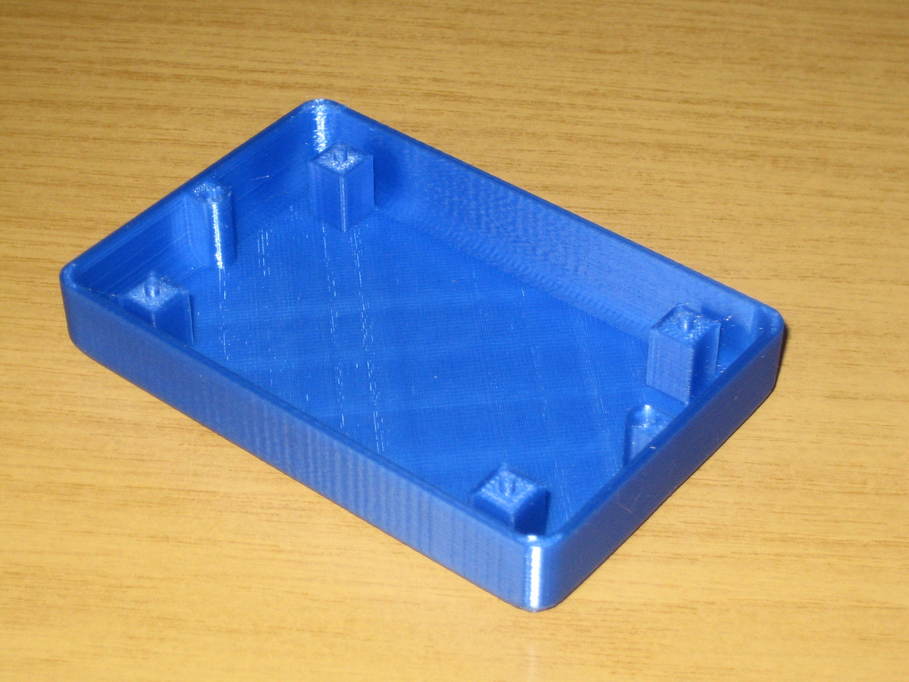
When it came to assembling the case I’d printed it became obvious that the pillars supporting the circuit board really weren’t strong enough to withstand cables being inserted into and removed from the sockets on board the PCB. I decided therefore to print another version, this time with larger square pillars.

(I got bored of red, so this one is blue 🙂

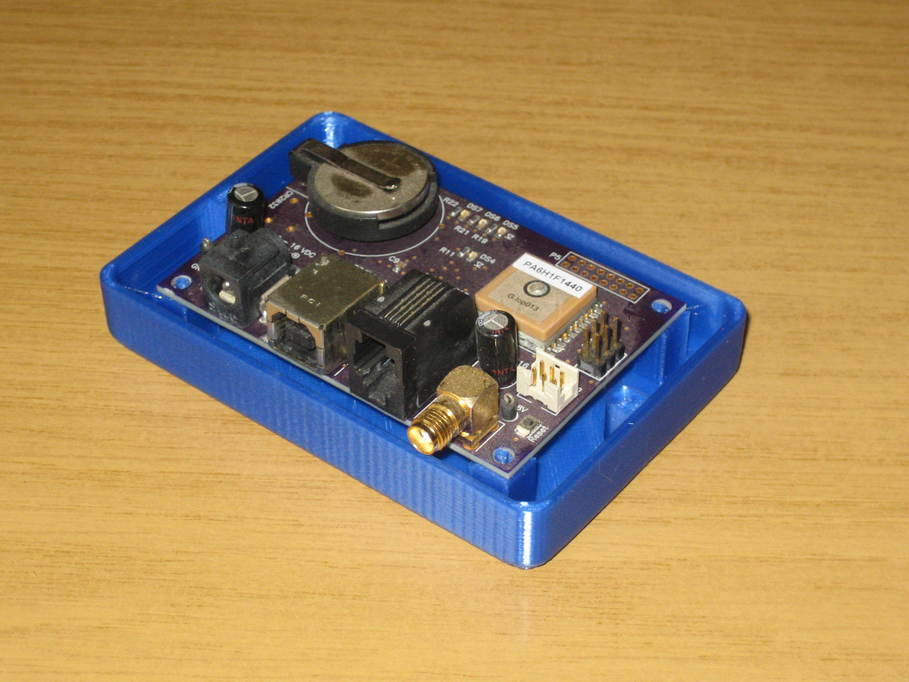
This has worked much better and the PCB is now firmly supported against the forces placed on it via the sockets.

The design for the top was basically the same as the base, but with cut-outs for the sockets and a lip around the inside edge to fit into the base. It is a lovely snug fit which was a pleasant surprise. So snug in fact that I haven’t bothered putting in screws to hold the two halves of the case together.

Posted in 3D Printing, Projects | Tagged | Leave a comment

3D printer filament spool holder

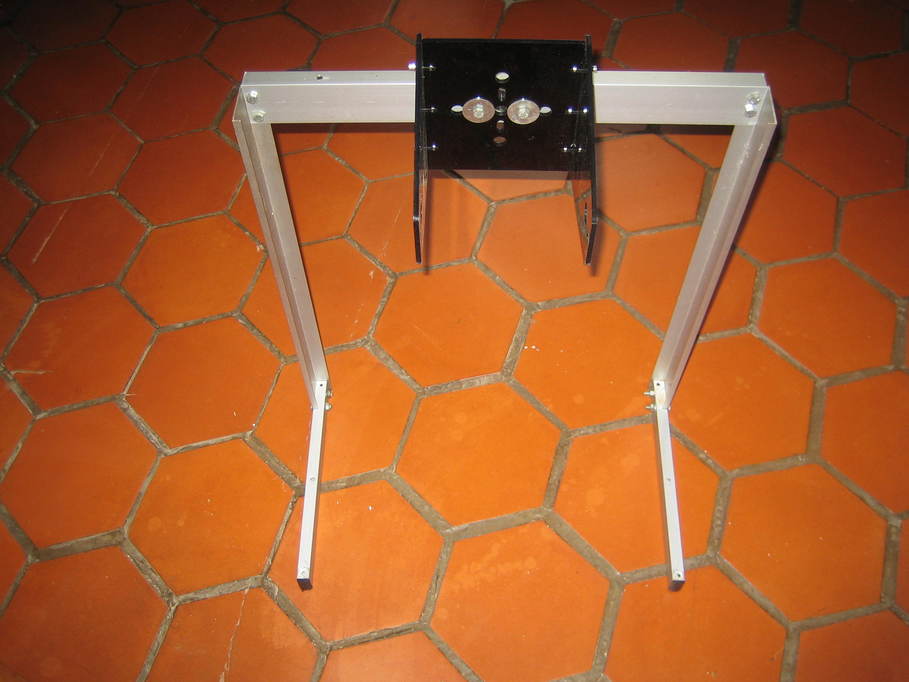
I decided at the weekend that I should have a proper support for the filament spool for the printer that would allow the filament to be pulled into the extruder without needing to negotiate any bends. The printer came with a stand for the spool, but there’s nowhere to fix it on the printer and in fact I really don’t want to stick over a kilogram on top of the printer potentially wobbling it about.

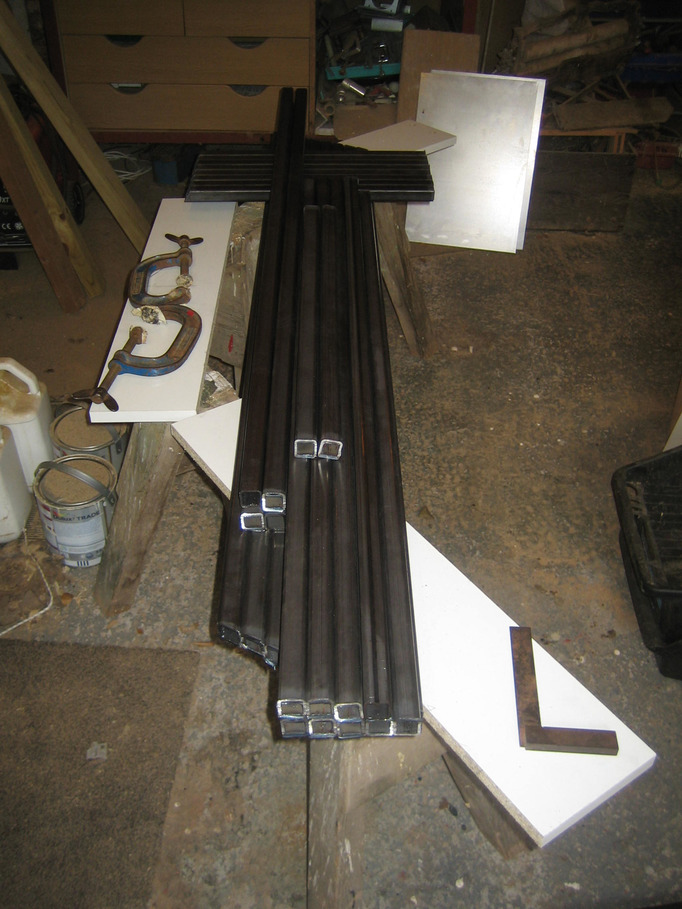
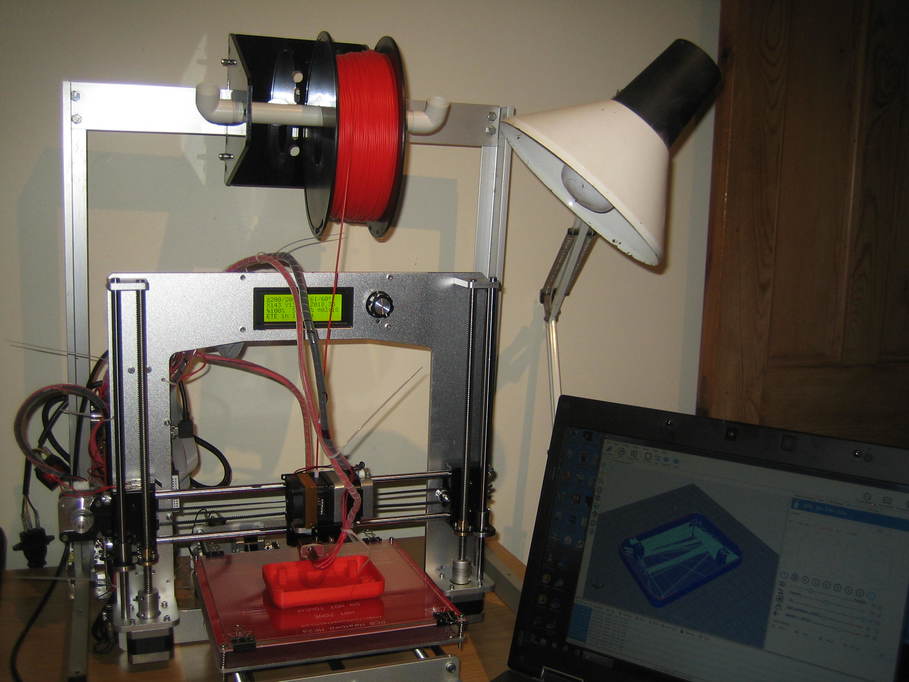
I hunted around in my pile of scrap metal and found some parts from a dismantled wardrobe and a broken step ladder and put them together with the existing stand to make this:

It’s perhaps not quite as strong as I’d like — the back can twist a little as filament is pulled from it, but it seems to do the job nicely.

Posted in 3D Printing, Projects | Leave a comment

Printing my first self-designed object

It’s probably been time to bite the bullet for a while, so I finally decided to get on with designing something of my own to print out on the 3d printer. This is actually a case for the PCB of the PTR unit for occultation recording using oacapture. It’s sat on my desk for some time now in an ill-fitting box, so it’s time to fix that.

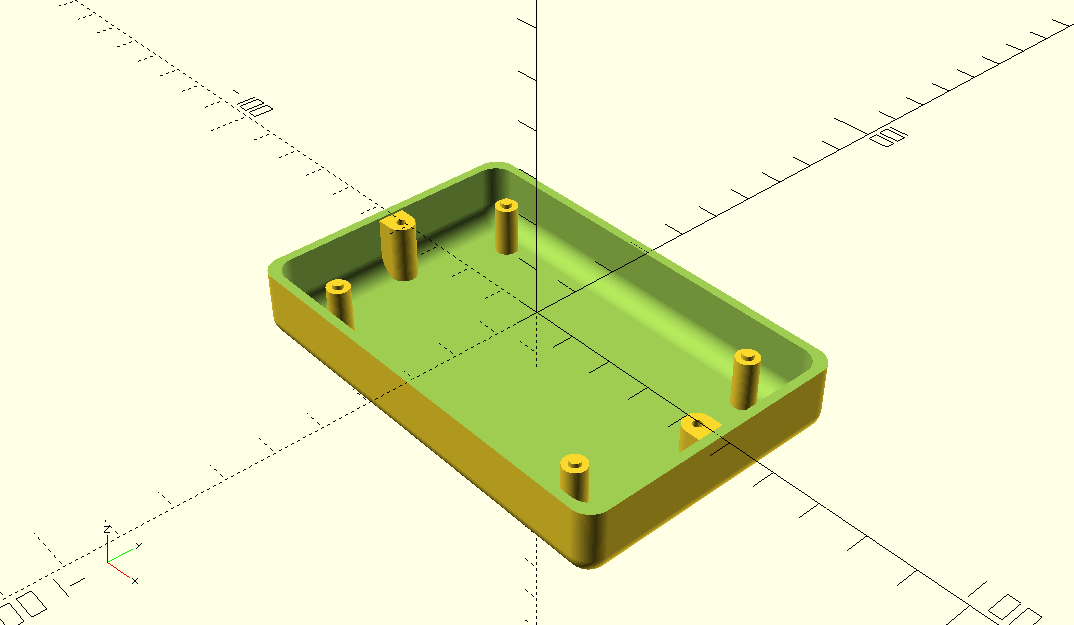
I’ve never done CAD work before, but I am familiar with Sketchup. Unfortunately Sketchup doesn’t really like to run under WINE on my Linux desktop, so after searching about for a while I came across OpenSCAD. To my way of thinking this shares a lot of ideas with Sketchup, but the work is done by writing code for all the objects rather than dragging them around the screen. Given that I’m used to coding this works well for me, though it might not be to everyone’s taste.

I decided to make the case in two halves, the lower one being the less complex. Fifty lines or so of code in OpenSCAD resulted in this:

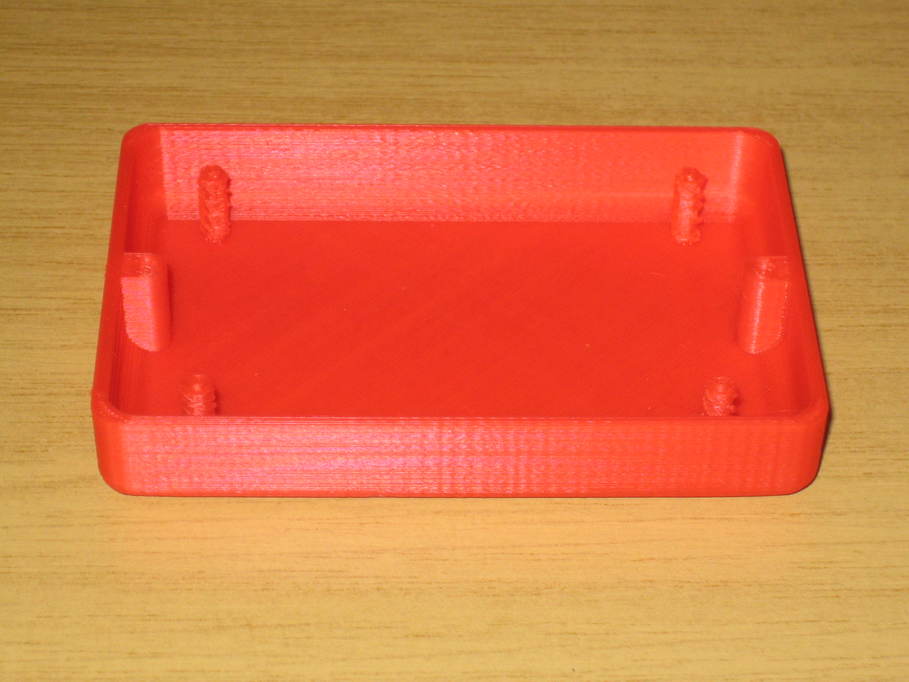
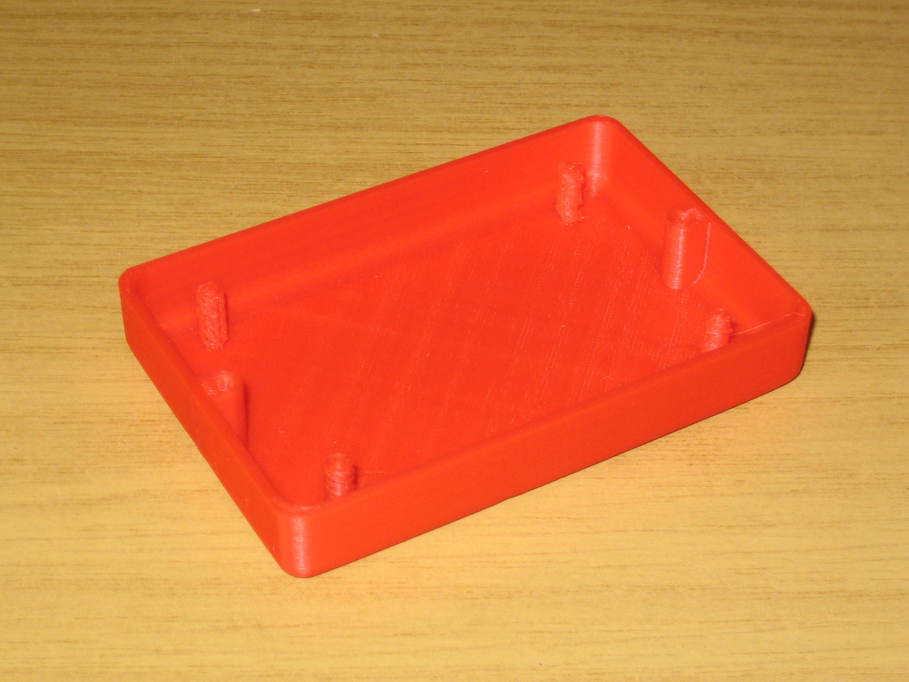
and after exporting it to STL and waiting a couple of hours for the printer to finish I ended up with this:

Whilst I’m not unhappy with this, it’s not perfect. I had an issue with the first layer not printing out nicely which I’ll come to in another post, but the other thing I really wasn’t happy with was the posts. The pins to locate the PCB are fine, but the posts themselves are a bit of a mess. I think perhaps I should have made them bigger and the printer would then have made a better job of them. If I were to print it again I think I’d make them larger diameter, or perhaps square.

Posted in 3D Printing, Projects | Tagged | Leave a comment

Building an observatory: new toys

As the frame for the sliding roof of my observatory is going to be welded up from mild steel I decided I’d take advantage of an offer from one of the online tool vendors to buy a cut-off saw at a discount. My father-in-law then told me that LIDL were selling stands for the princely sum of £40 (a few pence less, actually) so I decided to risk one of those to put the saw on.

As it happens, it’s not bad at all. Very sturdy welded construction and holds the saw nicely. My only criticism might be that it’s two or three inches too shorter than I’d ideally want. That’s easily fixed however, so I shan’t be complaining.

Posted in Observatory | Tagged | Leave a comment

Reducing stringing in my 3d prints

I tried printing a couple of 3d printer torture tests (for example, this one and found quite a bit of stringing between the smaller elements that I really wasn’t happy with.

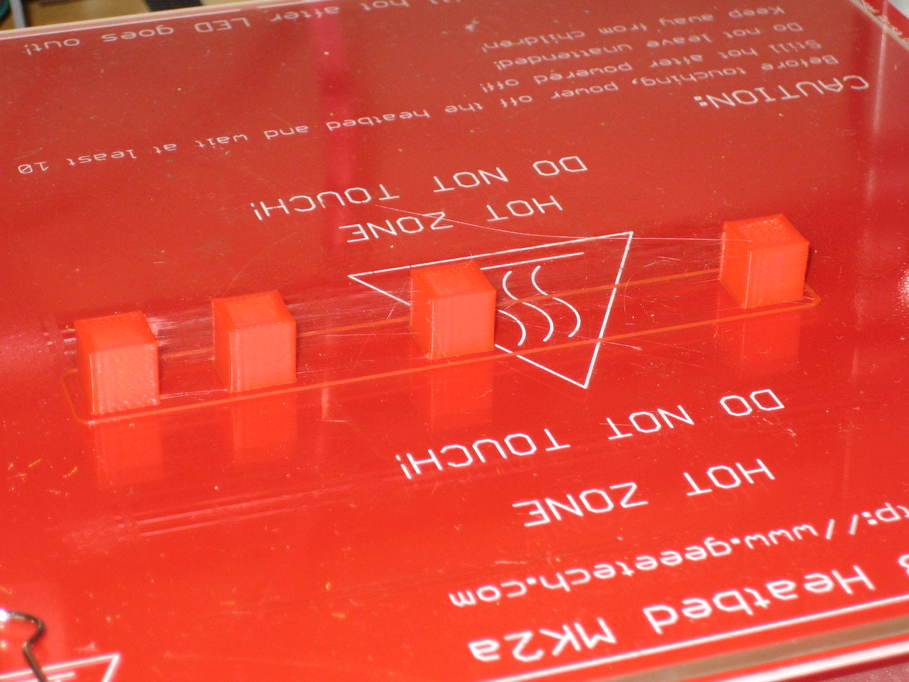
To try to address that I found a quicker test to run and printed it. It’s tricky to see from this photo (would have been far more sensible to print it in another colour), but the back edges of all the cubes are joined by a very thin layer made from the stringing as the printer jumps between the cubes.

Printing a new test each time I reduced the print temperature in jumps of ten degrees until I had no stringing between the cubes, but at that point I was down to 180C and the printed surface was looking quite poor, so I then started stepping up the temperature again, increasing the retraction distance by 0.5mm each time until I achieved a surface I was happy with and no (or minimal) stringing. That was at 200C with 1.5mm retraction. I could perhaps have gone to 2mm and might still do so.

Another print of the initial test showed significantly reduced stringing and a much better print overall, though the stringing does still exist where the thickness of the print gets down to the same sort of size as the nozzle. I think the better solution there would be a smaller nozzle.

Posted in 3D Printing | Tagged , | Leave a comment

Swimming, 28th August 2018

First time in the water for a week, thanks to the bank holiday and to spending over an hour in the dentist’s chair on Thursday after which I was advised to avoid strenuous exercise for 24 hours. Advice I didn’t really need as it turned out, given how awful I felt for the next couple of days 🙁

Anyhow, back to my USRPT set:

400m front crawl warm-up
25 x 50m front crawl, target time 51s, rest interval 24s
200m front crawl swim down

And today it was a total disaster 🙁 First rep was over 51s, then the eighth and finally the tenth, at which point I stopped. I just couldn’t find any speed today and felt very tired. Let’s hope it goes better next time.

USRPT distance this year: 52,700m
Total distance this year: 129,950m

Posted in Swimming | Tagged , | Leave a comment

Geeetech Prusa i3 Aluminium axis calibration

My first step in calibrating the printer was to check the filament feed rate. There didn’t seem much sense working on anything else if filament wasn’t getting to the nozzle at the correct rate. So once again I removed the motor and extruder from the printer, leaving the motor connected up.

To run the test I aligned the end of the filament square with the bottom face of the extruder, then started up Repetier Host and sent the G-Code command “M302” to allow filament to be extruded without the nozzle being up to temperature. That done I hit the button to extrude 100mm of filament and measured the length actually extruded using calipers. I repeated the test six times, five times getting sufficiently close to 100mm that I couldn’t tell the difference. Once I got 99.1mm, but as that was not reproduced at all I assume it must have been my error.

So, I have some faith in the extruder being accurate. Hopefully for the last time for a while it all went back together.

The next step was to print out this test cube. The faces are all supposed to measure 20mm. According to my calipers my first cube came out at 19.35mm for the X and Y axes and 20.25mm for the Z axis. I wasn’t entirely happy about the print though, so I tried a second time. This one I measured at three different places across each face and obtained the measurements for X: 19.45, 19.35, 19.45; Y: 19.35, 19.35, 19.35 and Z: 20.3, 20.3, 20.2.

I’d read on several web pages that sending the G-code command “M501” would display the existing X, Y and Z values for the number of steps per millimetre for each axis, but that turned out not to work for me. Fortunately “M503” did display the figures, along with quite a few others. The settings for my printer were X: 78.74, Y: 78.74, Z: 400. There’s also an “E” figure, but I’m going to leave that alone for now (it was 95).

Based on the formula new value = old value x expected size / actual size, this gave me new figures for the axes of 81.09, 81.39, 394.67. I set these new values and saved them to the EEPROM using:


M92 X81.09 Y81.39 Z394.67 E95
M500

Then kicked off another cube print. This time the X and Y faces were 20mm as close as I could tell, but the Z dimension was way too small at 19.55mm. As this would have resulted in the above formula giving a figure greater than 400 (which I already knew looked as though it was too large) I just decided to bump the Z figure up to 398 this time.

As I was about to print another test cube, someone suggested to me trying an object a little like this one, but in fact the one they gave me had 100mm sides. I printed that out, measured the sides using my calipers again and plugging values back into the above formula finally settled on these values

X: 79.73
Y: 80.19
Z: 400

Which I have now set in the EEPROM as above. I’ll keep these under review as I continue testing.

Posted in 3D Printing | Tagged , | Leave a comment

Building an observatory. Construction #13

I hadn’t realised that we have a bank holiday weekend coming up, so in the hope that I’ll have a little more time available I decided to get some of the parts for the rolling roof ordered.

First up are the V-groove wheels and track. So many people have recommended these that it seems silly not to.

And then the steel for making the roof frame. I’ve chosen 25mm square section steel tube with a 2.5mm wall. I think that should be sufficient. Just hope I can lift the roof on once it’s made 😀

Posted in Astronomy, Observatory, Projects | Leave a comment

Uploading Geeetech Sanguino firmware from Mint 19/Ubuntu 18.04

This evening I dared to hit the “upload” button after compiling Geeetech’s firmware. I was immediately faced with a huge number of timeouts and other errors that all looked quite horrible, but somewhat reminiscent of a baud rate mismatch.

Enabling verbose mode for the upload showed avrdude being given a speed of 115,200 for uploading the firmware image. A bit of a hunt on the Internet suggested that the actual speed for uploading to my printer should be 57,600, but there’s no obvious place to set the comms rate for the serial device (/dev/ttyUSB0 in my case).

Further hunting revealed that the speed is set in the support files for the Sanguino board I’ve posted about downloading already. In my case I needed to edit $HOME/.arduino15/packages/Sanguino/hardware/avr/1.0.2/boards.txt and change the line that reads

sanguino.menu.cpu.atmega1284p.upload.speed=115200

to

sanguino.menu.cpu.atmega1284p.upload.speed=57600

Restarting the IDE and hitting upload once again resulted in a clean compile and upload to the printer which subsequently restarted itself quite happily.

Now time to do some calibration, I think.

Posted in 3D Printing | Tagged , , , | Leave a comment

Compiling the Geeetech Sanguino firmware with a recent Arduino IDE

As I have posted previously, trying to compile the Geeetech Sanguino firmware with a recent version of the Arduino IDE results in the following errors:

In file included from sketch/SdFile.h:27:0,
                 from sketch/cardreader.h:8,
                 from sketch/Marlin_main.cpp:44:
SdBaseFile.h:38: error: using typedef-name 'fpos_t' after 'struct'
 struct fpos_t {
        ^
In file included from sketch/Marlin.h:10:0,
                 from sketch/Marlin_main.cpp:30:
/usr/local/arduino-1.8.5/hardware/tools/avr/avr/include/stdio.h:950:33:
note: 'fpos_t' has a previous declaration here
 __extension__ typedef long long fpos_t;
                                 ^
exit status 1
using typedef-name 'fpos_t' after 'struct'

The recommendation repeated often on the Geeetech forums is to use v1.0.1 of the IDE because the code is written specifically for that version, but that’s hardly practical and a little misleading, I’d suggest. It’s more the case that the code happens to compile with that version of the IDE and won’t with later ones because of the above error which is presumably due to changes within the compilation environment.

In fact, the problem is relatively easy to fix by changing the name of the variable in the firmware source code. It’s only used in two files, SdBaseFile.cpp and SdBaseFile.h, so they’re easy enough to edit by hand changing all the occurrences of “fpos_t” to something else. Because I couldn’t be bothered to edit them, I changed to the firmware source directory and ran the following to change “fpos_t” to “gt_fpos_t”:

sed -i.bak -e 's/fpos_t/gt_fpos_t/g' SdBaseFile.cpp SdBaseFile.h

That done, recompiling gives the result:

Archiving built core (caching) in: /tmp/arduino_cache_531416
/core/core_Sanguino_avr_sanguino_cpu_atmega1284p_9d0b33a4df3327bd721e7d4e4de1171e.a
Sketch uses 92644 bytes (71%) of program storage space. Maximum is 130048 bytes.
Global variables use 4029 bytes (24%) of dynamic memory, leaving 12355 bytes for local
variables. Maximum is 16384 bytes.

Happy days. Next comes the scary step of seeing if I can upload it successfully.

Posted in 3D Printing | Tagged , , , | Leave a comment