127 Mak Collimation

I’ve been doing a fair bit of fiddling around with my 127 Mak recently. The initial reason for this was that the mirror had become loose on the carrier mechanism, meaning lots of trouble getting reliable focus.

To fix this it was necessary to remove the corrector lens from the front of the OTA, remove the focuser knob and slide the entire mirror assembly off the baffle tube whilst fiddling the focuser spindle through the backplate and trying not to get grease everywhere. The mirror carrier itself is an externally threaded tube with a flange against which the front of the mirror rests. Behind the mirror is an o-ring. The focuser plate screws onto the thread behind that to hold the mirror in place and behind the focuser plate is a locknut which, in theory at least, should keep the whole lot fixed in place.

Having taken the scope apart it was going to be necessary to collimate it once reassembled. I don’t have a proper collimation cap, so I made one up out of the nasty 2x barlow shipped with some Skywatcher scopes (from which I have already removed the lens so I can use it as an extension tube). I then found a plastic bottle top that would fit over the end neatly and drilled a 3mm hole through the middle. This went into the back of the baffle tube and I started to follow the instructions here:

(Should this link break and the file isn’t available elsewhere, I have a copy of it.)

It’s actually somewhat more tricky than might be suggested given that effectively all six screws (three “pull” and three “push”) need to be adjusted at the same time to move the backplate, thus moving the baffle and the mirror. I found it helped to move to the front of the scope and stand at the focal distance. By lining up the reflections it was then much easier to tell if I was out and by how much. The rings formed by all the reflections are fairly obviously skewed if it is out of collimation.

Over half an hour or so of tweaking the adjustments I got it as close as I felt was possible without a star test (and I don’t at the moment have an artificial star). A final check through the colli cap to make sure that looked ok and, oh, now that’s not good. The mirror appeared to be collimated properly, but the baffle tube was clearly not central and I could see more on one side of the secondary mirror than the other.

It’s worth noting at this juncture that I didn’t buy the Mak new, and when I did it came with an SCT adapter and two inch diagonal attached. I wasn’t too enamoured of the quality of the diagonal and am not entirely sure that it makes sense to have one on this scope, so I decided to remove it. Easier said than done as it turned out. The SCT converter was jammed onto the baffle retaining nut and wouldn’t unscrew from it. I ended up having to remove them both together and separate them in the workshop where I could get at things with proper tools. Because the converter was jammed, I surmise that either when it was put on or when I removed it, the baffle became skewed in the tube.

Not much to do other than take it all apart again now though, so that’s what I did, removing the backplate, separating the baffle tube from it and cleaning all the mating surfaces before reassembling it. Here are all the bits before reassembly.
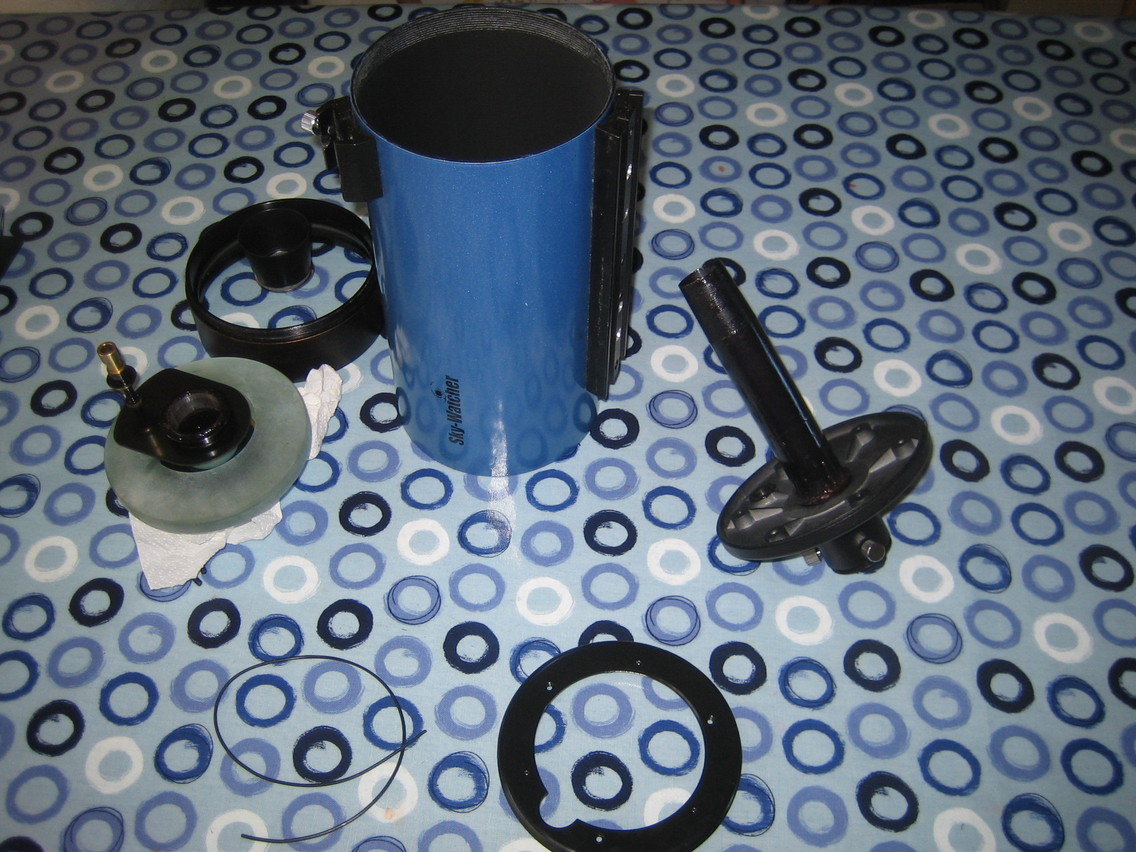
I’ve now put everything back together (and I didn’t even have any bits left over!) and redone the collimation, checking it by eye from the front at both ends of the mirror travel. The baffle tube looks much more central through the collimation cap and I now await a clear night to do a star test. I really should sort out an artificial star. Tweaking the collimation in the dark is far from simple.
Posted in Astro Equipment, Astronomy | Tagged | Leave a comment

Alternative Breakfasts

I’m sitting here this morning eating rhubarb crumble for my breakfast. It makes an interesting change from the usual toast or cereals and I’m very much enjoying it. The thought also strikes me that as it was home-made from rhubarb grown in our own garden it’s also quite probably far healthier than most usual breakfast fare that leaves a factory in a cardboard box (and by and large tastes like sugar-coated cardboard too). It wasn’t cooked specifically for breakfast, I should point out. It’s left over from Sunday’s dinner.

Given the huge variety in breakfast meals around the world (and, in fact, in what we have eaten for breakfast in our own nation over the years), I think it might be time to experiment a little more with the options. Why on earth would you really want to allow massive multinationals to dictate what you should eat for what some people describe as “the most important meal of the day”?

Posted in Random | Leave a comment

Starting This Year’s Fruit and Veg

Well, kind of. I’ve already got broad beans under cloches in one of the veggie beds and a sowing of peas in the polytunnel, but they were all planted last year…

Anyhow, my daughter has been getting at me to go and sow some seeds with her so this weekend we went out and made a start. We’ve planted tomato varieties Gardener’s Delight, San Marzano, Costoluto Fiorentino and Cour di Bue. Some of the seeds were left over from last year, but we’ll see how they get on. Last year we had tomato plants everywhere, but we use them for making pasta and pizza sauces as well as in salads and can never have too many.

Next up were Zimbabwe Bird Pepper and Jalapeno chiles. Something else we can never have too many of. The instructions say they need a temperature of 28C to germinate. Not sure we’re going to get that much heat anywhere. I bet even our airing cupboard doesn’t get that warm. Still, they’re in the propagator and we’ll see how they do.

I was hoping to get some sweet peppers and Cayenne peppers in, too, but we ran out of time. I’ll catch up with those later in the week. I really must put together a planting plan over the next few days or I’ll not get anywhere.

Posted in Smallholding, Veg plot | Leave a comment

This Little Piggy Went To Slaughter

This morning at stupid o’clock I took our two Large Black pigs off to slaughter. Large by name and large by nature, too. I’d estimate they’re somewhere up around the 120kg to 130kg mark, live weight.

We’ve had them eight months, so they’re about ten months old, and it was really time for them to go before they ate their way out of their run. They’ve been living in a fenced off area of grass of around a quarter of an acre which they’ve they’ve turned into something that looks like part of a film set for the Somme, as well as chewing through the bases of some of the fence posts. I did put things in the run for them to play with, but that just seems to have encouraged them to eat everything in sight. They even chewed through some of their pig ark and completely trashed it. Whenever I fixed it they’d just break it again within a few days. It was time for them to go. Besides, I have a walnut tree that I want to plant in the run and it wouldn’t survive with them there.

Coaxing them into the trailer took a bit of time (you really can’t make a 120kg pig do much that it doesn’t want to). In the end I managed to lead them in with a bucket full of feed, running around the back and closing the trailer up behind them before they could change their minds. Then we set off for the local abattoir, about ten miles away.

Abattoirs are fairly surreal places on the best of days. On my first visit to one I was unloading the pigs with the assistance of the vet when one of the slaughtermen came out of the door into the pen, heavily spattered from head to foot in blood as if it were the most normal thing in the world. Which it might have been, for him, but it was pretty weird from where I was standing. Then there was the time when someone brought in a wild boar immediately before or after mine. A squealing ball of fire and fury that beat its way through the gates before anyone could stop it, smashed through a wooden fence and disappeared into the maze of buildings. Someone who could use a rifle was sought and after a short hunt the boar was returned in a wheelbarrow, dead.

Today I arrived, did the paperwork in the office and was asked to put the pigs in a small holding pen, which I’ve not had to do before. I drove the trailer round and discovered the entire place to be devoid of human life, which wasn’t helpful as given the design of the gates I couldn’t see how I could possibly get two large pigs out of the trailer and into the holding pen without the risk of them escaping. Whilst I was still trying to work this out, a slaughterman appeared and told me I could drop them off in the main pen as they were just about to move the current batch of pigs in.

And that’s one of the other disturbing things about taking pigs to slaughter. Sheep, in my experience, go fairly quietly, but once one pig starts squealing because it things something’s up the whole lot get set off. Standing amongst three or four dozen madly squealing pigs is not one of life’s most pleasurable experiences.

By this stage I’d been abandoned to myself again and had to get on with reversing the trailer up to the pen gates and persuading the pigs to leave the trailer without pushing the gates open and escaping into the yard all by myself. My biggest worry was that once I pulled forward to close the gates they’d be off, but by that stage they’d gone to introduce themselves to the other pigs and I got everything closed up before they realised. I clearly need to practice reversing with a trailer more. Perhaps it’s fortunate there was no-one there to see my efforts.

So, now we wait to see what turns up at the local butchers on Thursday. Depending on what the vet thinks of the livers and kidneys we may or may not get those back and then next week we’ll decide how to have the carcass cut up. Time to order some sausage skins and get the bacon curing mix ready.

Posted in Pigs, Smallholding | Leave a comment

Proper Marmalade

Towards the tail end of January or the start of February I like to buy some Seville oranges and make proper marmalade. I’m really not keen on a lot of the manufactured stuff which just doesn’t have the bitterness and depth of flavour I really enjoy.

Normally I have all the usual fun with the jam-making pan, but last year my wife bought a Tefal jam-maker (which can also be used for marmalade and, more surprisingly, rice pudding!) so I thought I’d have a go with that. The recipe book that came with it suggested a method I’d never seen before involving boiling the oranges whole for up to an hour before scooping out the pulp, removing the pips, chopping it and putting it into the jam-maker with some of the boiling liquid, sugar and the juice of a couple of lemons. And of course the obligatory strips of orange peel. Can’t have proper marmalade without bits of orange peel in…

Boiling the oranges was fine, but removing the pips from 2.5kg of oranges having allowed the fruit time to cool was an absolute nightmare and took ages. I may well be tempted next time either to squeeze the oranges in a juicer once boiled, removing the pips and adding any pulp to the juice, or to juice the oranges first and boil the skins on their own. Not sure how much difference the latter would make though.

The recipe suggested 30 minutes cooking time once the setting point was reached, but I found I wasn’t really getting a decent set at that point and retried every five minutes until I did, which took me up to 45 minutes. That gave me a very firm set (enough that the jar contents don’t move when turned upside down).

In the end the 2.5kg of oranges gave me between seven and eight pounds of marmalade. Ideally I’d have liked a little more to see me through the year, but I’ve left it rather late this time so I’ll have to be a little more sparing when using it.

Posted in Smallholding | Leave a comment

Strike Temperature

During my last batch of brewing I came across a formula for calculating the water temperature for a mash given the grain temperature and desired mash temperature. Unfortunately I can no longer remember where it came from. However, it is:

T<sub>s</sub> = T<sub>d</sub> + 0.4 ( T<sub>d</sub> - T<sub>g</sub> ) / R

where

  • Ts is the water strike temperature
  • Td is the desired mash temperature
  • Tg is the grain/mash ingredients temperature
  • R is the ratio of water to mash ingredients as litres per kilogram

I usually work with values of R from 2.5 to 2.75 depending on the volume of mash ingredients and how loose a mash I want. As my current mash tun is a plastic bucket with a false bottom wrapped in an offcut of an old duvet, I try to keep my desired mash temperature as close to 68C as possible. Over the course of a ninety minute mash I tend to lose about 2 to 3C.

This formula certainly seems to work fairly well for me. If anyone knows where it comes from or has a more reliable version I’d be pleased to hear about it.

Posted in Beer-making, Smallholding | Leave a comment

Trouble Brewing

I’ve not made much beer in the last year, so having ordered 25kg of pale malt and various other bits and pieces, last week I decided to crack on with a few brews. Protz and Wheeler’s “Brew Your Own British Real Ale At Home” has been something of a bible for me, so I worked my way through a few recipes.

Over the course of several days I did five gallon batches of Arkell’s Kingsdown, Morland Old Speckled Hen, Eldridge Pope/Thomas Hardy Royal Oak, Big Lamp Big Bitter and Courage Directors. I was in the process of heating up some water to start a mash for some Fullers London Pride when the power went off. Down in the cellar I could see that the earth leakage trip had flipped. I reset it only for it to trip again. A second reset allowed me time to discover that the connector for the heating element in my boiler was making an unpleasant crackling noise and was almost certainly the cause of the electrical problems, so I disconnected it immediately.

Unfortunately the thermostat on the boiler has also been playing up and to replace both the element and thermostat is little different to the cost of an entirely new boiler, so my mind turned to what I might replace it with that would make brewing a bit more efficient and allow me to work somewhere other than the kitchen, as for some inexplicable reason my wife seems to have an aversion to sticky floors. I have some ideas now, but they may have to wait a while as it could easily turn into another “project” and right now I have quite enough of those to finish as it is. So, the weighed out London Pride mash ingredients have been bagged up and put away and I’ll come back to that another time.

Whatever my new arrangements, it will be interesting to see how efficient the mash is. My OG figures always come out a few degrees lower than those suggested by Wheeler and Protz. It would be encouraging to achieve something closer, either as a result of improving the mashing process, or by better sparging.

Posted in Beer-making, Smallholding | Leave a comment

Observation Report, 18 Feb 2012

My plan for this evening was to spend a bit of time collimating the 127 Mak having had it in pieces a week or so back and then attempt some imaging of Mars, but strong winds made that completely impossible.

So, having wasted a fair amount trying I decided to bring out the ST120 and do a little Messier hunting instead. The season has turned sufficiently that Virgo is getting nicely above the horizon before I start to fall asleep at the eyepiece and I’ve had two targets remaining in this area for quite some time.

The first was an easy star-hop from Zaniah a short distance towards the zenith, M61. Nothing more than a faint fuzzy patch in this scope, but the last of the Messier objects in that whole cluster above Virgo.

The second was M104, the Sombrero galaxy. I spent several nights looking for this last winter, but it completely escaped me. This time, somewhat to my astonishment, I found it in about thirty seconds, star-hopping my way back towards Corvus from Virgo. Once found I really understood why I’d failed so many times last year. Even with the ST120 and with a year’s more experience at recognising these objects, it was nothing more than the faintest possible sliver of grey fuzz.

Once I get my observatory up and running I really look forward to going back to visit all of these objects with my 200P. I know newts aren’t supposed to have the contrast of a refractor, but it does have at least two and a half times more aperture.

Anyhow, barely discernable fuzzy blob or not, it’s still two more Messier objects taking my current total up to 77.

Posted in Astronomy | Tagged , , | Leave a comment

EQ3-2 Polar Scope Illuminator

I’ve read a few posting by people who have made polar scope illuminators for their EQ5 mounts and as I find aligning my EQ3-2 very awkward thanks to the lack of illumination of the reticle I decided to attempt to build one for my mount.

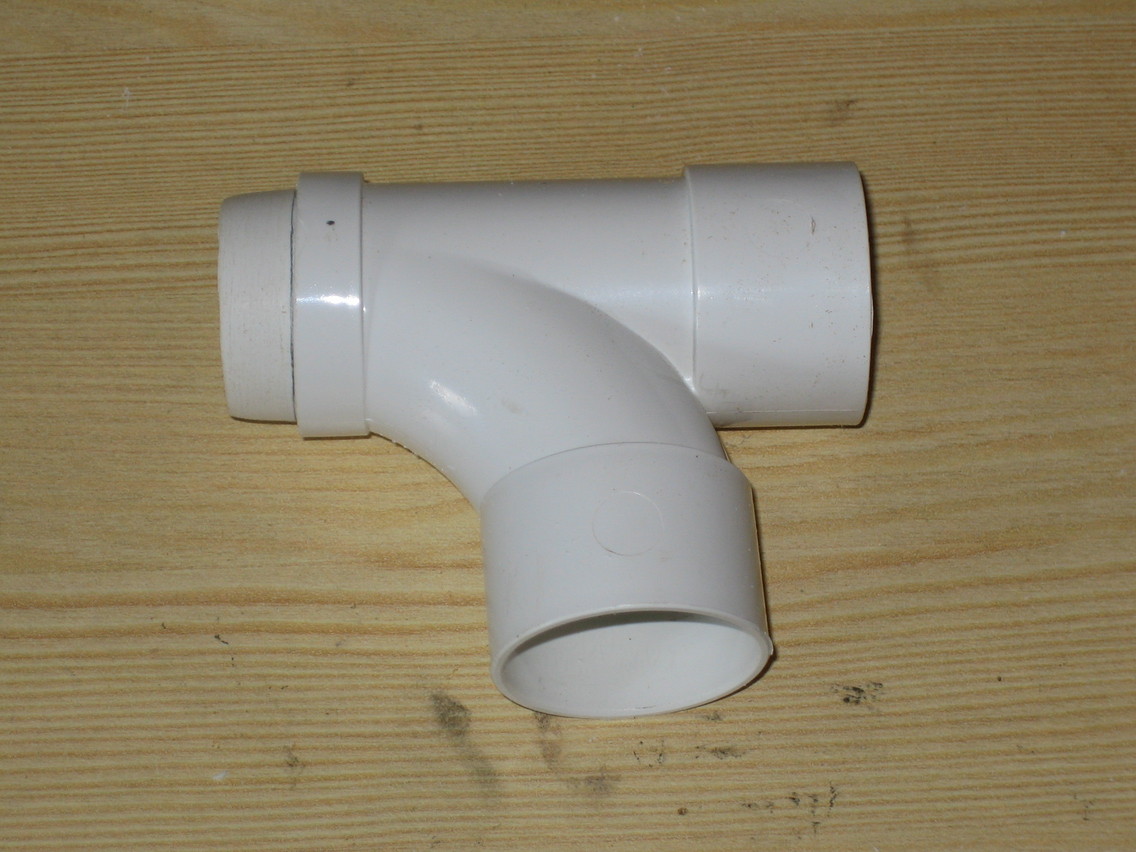
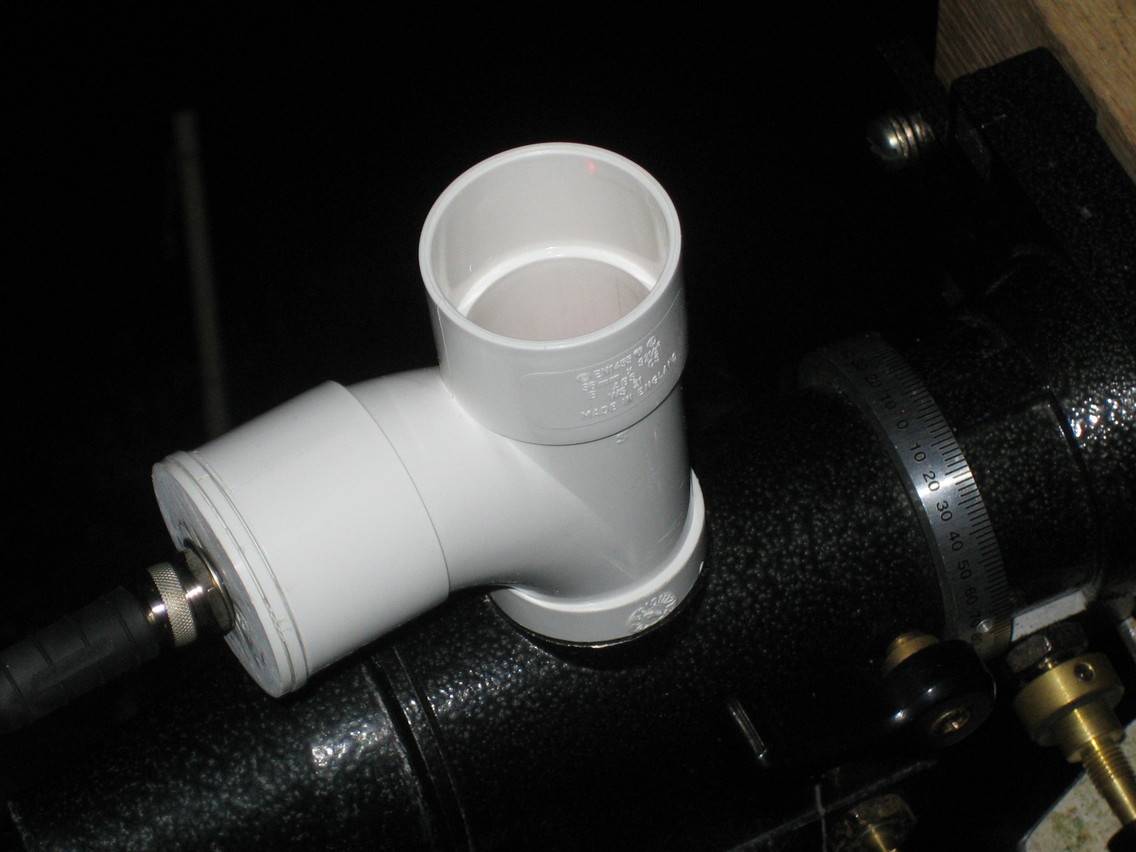
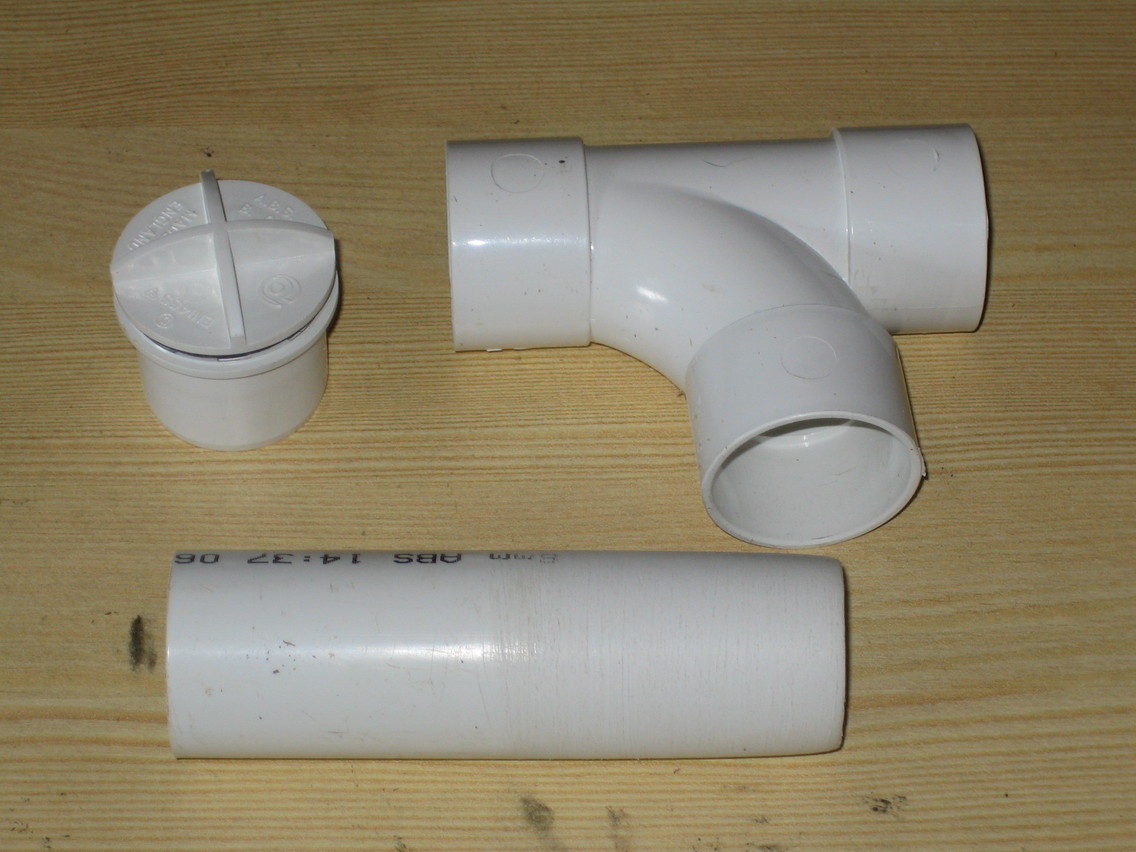
The initial problem was the size of the polar scope “window”. At 35mm diameter, I couldn’t find anything that would fit inside. Eventually I decided to sand down the outside of some 32mm plastic waste pipe (which has a 36mm outside diameter) and use that. To hold the illuminating LED I also wanted a 32mm tee and end cap. The local builders merchants didn’t have any standard end caps, only the screw-in version, but actually I think that worked out better in the end:

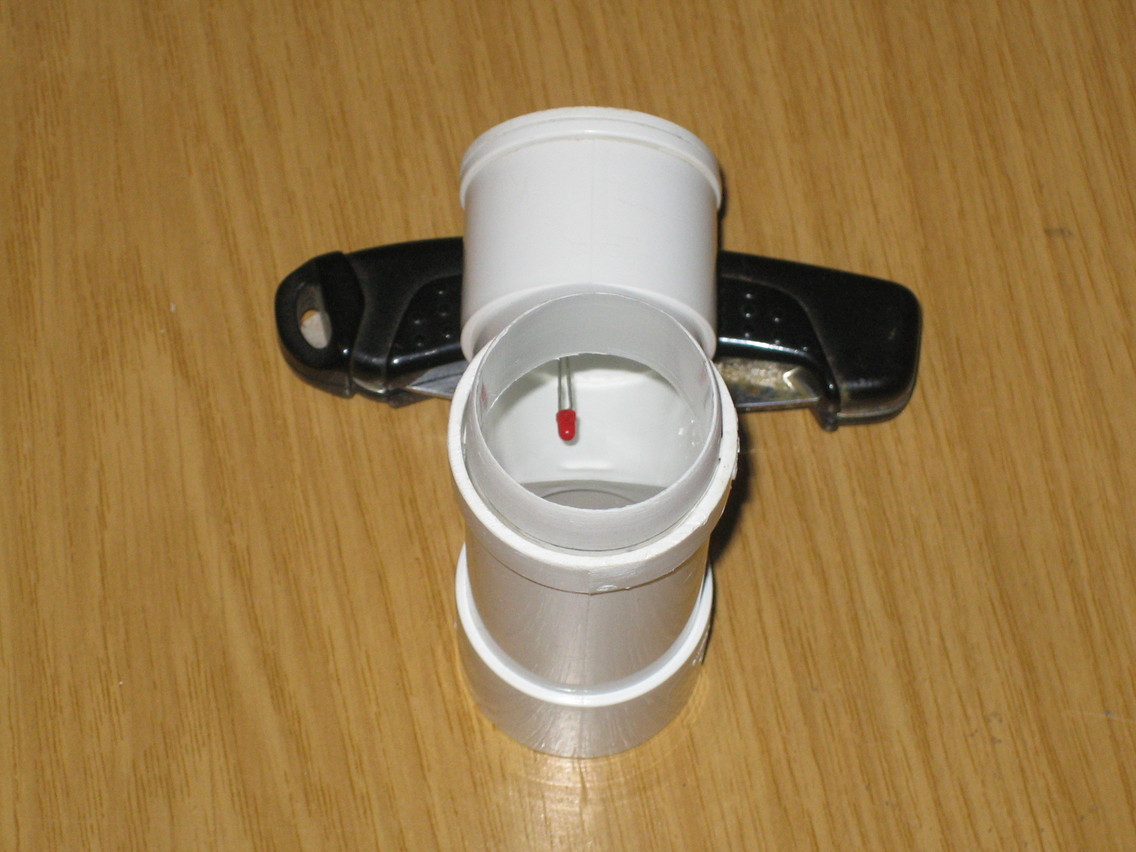
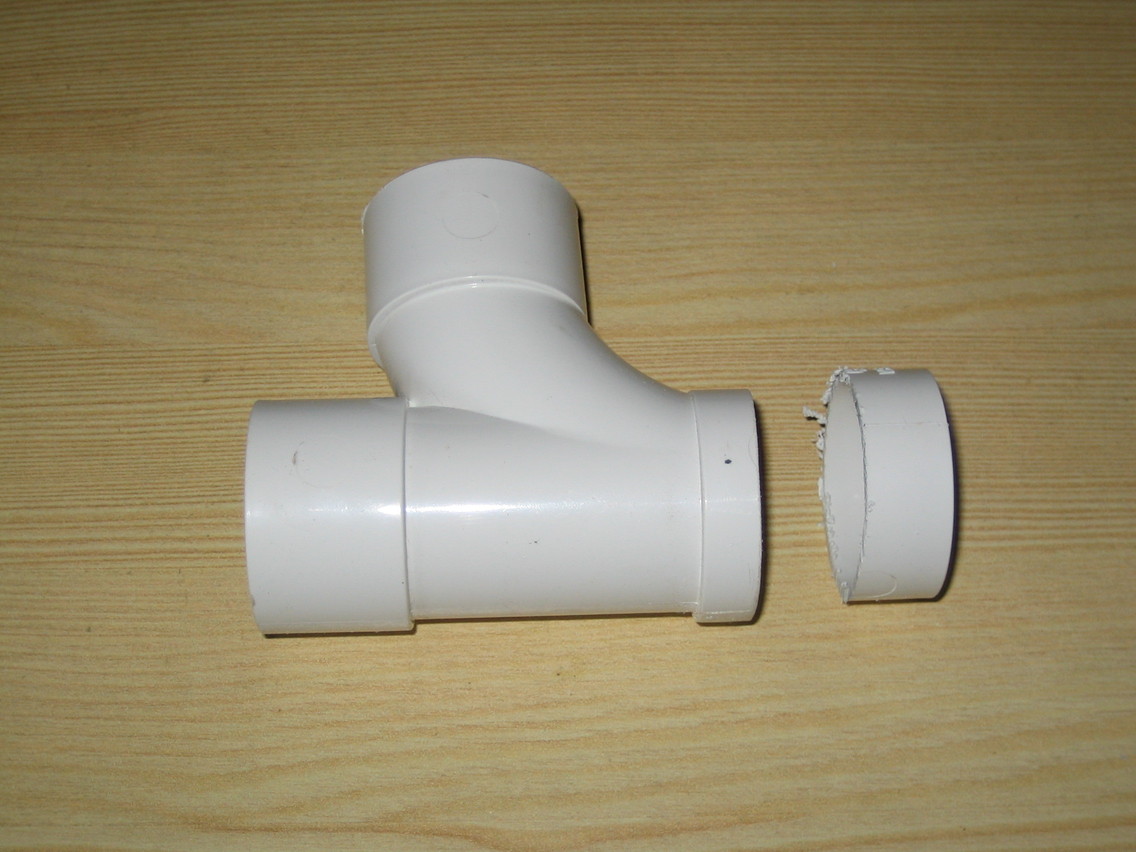
These are all solvent-weld fittings and I felt that the tee didn’t need to stand quite so high on the mount, so I trimmed off all but the last 10mm of the socket on the mount side of the tee. I then offered up the sanded-down tube to the mount and marked the limit of its insertion around the outside of the tube, cutting the tube so the mark was just outside the end of the tee. It was then glued into place (you can just see the mark in the second picture):

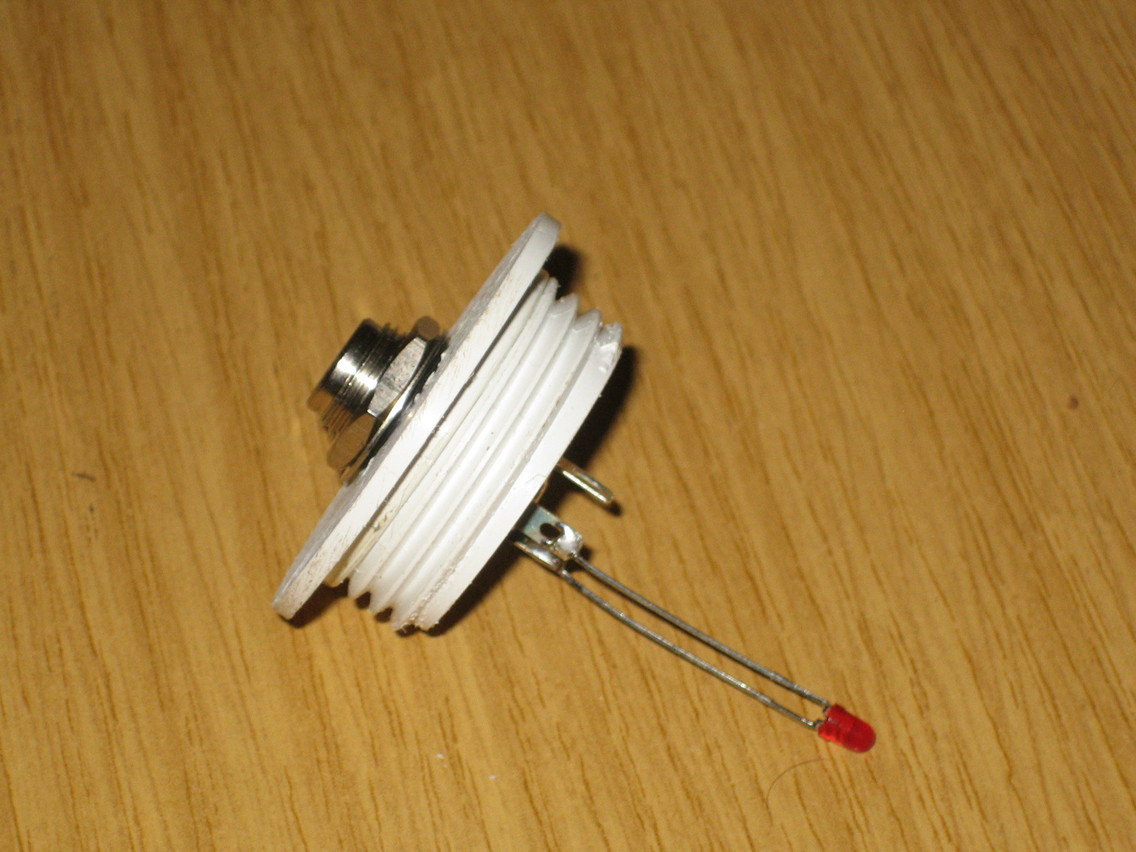
I also glued the collar for the end plug into the side entrance of the tee and cut off the moulding on the back of the plug, sanding it smooth.

To provide the illumination I used a 5V red LED with a built-in resistor and soldered it directly across the pins of a power connector socket. I drilled a 12mm hole in the plastic end plug and fitted the power connector to it. As luck would have it, when the plug was screwed into the tee the LED came just to the end of the opening, giving a small amount of light down towards the polar scope without being overpowering.

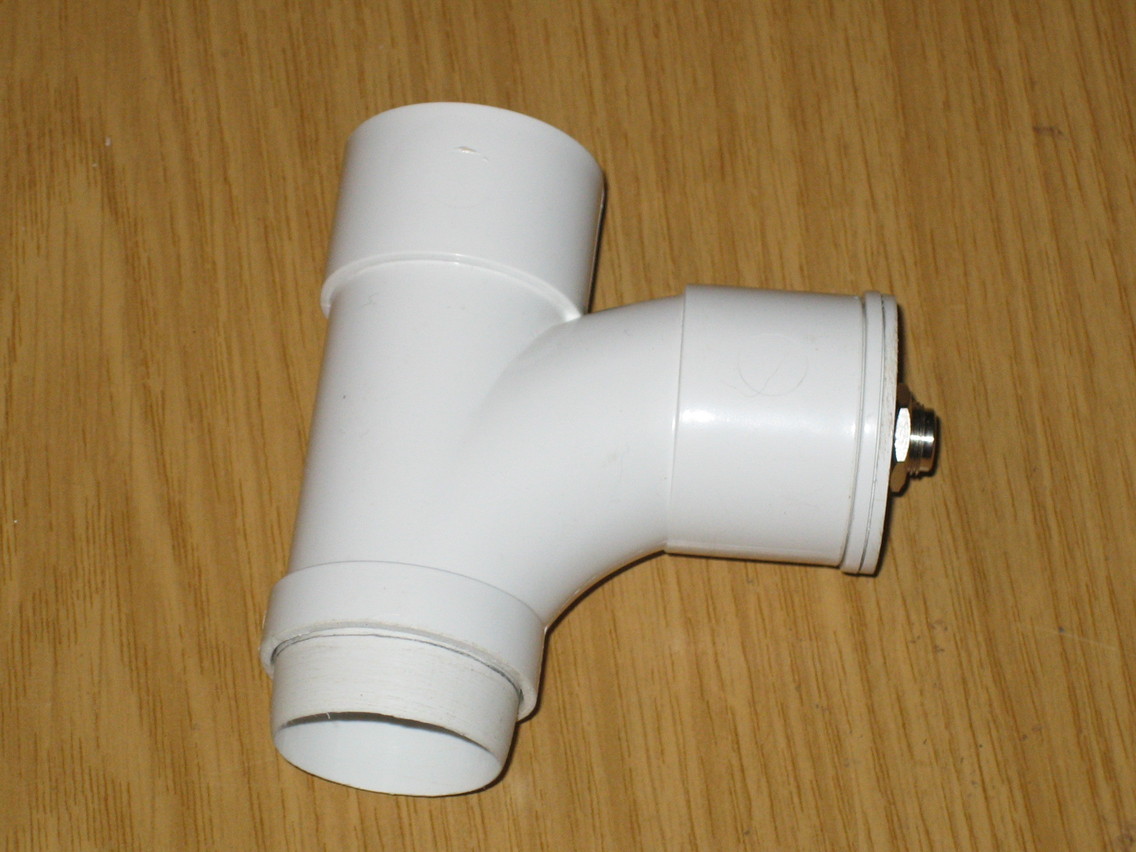
All that was left was to power it up and try it out. For power I used an old 3.7V Nokia phone charger adapter. Running the LED at slightly lower than the rated voltage also helps keep the light levels down. Here’s the finished item:

Aligning the polar scope used to take ages before I made this because of the juggling of a torch to get just enough light down through the scope window and then needing my hands to turn the adjusters, meaning I was spending plenty of time crouching below the mount contorting my neck to be able to see up through the scope. The viewing position hasn’t changed at all, but now the entire alignment procedure takes about thirty seconds and is so much easier and more accurate. I have recently been experimenting with imaging Mars and found that over four minute imaging runs I was seeing minimal movement relative to the SEC axis. A very pleasing result.

Posted in Astro Equipment, Astroimaging, Astronomy, Projects | Tagged | Leave a comment

Mains Power for Skywatcher Motor Focuser

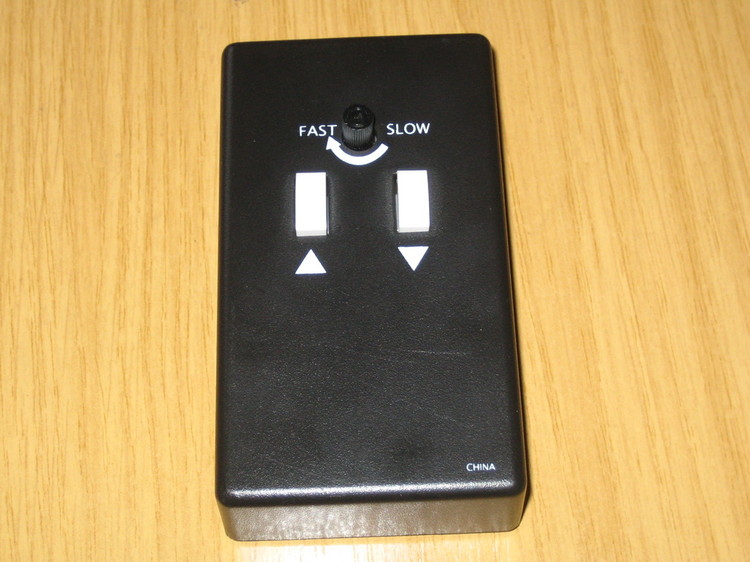
Now I have the motor focuser on the 127 Mak I decided it might be useful to be able to power it from the mains when the opportunity arose. I had a rummage around for a suitable power connector socket, a spare PP3 battery connector (I planned to replace the original because the wires were short making it a pain to fit new batteries) and a few bits of wire.

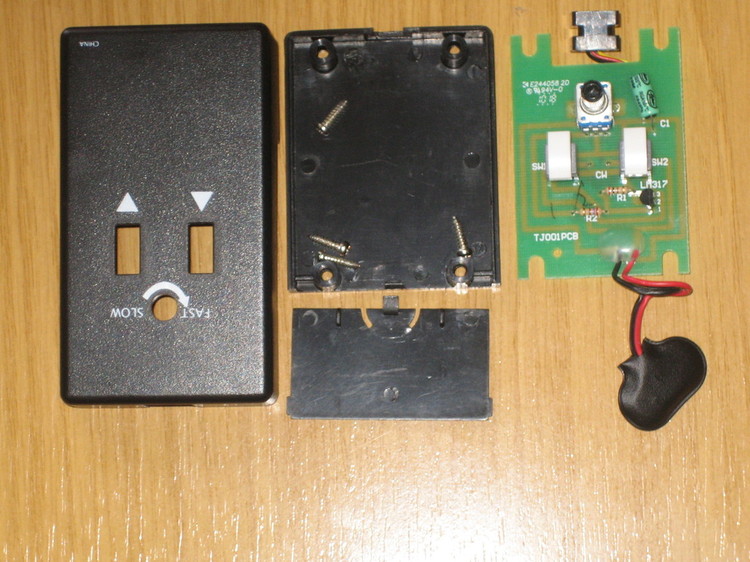
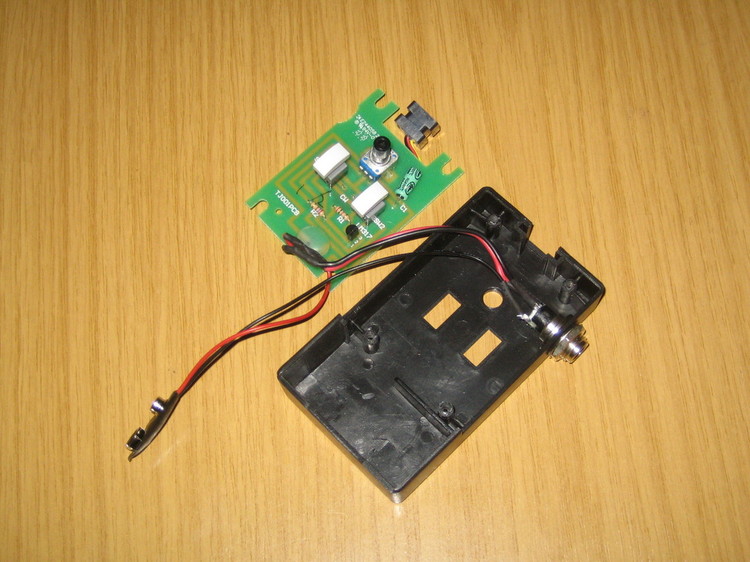
Here’s how it looked when I started, and after removing the four screws from the back and taking out the circuit board:

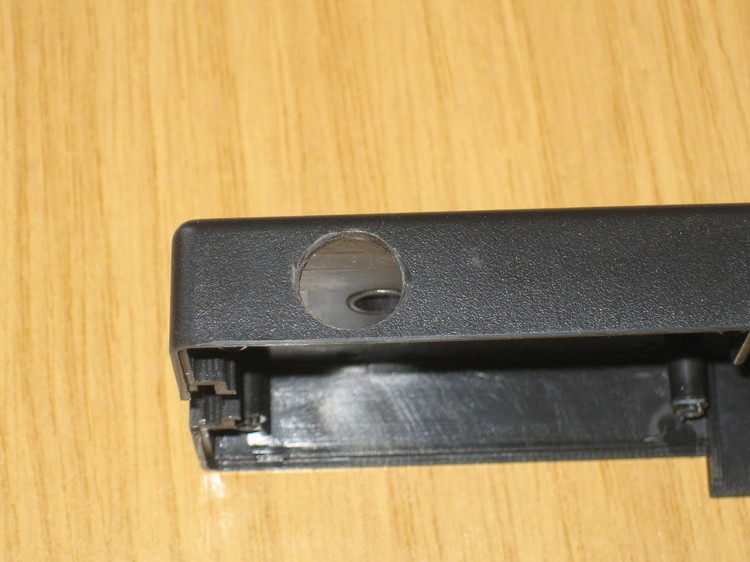
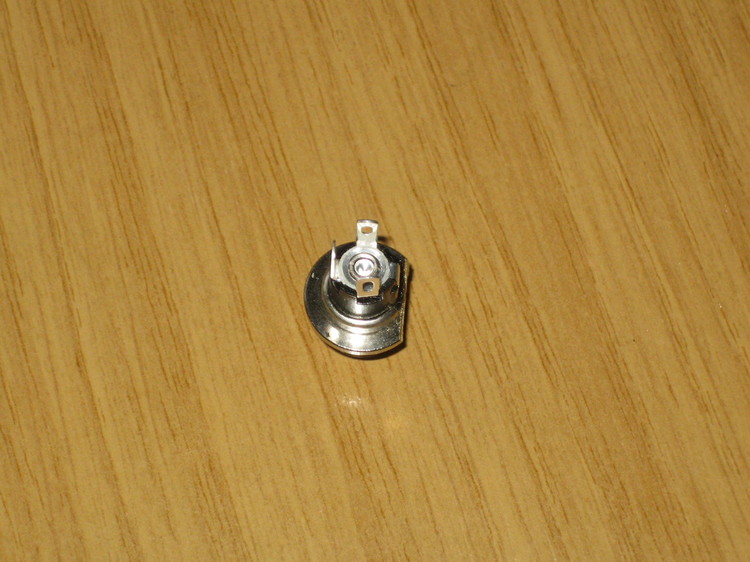
At the top left of the circuit board there was plenty of space for the back of the socket, so I cut an 11mm diameter hole next to it in the side of the box. It was a very tight fit. In retrospect using a smaller diameter socket would have been a better choice:

Here’s the other reason a smaller socket would have been better. I had to cut off part of the rear flange so the socket would fit against the wall of the box:

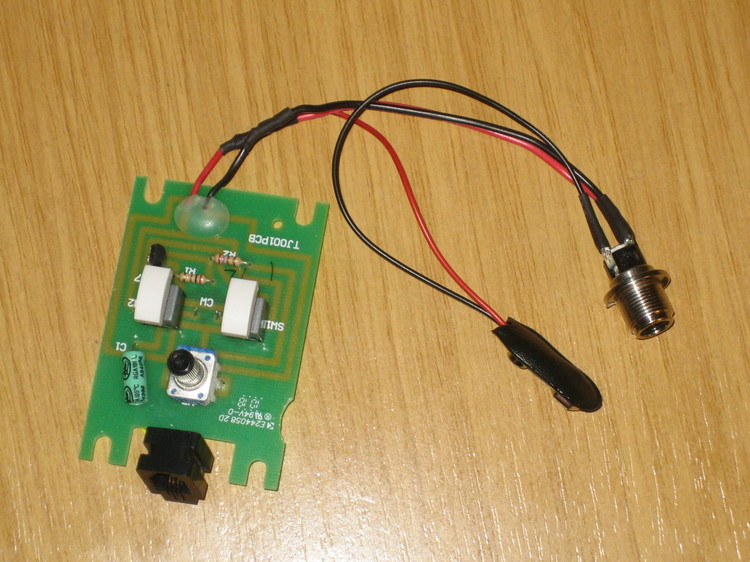
Originally I was planning to unsolder the old battery connector from the circuit board but there’s a huge blob of glue over the solder points, so I trimmed the wires short and soldered the new wires onto them instead. Here’s everything soldered up. The power socket has three terminals. One is the pin (positive in this case), one is the outside of the plug and the third is connected to the second when a plug is not inserted. The negative battery connector is soldered to that third terminal and routes back to the original negative connection on the circuit board. The positive battery connection and the pin connection on the socket are both soldered to the original positive connection. I could have done that on the pin connector itself, but there were enough cables running about a confined area as it was. All the joints were shrink-wrapped:

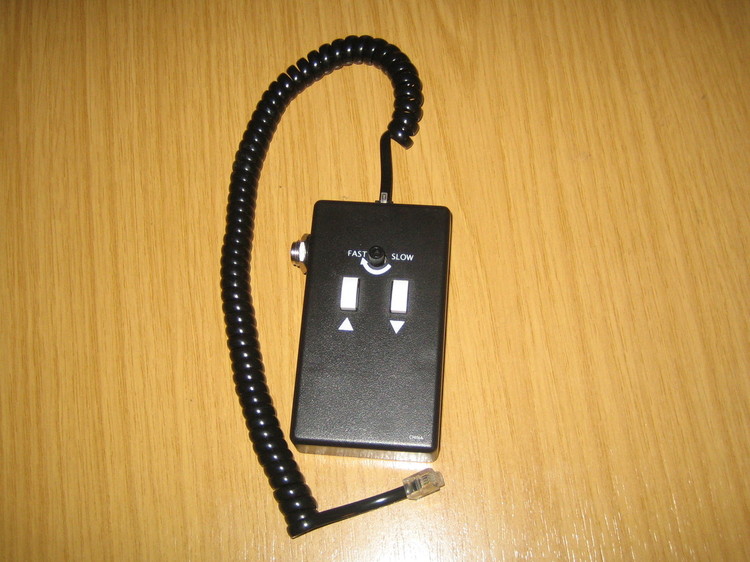
Finally everything was reassembled:

Testing with a battery and 9V wall-wart worked perfectly.

Posted in Astro Equipment, Astronomy, Projects | Tagged | 3 Comments