EQ3-2 Mount Tune-Up (Part Three)

My EQ3-2 mount came with a pair of motors installed for the RA and DEC axes. I’ve had no major issue with the RA motor, but backlash in the DEC axis was very bad. Up to now my experience of the DEC adjustment has been that it takes five to ten seconds to take up all the backlash and then the target can shoot off the screen before I can lift my finger off the controller button. I’ve already described how I stripped and cleaned up the DEC axis gearing itself. That done I was inspired by this SGL thread to convert the DEC axis to direct drive, losing a couple of gear wheels and a rubber clutch in the process.

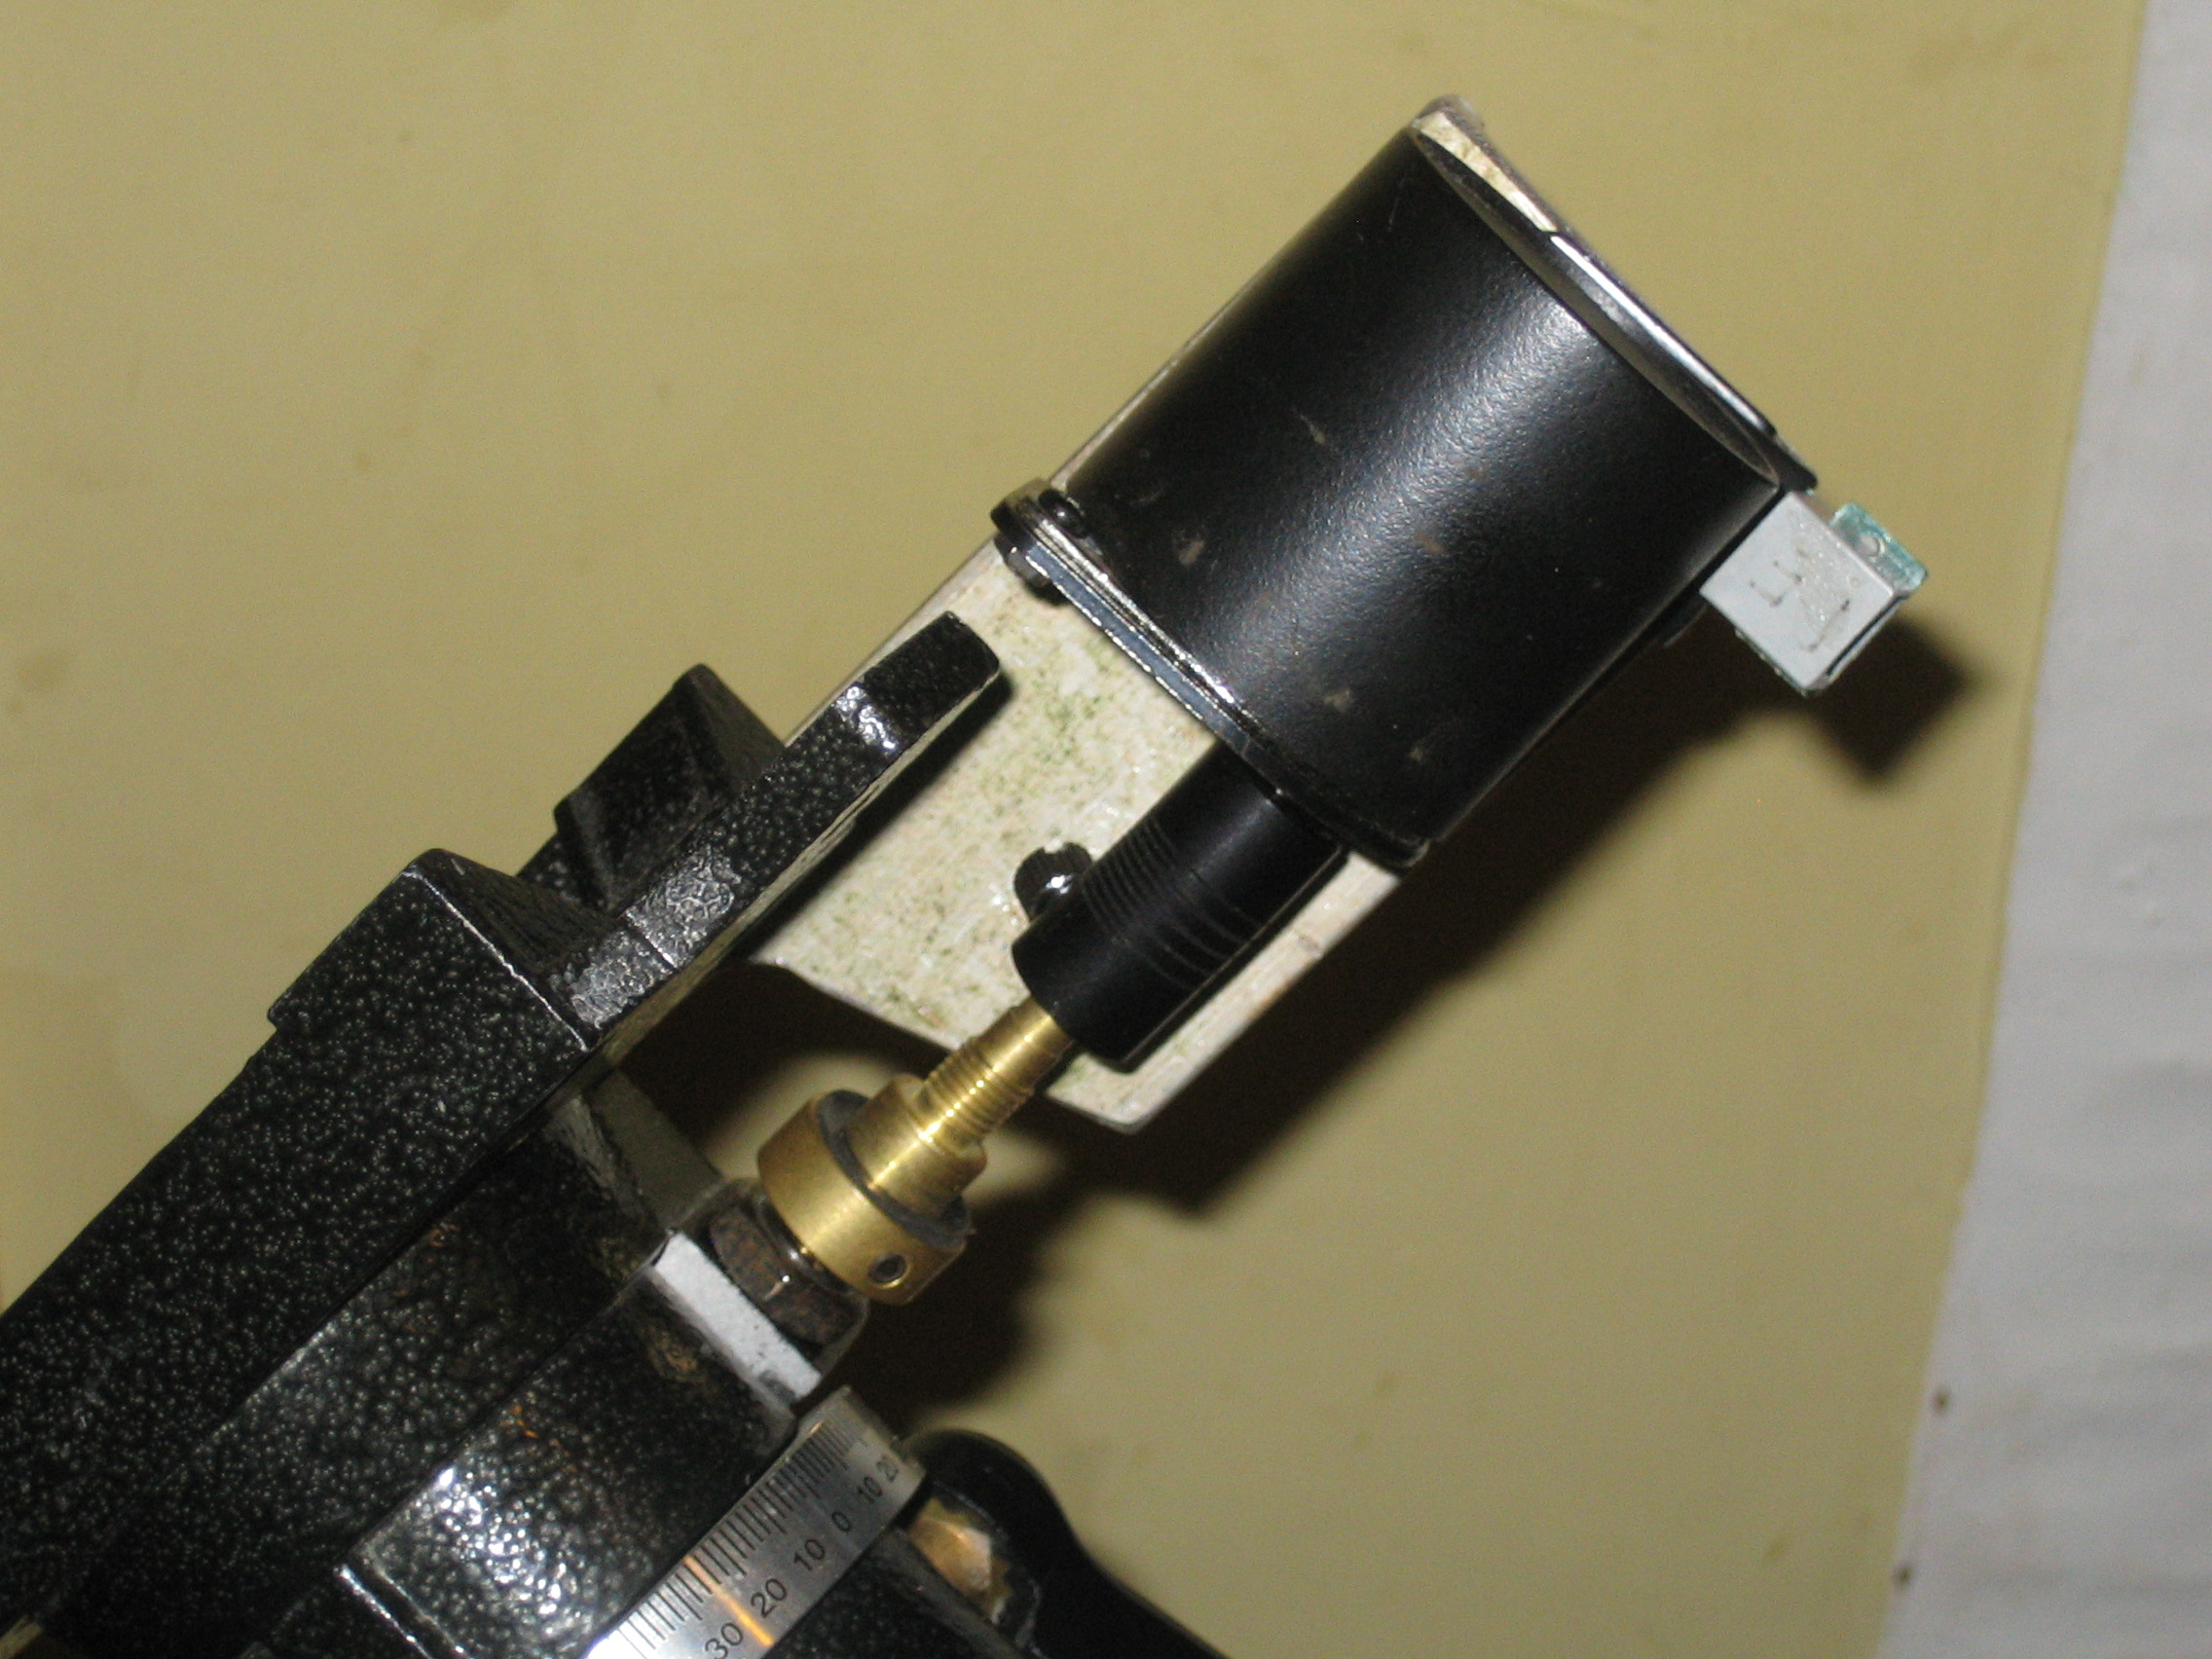
As part of my 127 Mak Motor Focuser project I had a Skywatcher motor focuser drive. It came with a springy plastic “universal joint” couplings that I wasn’t going to need so it got donated to the direct DEC drive project (see my note at the end for an alternative). I removed the gear from the end of the DEC gearbox output shaft and replaced it with the coupling. I also removed all the extra gubbins that goes on the end of the DEC worm shaft when the motor drive is installed as per the manufacturer’s instructions. My initial plan was to directly couple the drive to the shaft, but whilst that may be possible, to avoid fouling the mount body it means the motor has to be turned to what is a very awkward angle to mount to anything. In the end I reinstalled the brass extension that comes with the drive kit to give me more room to play with. It meant that the motor could be lined up with the mounting bracket at right angles to the original mounting lug and with enough room not to foul the mount as it turns. Here’s the motor connected up to the worm drive, but otherwise unsupported:
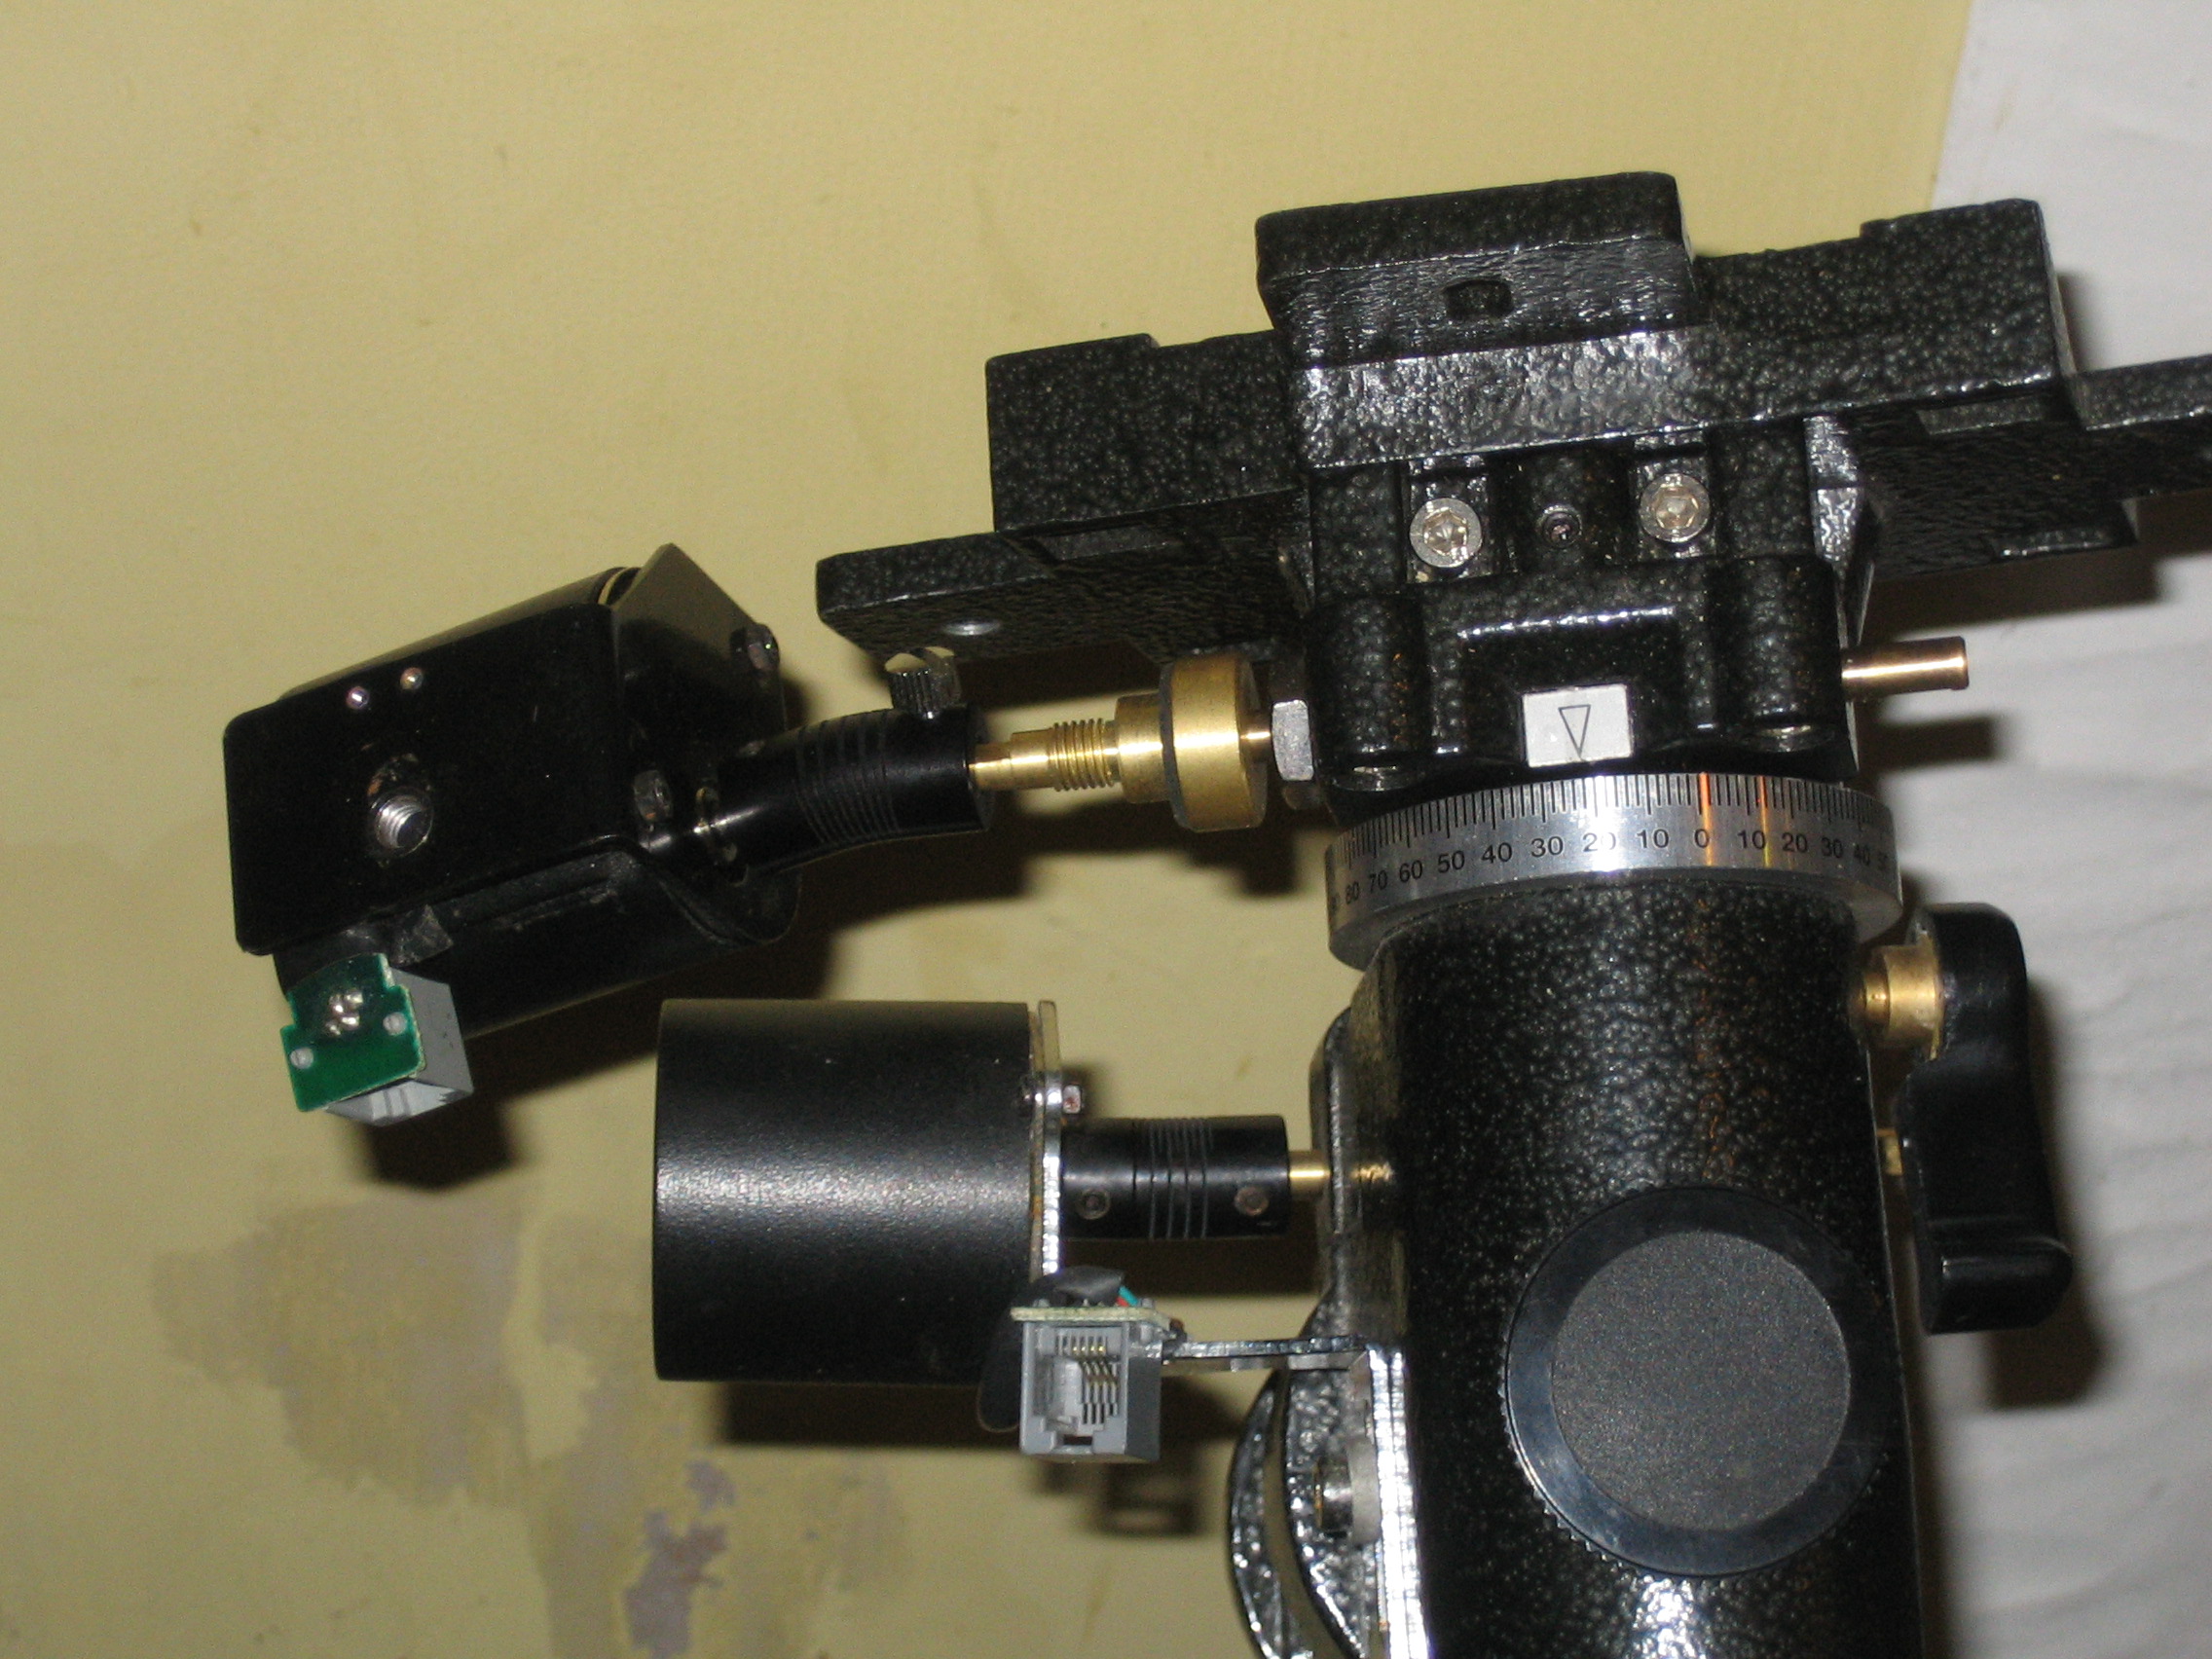
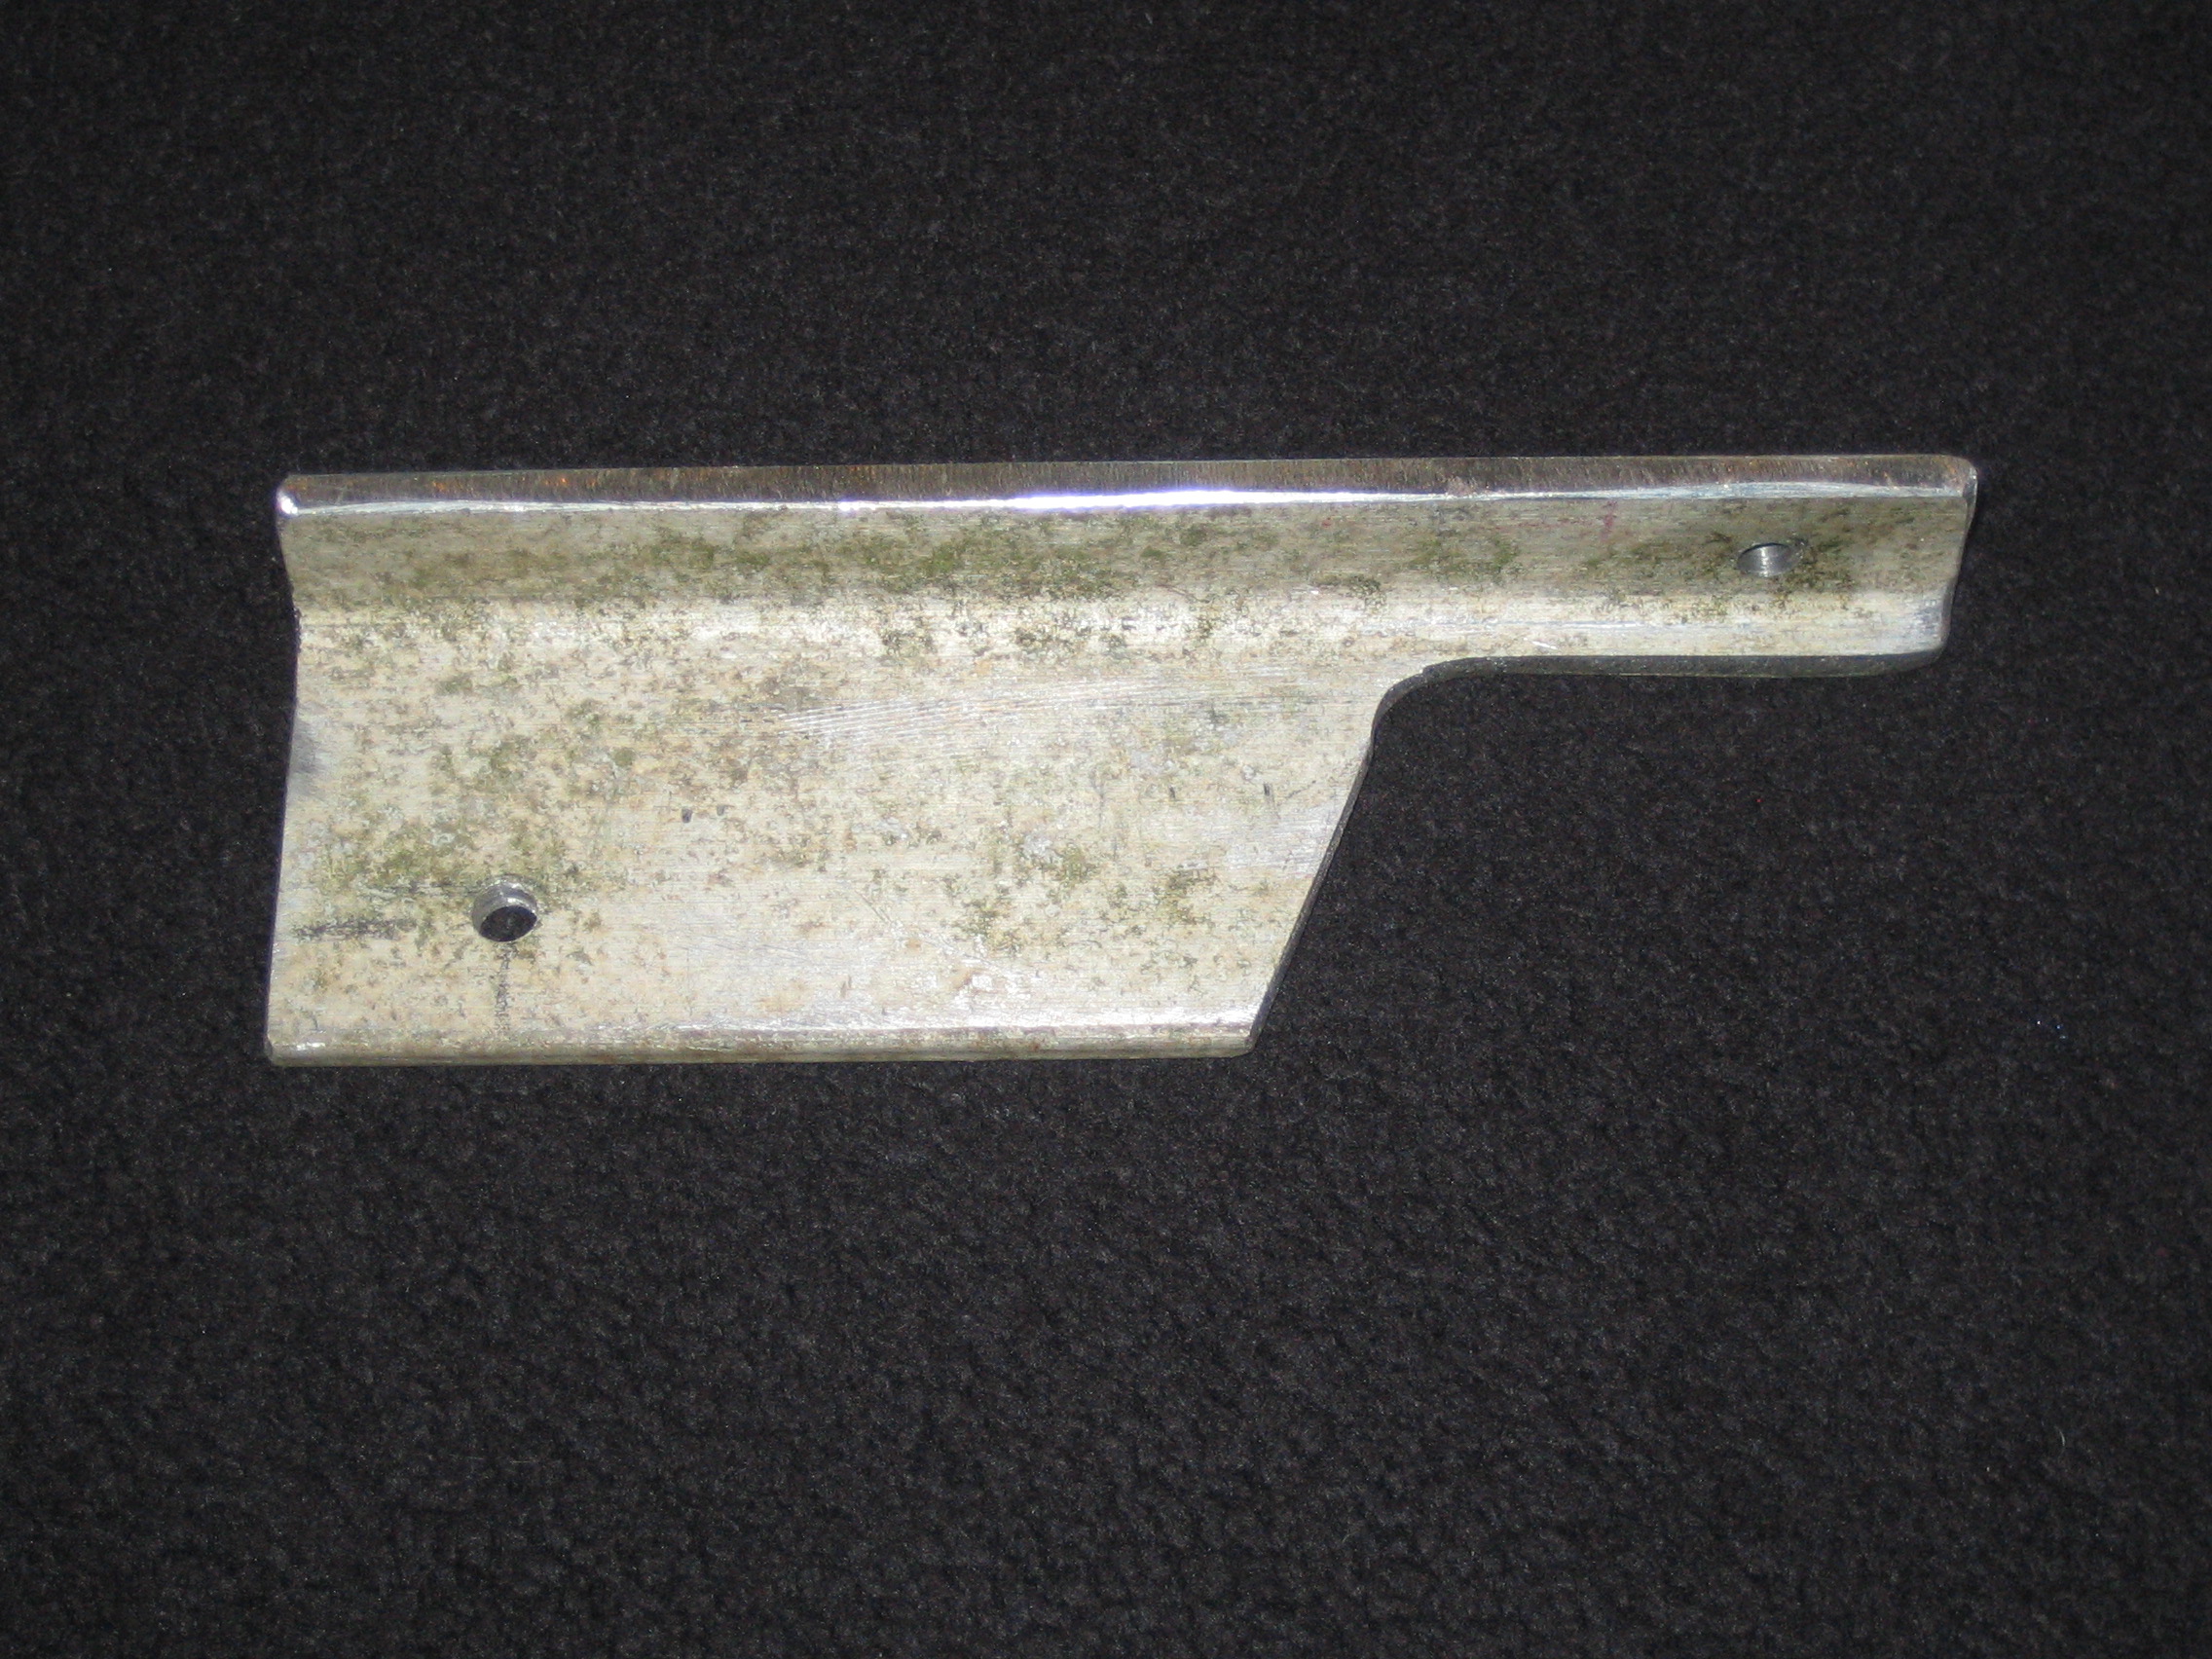
As luck would have it my father-in-law had just used a length of ~5mm thick 90 degree section aluminium and left the scrap on his workbench, so I found myself with an ideal piece to make the mounting bracket for the motor. I cut off some of the excess width on what would become the top (I used that offcut in the focuser mod in the end) and enough of the side to leave easy access to the DEC worm tensioning screws. In one end I drilled a 6mm hole to allow the original mounting screw to be used with the motor mounting bracket (though it needs a couple of washers as spacers) and in the top at the other end I drilled and tapped an M6 thread to allow a second M6 bolt to fix the bracket to the mount:
Final indoor testing has been done this evening and everything seems to work well. Now I just need to give the bracket a coat of Hammerite black to match the mount. Too cold for doing that at the moment though. Outdoor testing will happen as soon as we next get clear skies.

The final step to improve the DEC response is to get the gearbox backlash improved if possible. I’m waiting for some isopropyl alcohol to arrive so I can use it to clean up the horrible grease that’s all over the gears before I do that.

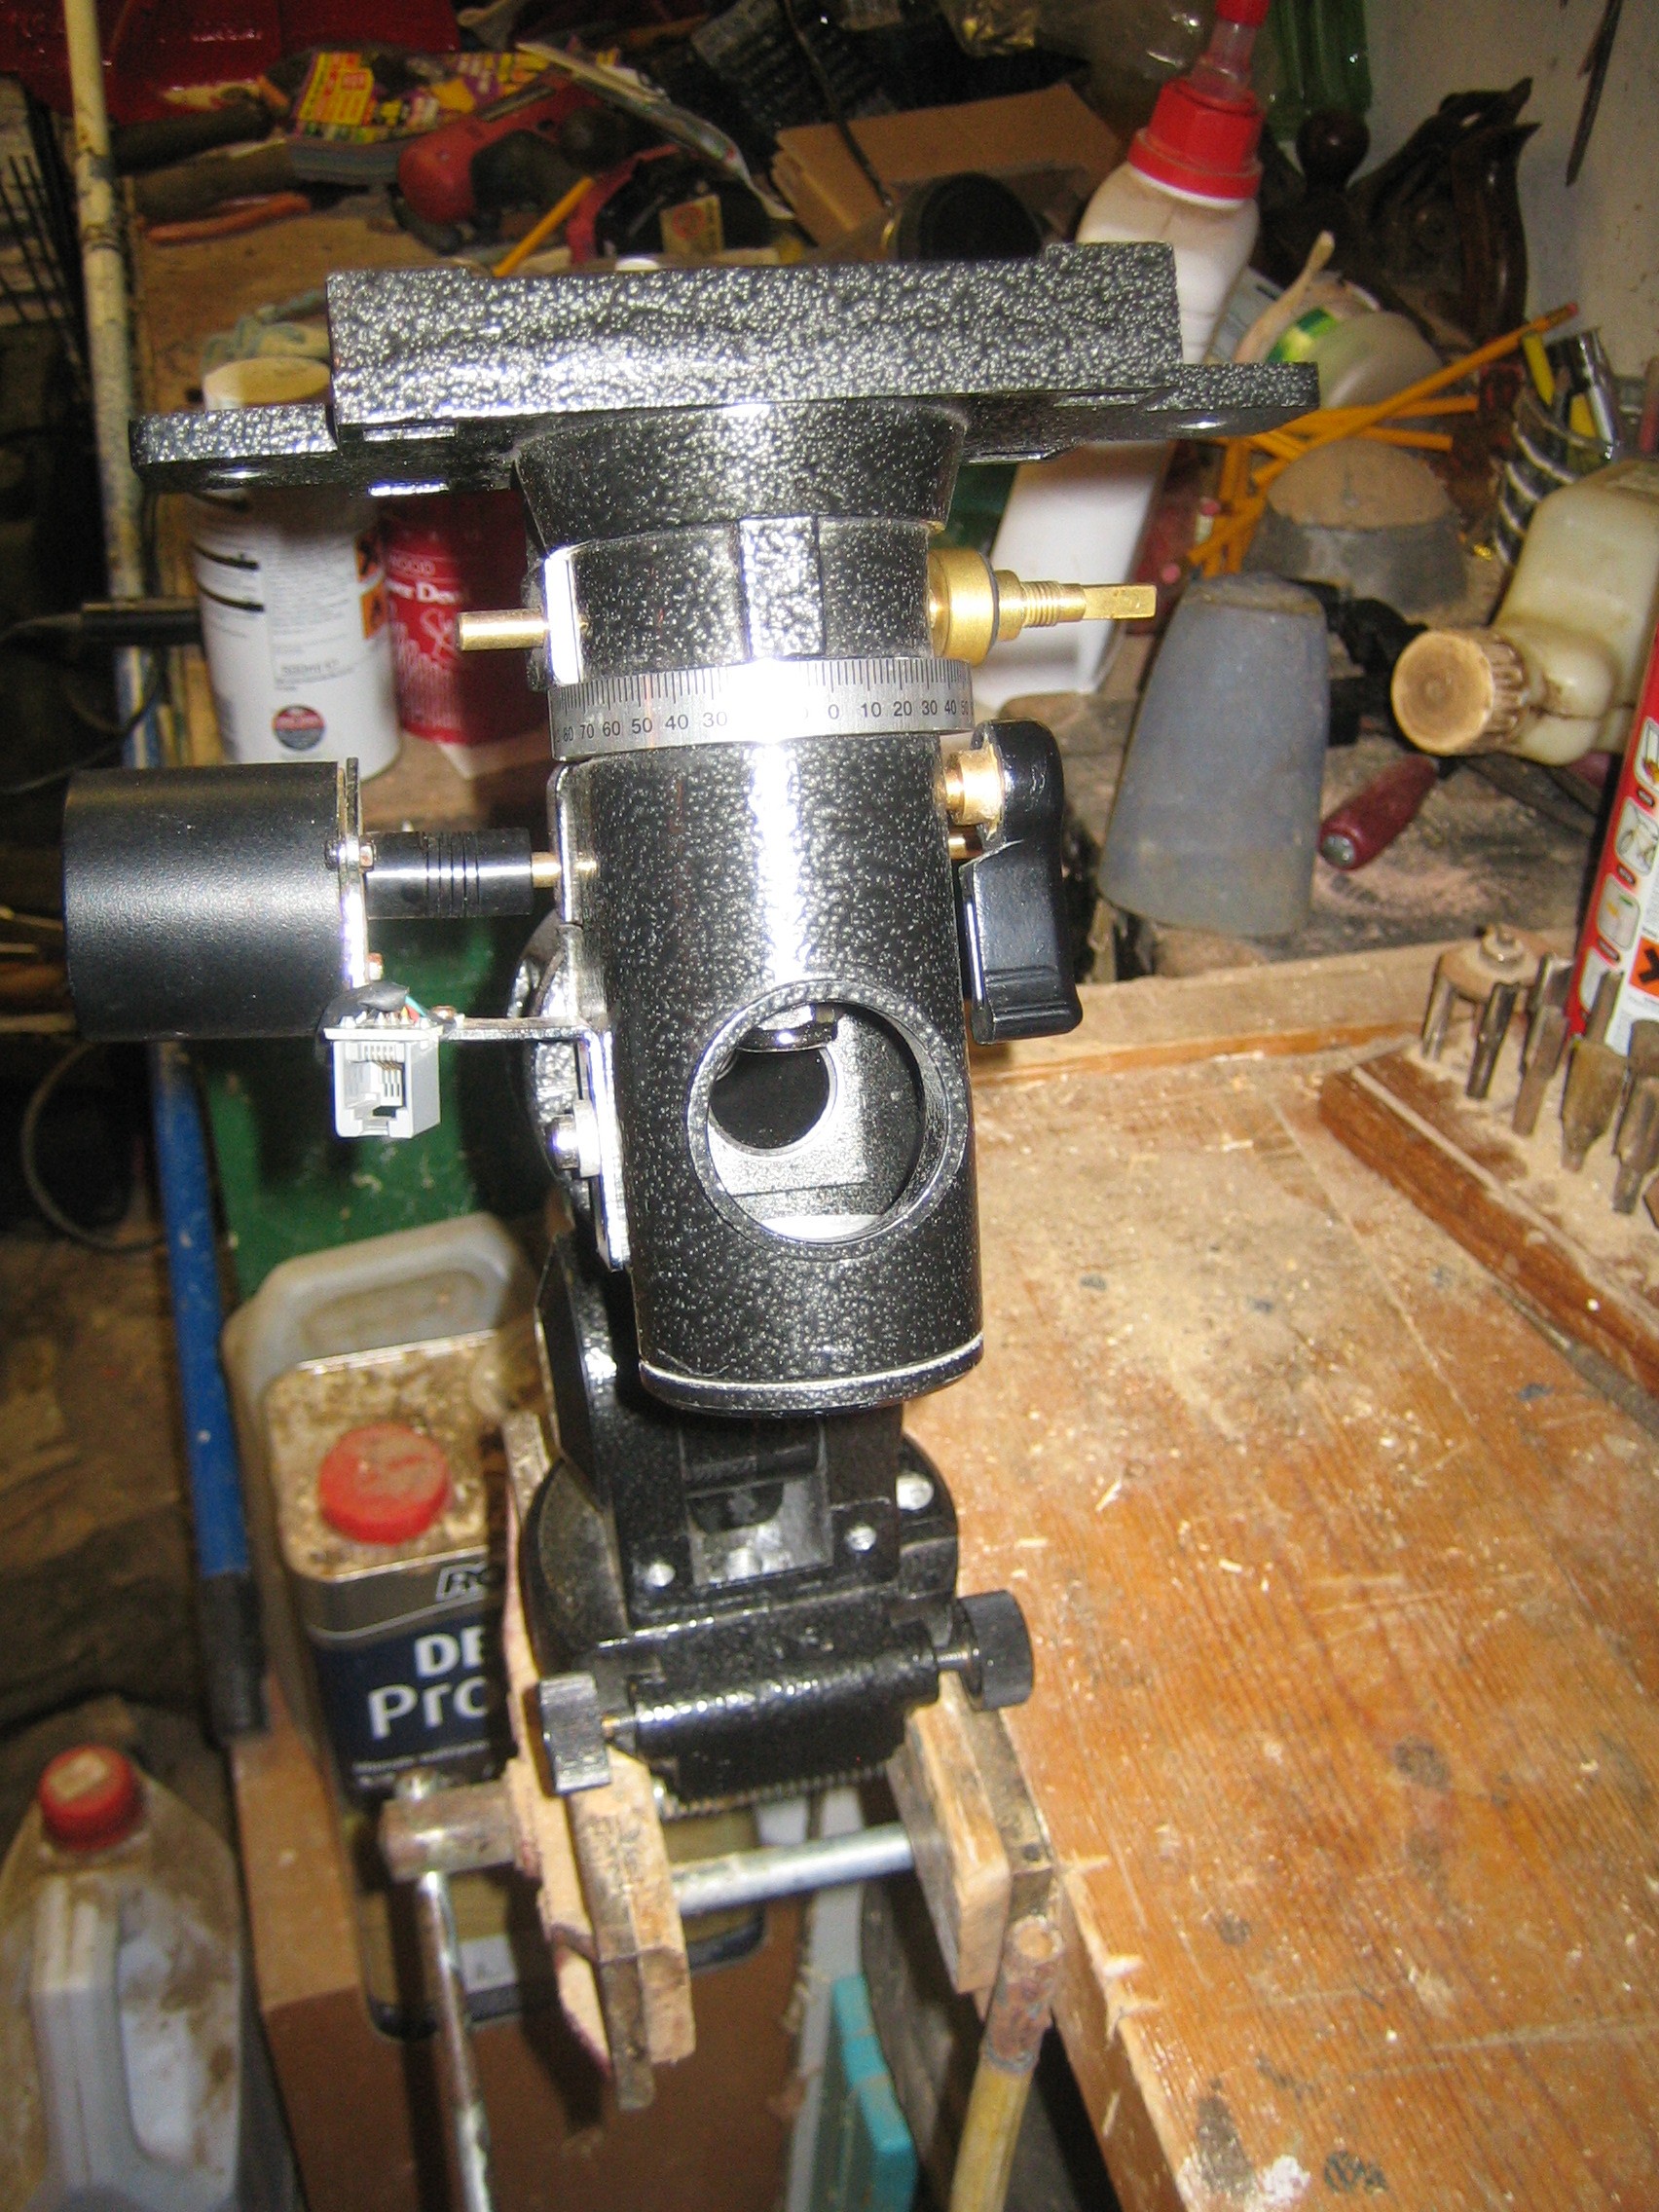
Finally, some photos of the “front” and “back” views of everything assembled.
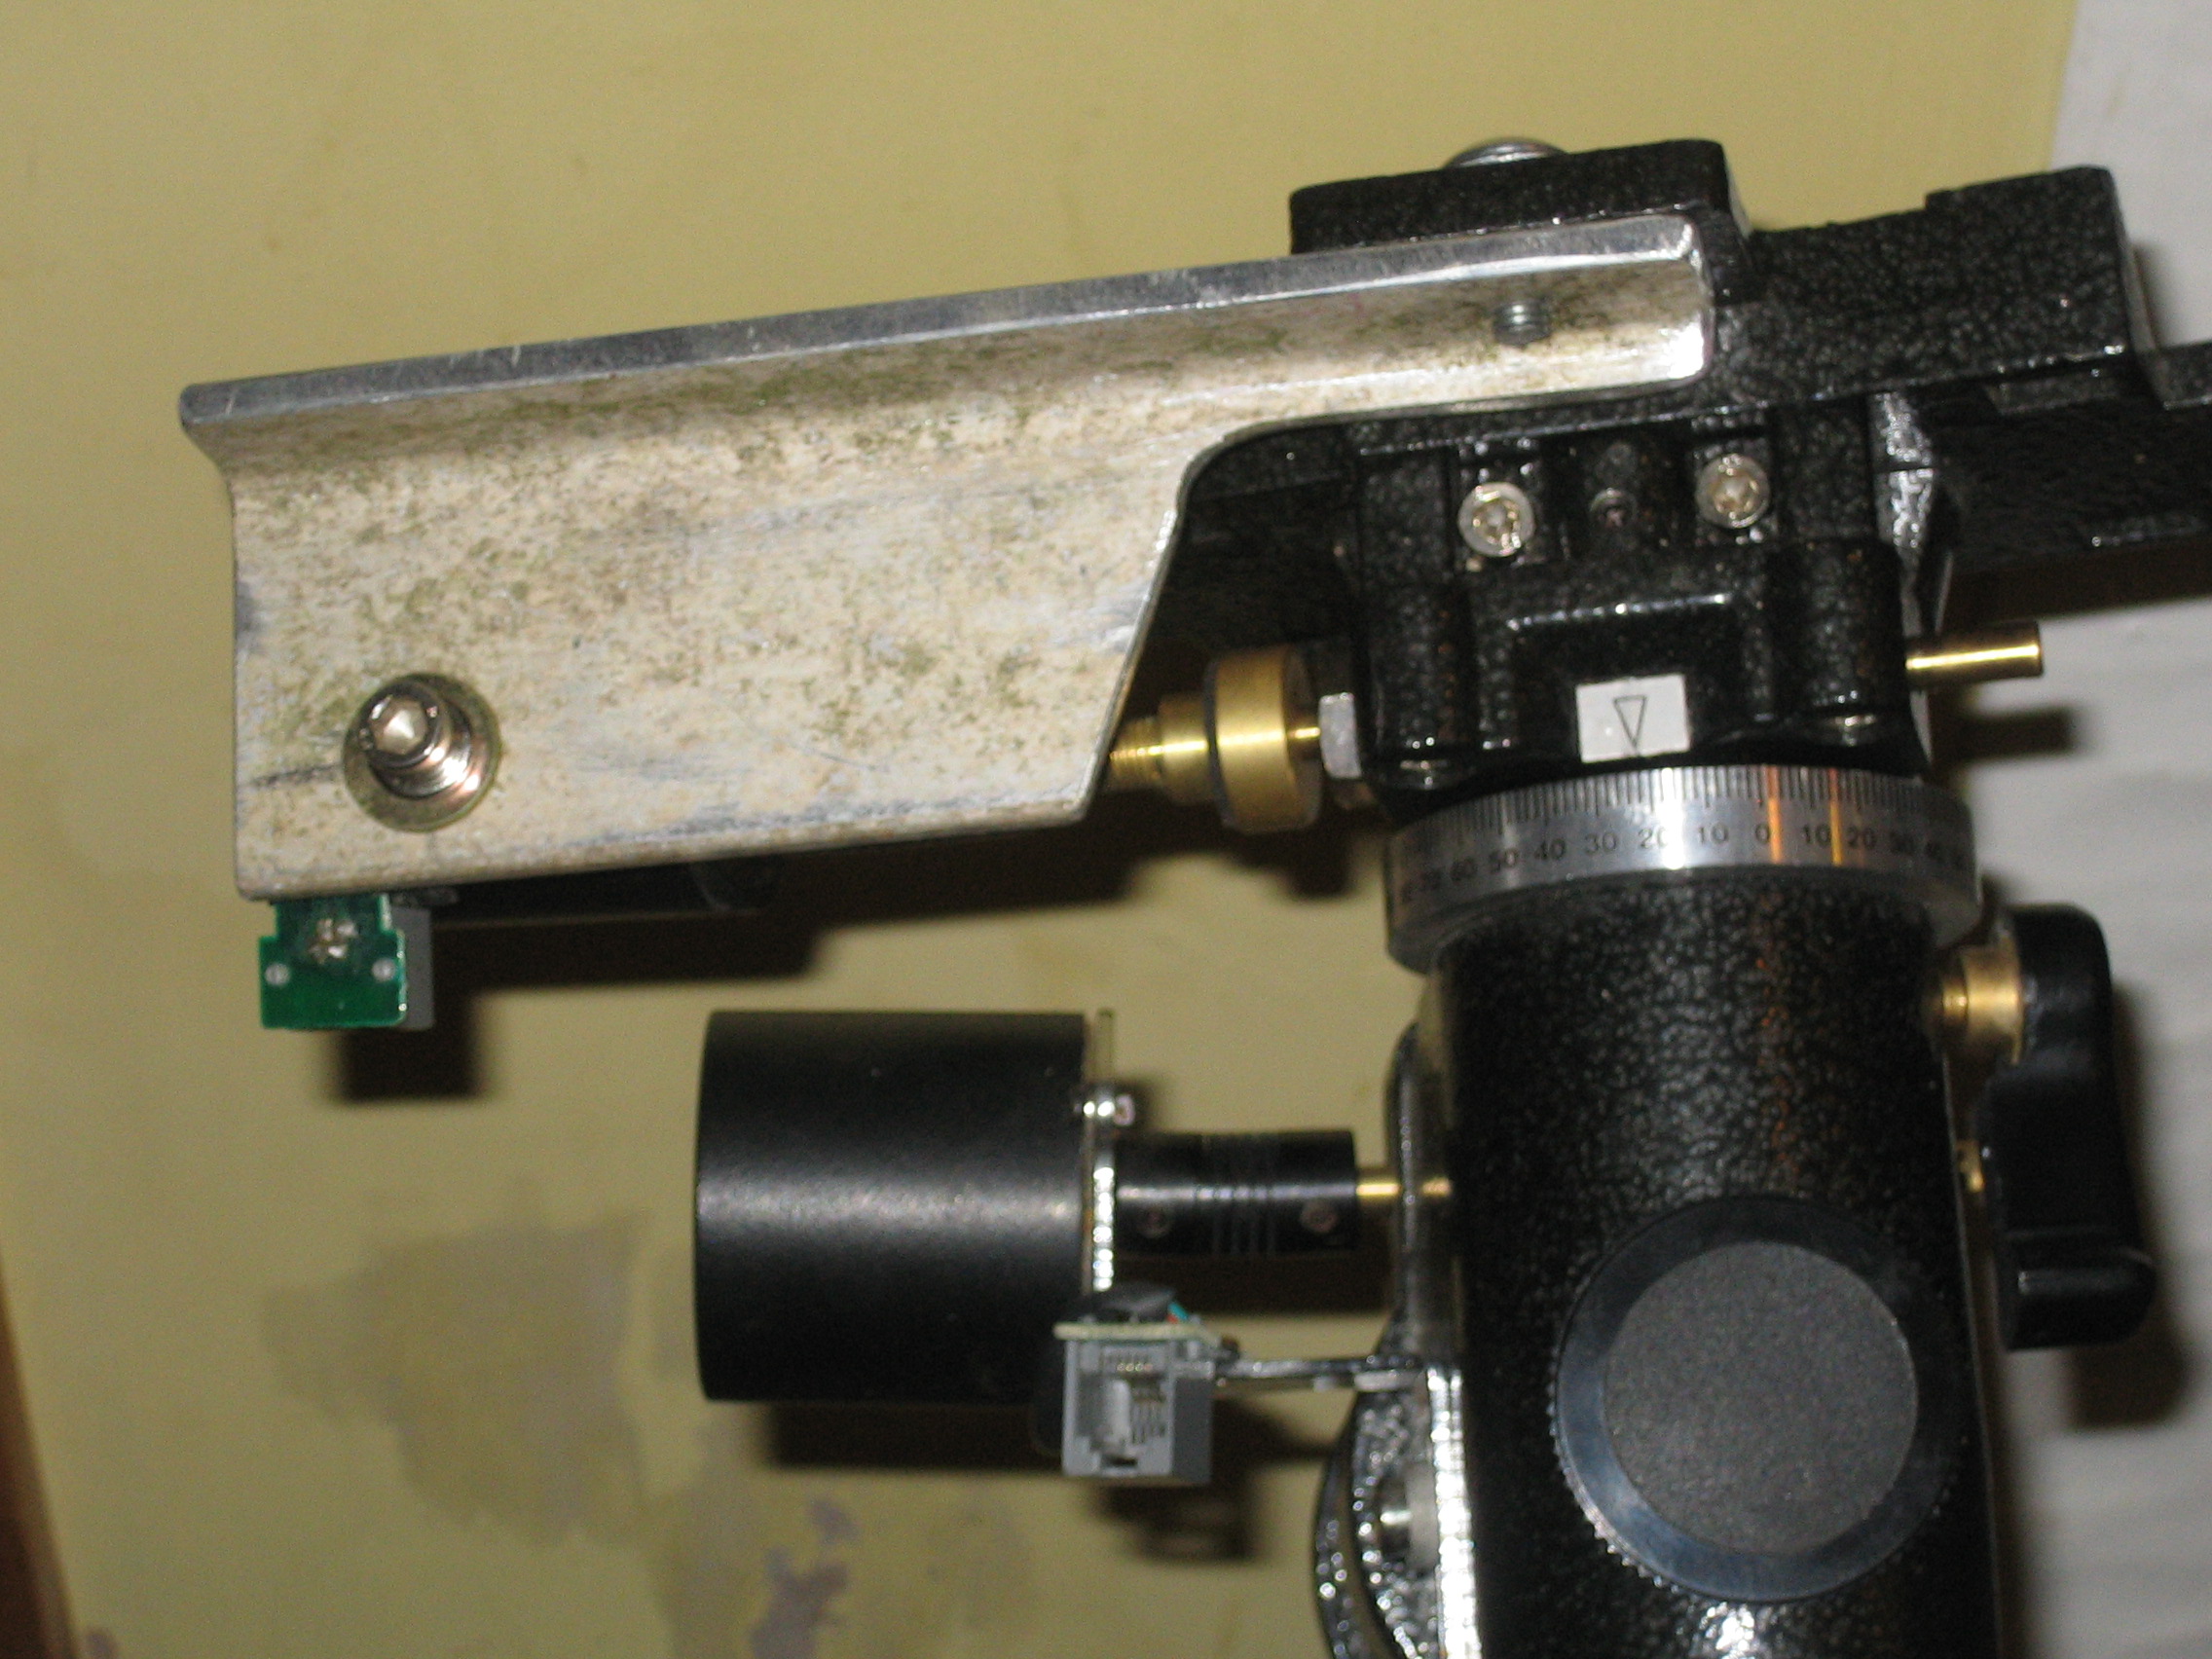
(The photos show my DEC power connector in a different place from normal because at some point in the past the section of PCB has snapped and a repair was required.)

In the event that you don’t have a handy spare connector for the drive shafts, it looks like Technobots might be a good source. Be aware that the motor drive output and worm drive extension may well not be the same diameter. Mine were 5mm and 6mm respectively.
Posted in Astro Equipment, Astronomy, Projects | Tagged | Leave a comment

Skywatcher 127 Mak Focuser Motor Drive Conversion

It seems to be fairly widely accepted that the 127 Mak suffers badly from vibration when the focuser is adjusted by hand on the mounts it’s shipped with as standard. That’s certainly the case with mine. For me, it would also be useful to be able to adjust the focus when sitting at my laptop when imaging. I’ve read a number of descriptions of the motor drive focuser conversions that people have done to help alleviate this problem, but they all seem to be for alt-az mounted OTAs and have a convenient mounting point for the motor on the back end of the dovetail allowing it to sit right next to the focuser.

My Mak usually goes on my EQ3-2 mount and as such has the dovetail on the bottom of the OTA rather than the right hand side, leaving me no convenient existing mounting point for the motor. I didn’t want to drill the OTA either. I considered various options before combining a few other peoples’ solutions with some bits of my own. Here’s what I did:

I started off with a Skywatcher motor focuser drive that I’d originally bought for my ST102. I’d already donated the coupling from this to my EQ3-2 direct DEC drive conversion, but that was fine as I wasn’t planning to use it. I considered driving the existing focuser knob with a 4mm O-ring and pulley, but wanted better control and so eventually opted to use a timing belt and gears that a few other people have also tried. The gears and belt came from motionco. A 60 tooth gear was probably the largest I could fit on the focuser end and a 15 tooth gear was the minimum for the motor end and even then there’s only just enough metal to bore it out to 6mm to fit the motor drive shaft. Others have used the same ratios, so I followed the herd.

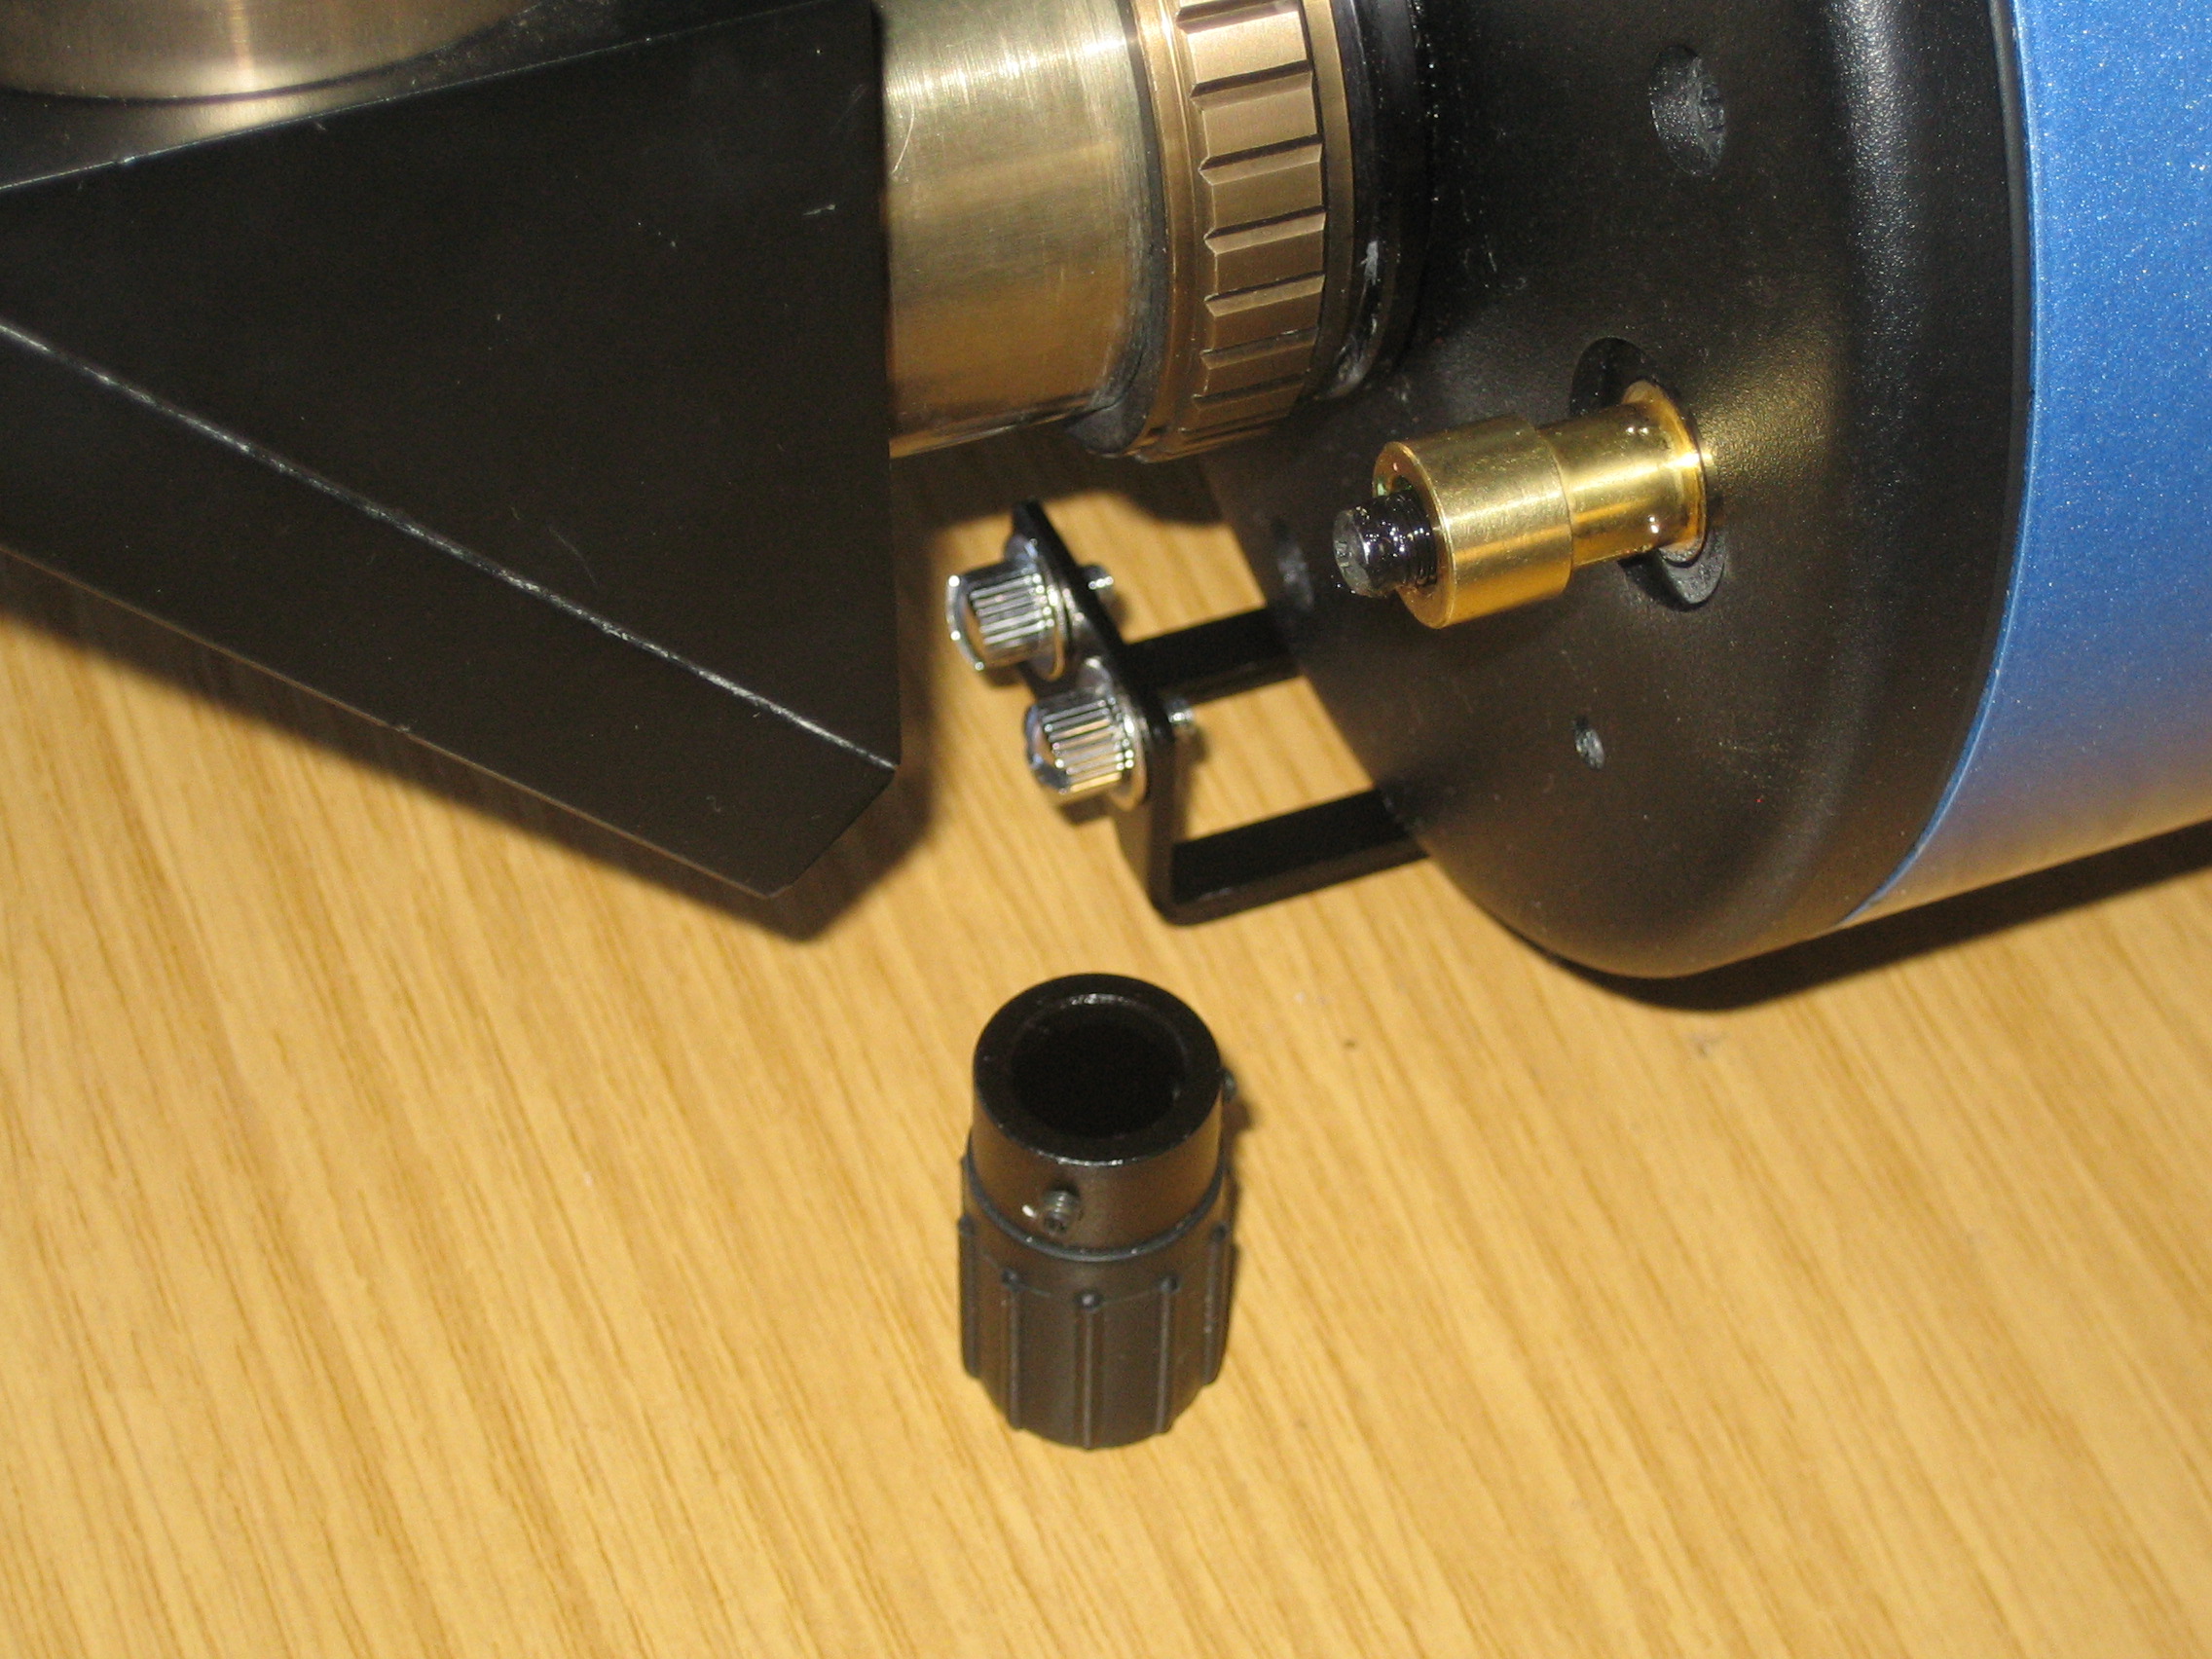
One of the timing belt conversions I’ve seen looks like it involves removing the rubber cover on the focus knob and fitting the gear over the top of the remaining plastic section. That requires drilling the centre of that gear out to 15mm. I don’t have a 15mm drill (a pathetic excuse, really 🙂 and couldn’t get the rubber cover off the knob, so I decided to remove the knob entirely and fit the gear to the shaft directly. There are a couple of “gotchas” with this approach. Firstly, the focus knob is all that stops the mirror falling down the OTA if it’s stood on the corrector lens end. The second is that the mirror is moved on a threaded rod that moves up and down inside the focusing shaft (similar to how a tap opens and closes, I guess) and that rod eventually ends up protruding from the shaft when the mirror is at the end of the OTA, as seen here:

To address the first problem I had to make up a spacer to fit between the gear and the back of the OTA to take up the play between the two. I happened to have some rocket launcher tube left over from last Guy Fawkes Night that fitted the bill perfectly once cut to length. I was pleased to have found it because my other option was a section of 15mm copper tube and I didn’t really want that spinning against the back of the OTA no matter how smooth I could make the edges.

For the second, whilst I needed to bore out the centre of the gear to 12mm to fit over the shaft anyhow, I had to go much deeper than the length of the shaft to allow space for the inner rod inside.

As several other people have done, I opted to use the smaller mount for the Skywatcher motor fixed to the dovetail (visible in the above photo), but the positioning meant I’d have to make a bracket to fit on that and carry the motor. My best guess when I ordered the gears was that I’d need a 110 tooth belt to have clearance at a convenient mounting point.

First job once the gears arrived was to enlarge the bore of the 15 tooth wheel to 6mm using a pillar drill. This gear is actually in two parts — the collar holding the grub screw has the gear section passing through the middle of it and boring out to 6mm takes almost all of that metal away. I cut just deep enough to pass the grub screw hole, but in retrospect I think I might be tempted to use a slightly larger gear. Fortunately it all fitted very nicely.

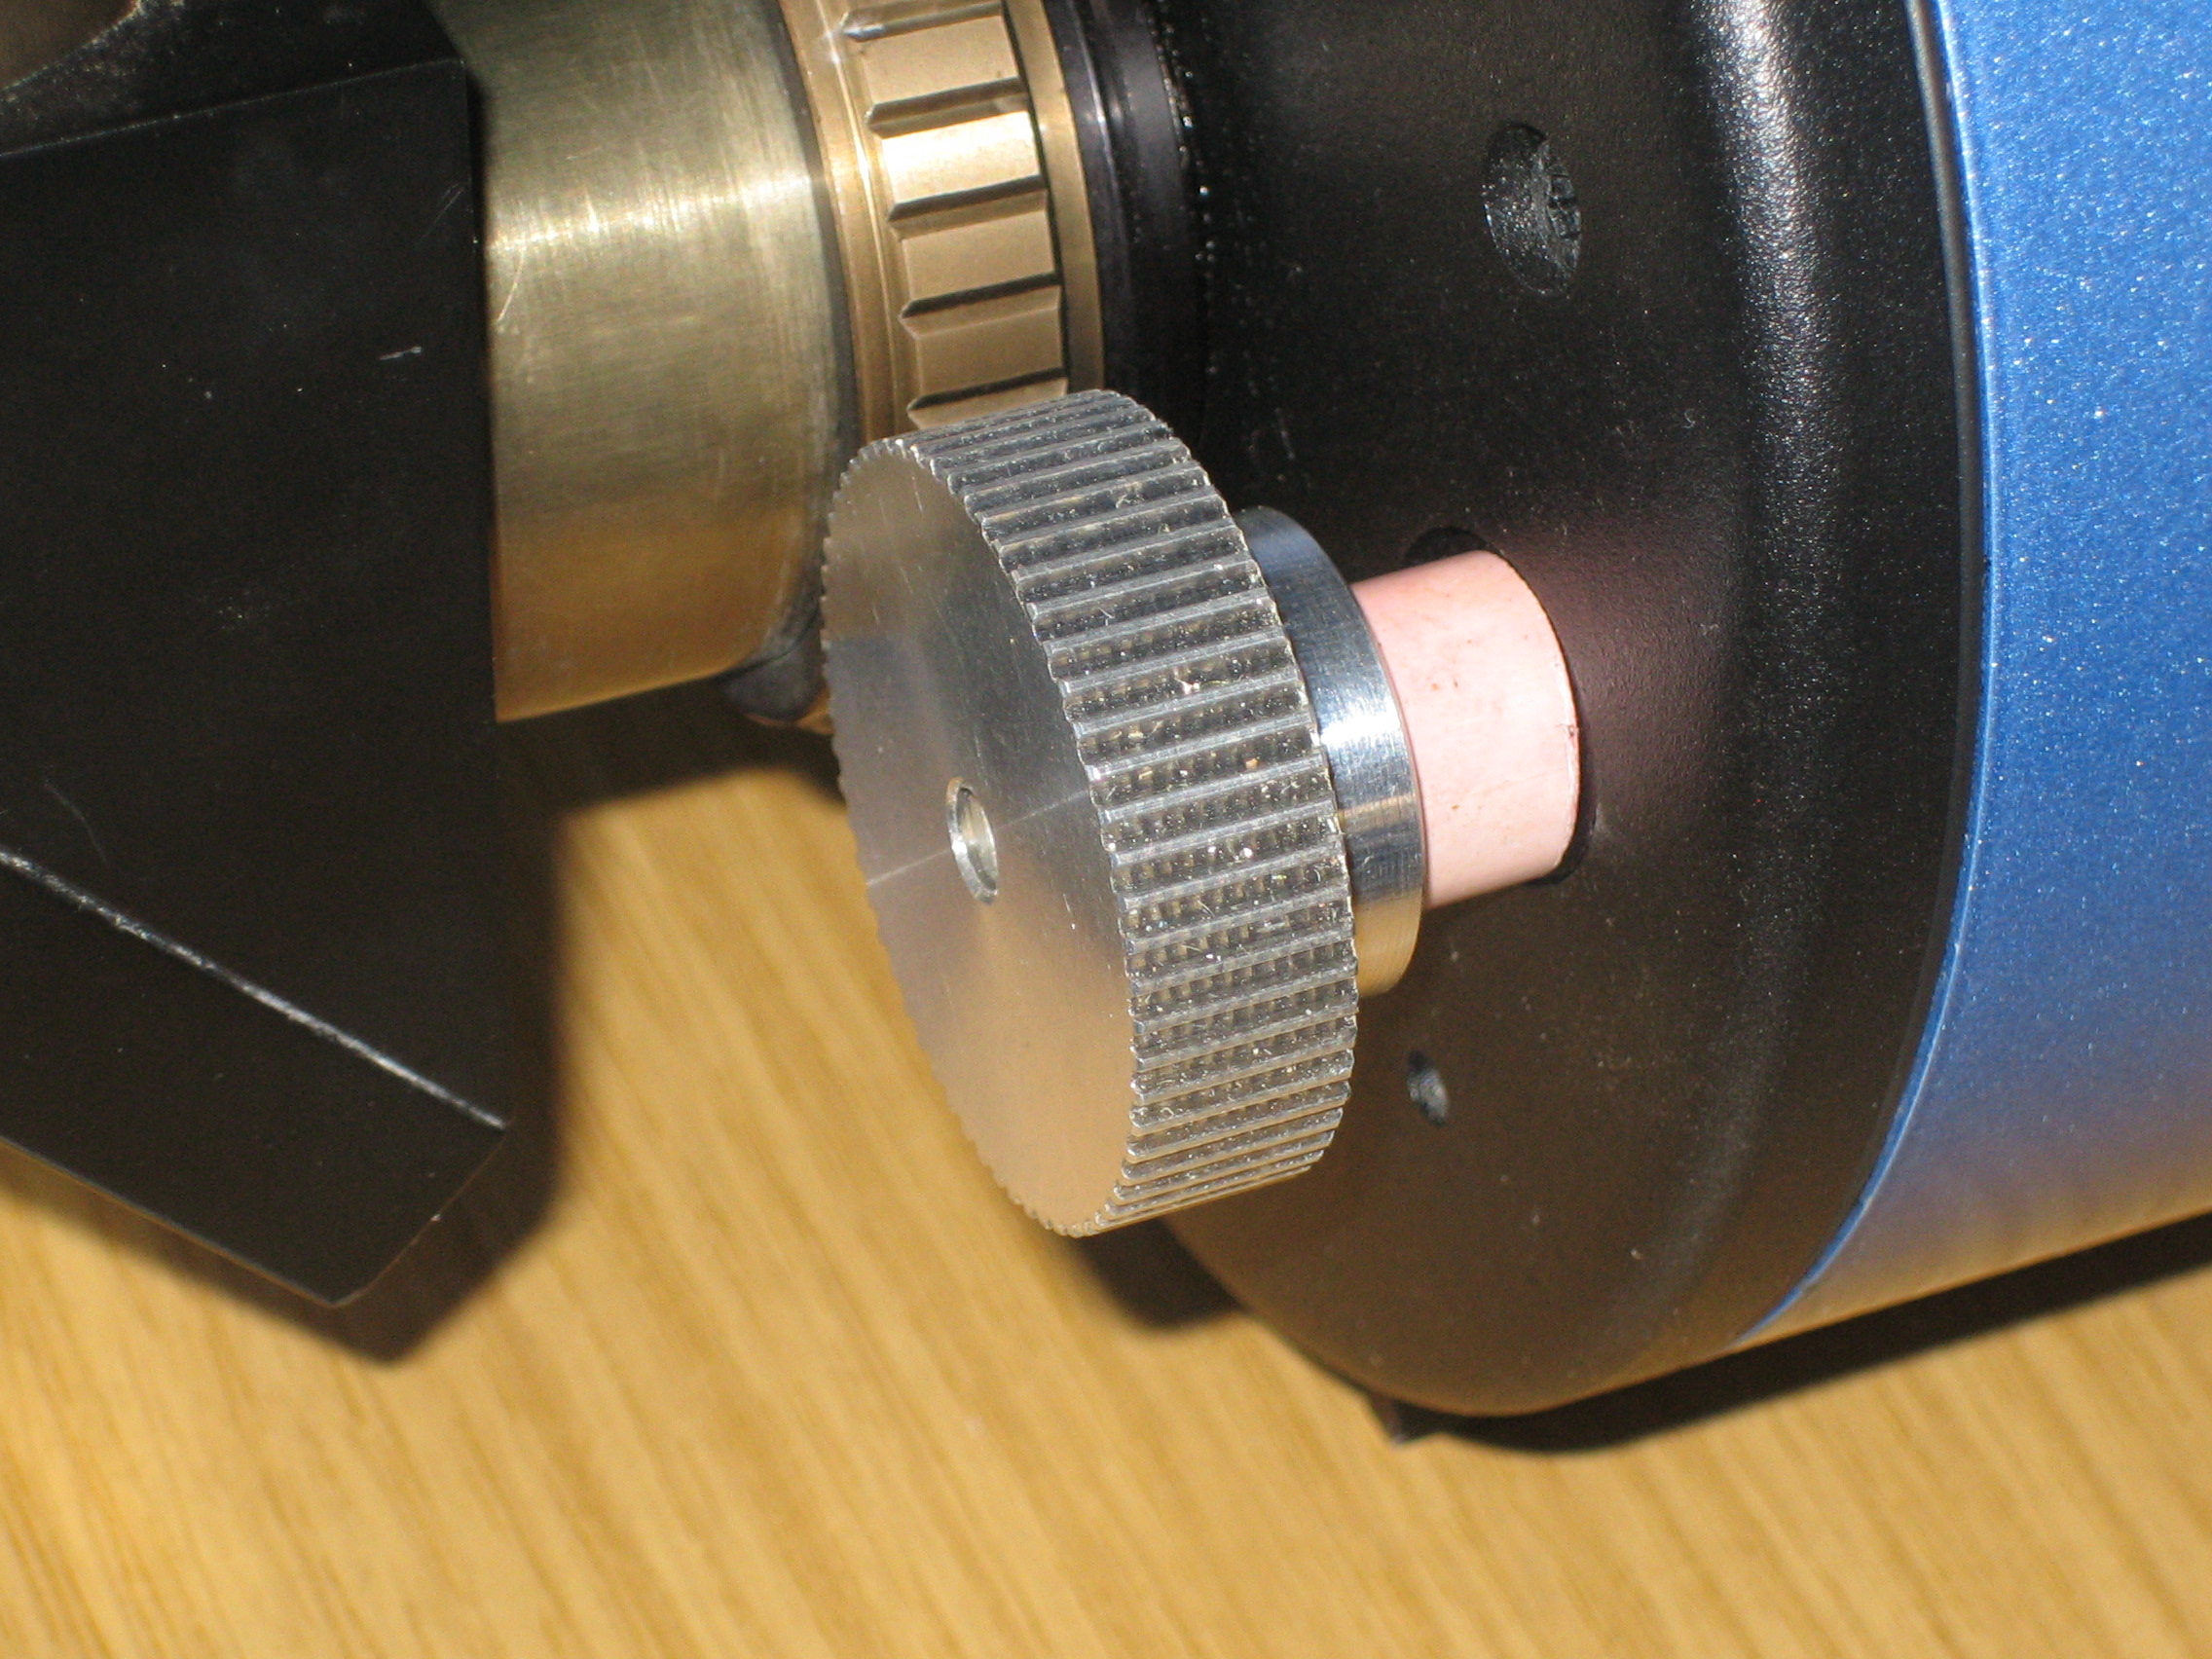
I then enlarged the bore of the 60 tooth gear to 12mm, but stopped just short of going all the way through which means that although there’s still a hole on the outside face it’s only small and I won’t risk getting grease from the innards all over my hands if I’m operating the focuser manually. Here’s the finished gear installed, with the spacer in place:

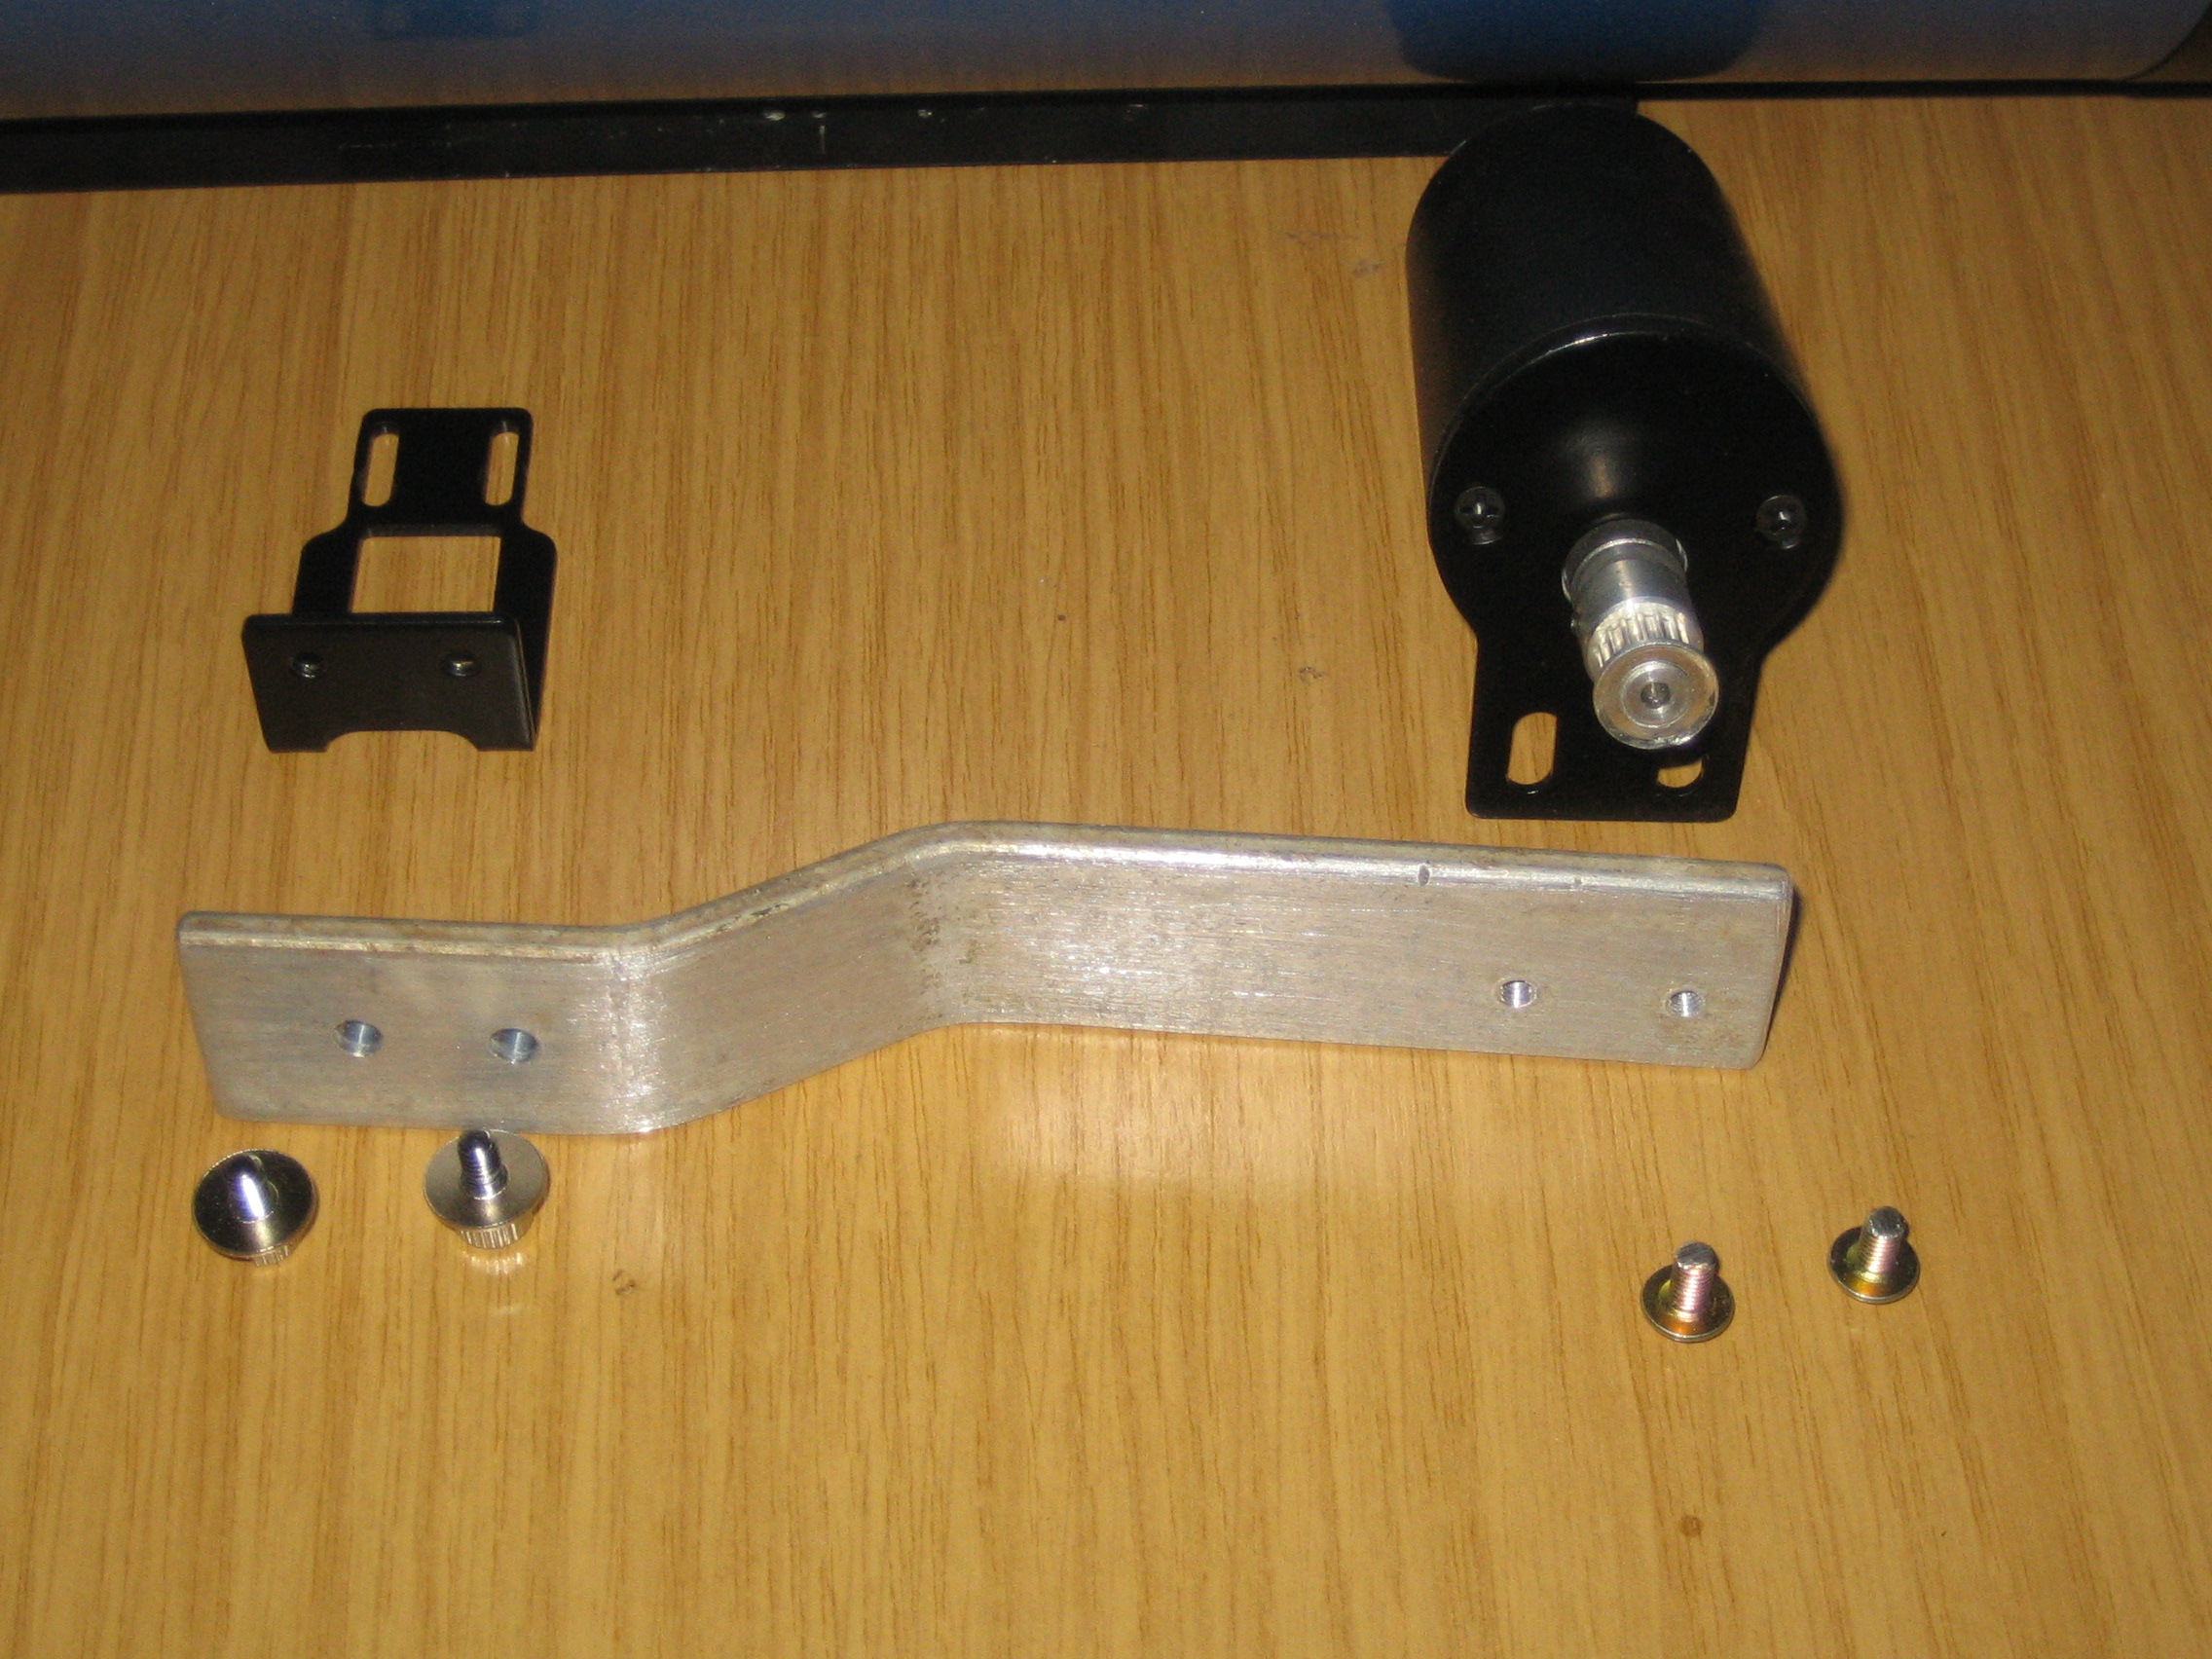
Finally I cut and bent a piece of aluminium to make a bracket for the motor and to fit onto the Skywatcher bracket. At the Skywatcher end I drilled two holes to match the M4 threaded ones in their bracket and at the motor end I drilled and tapped another pair of 4mm holes in a position that allowed a little adjustment of the motor to take up the slack in the belt:

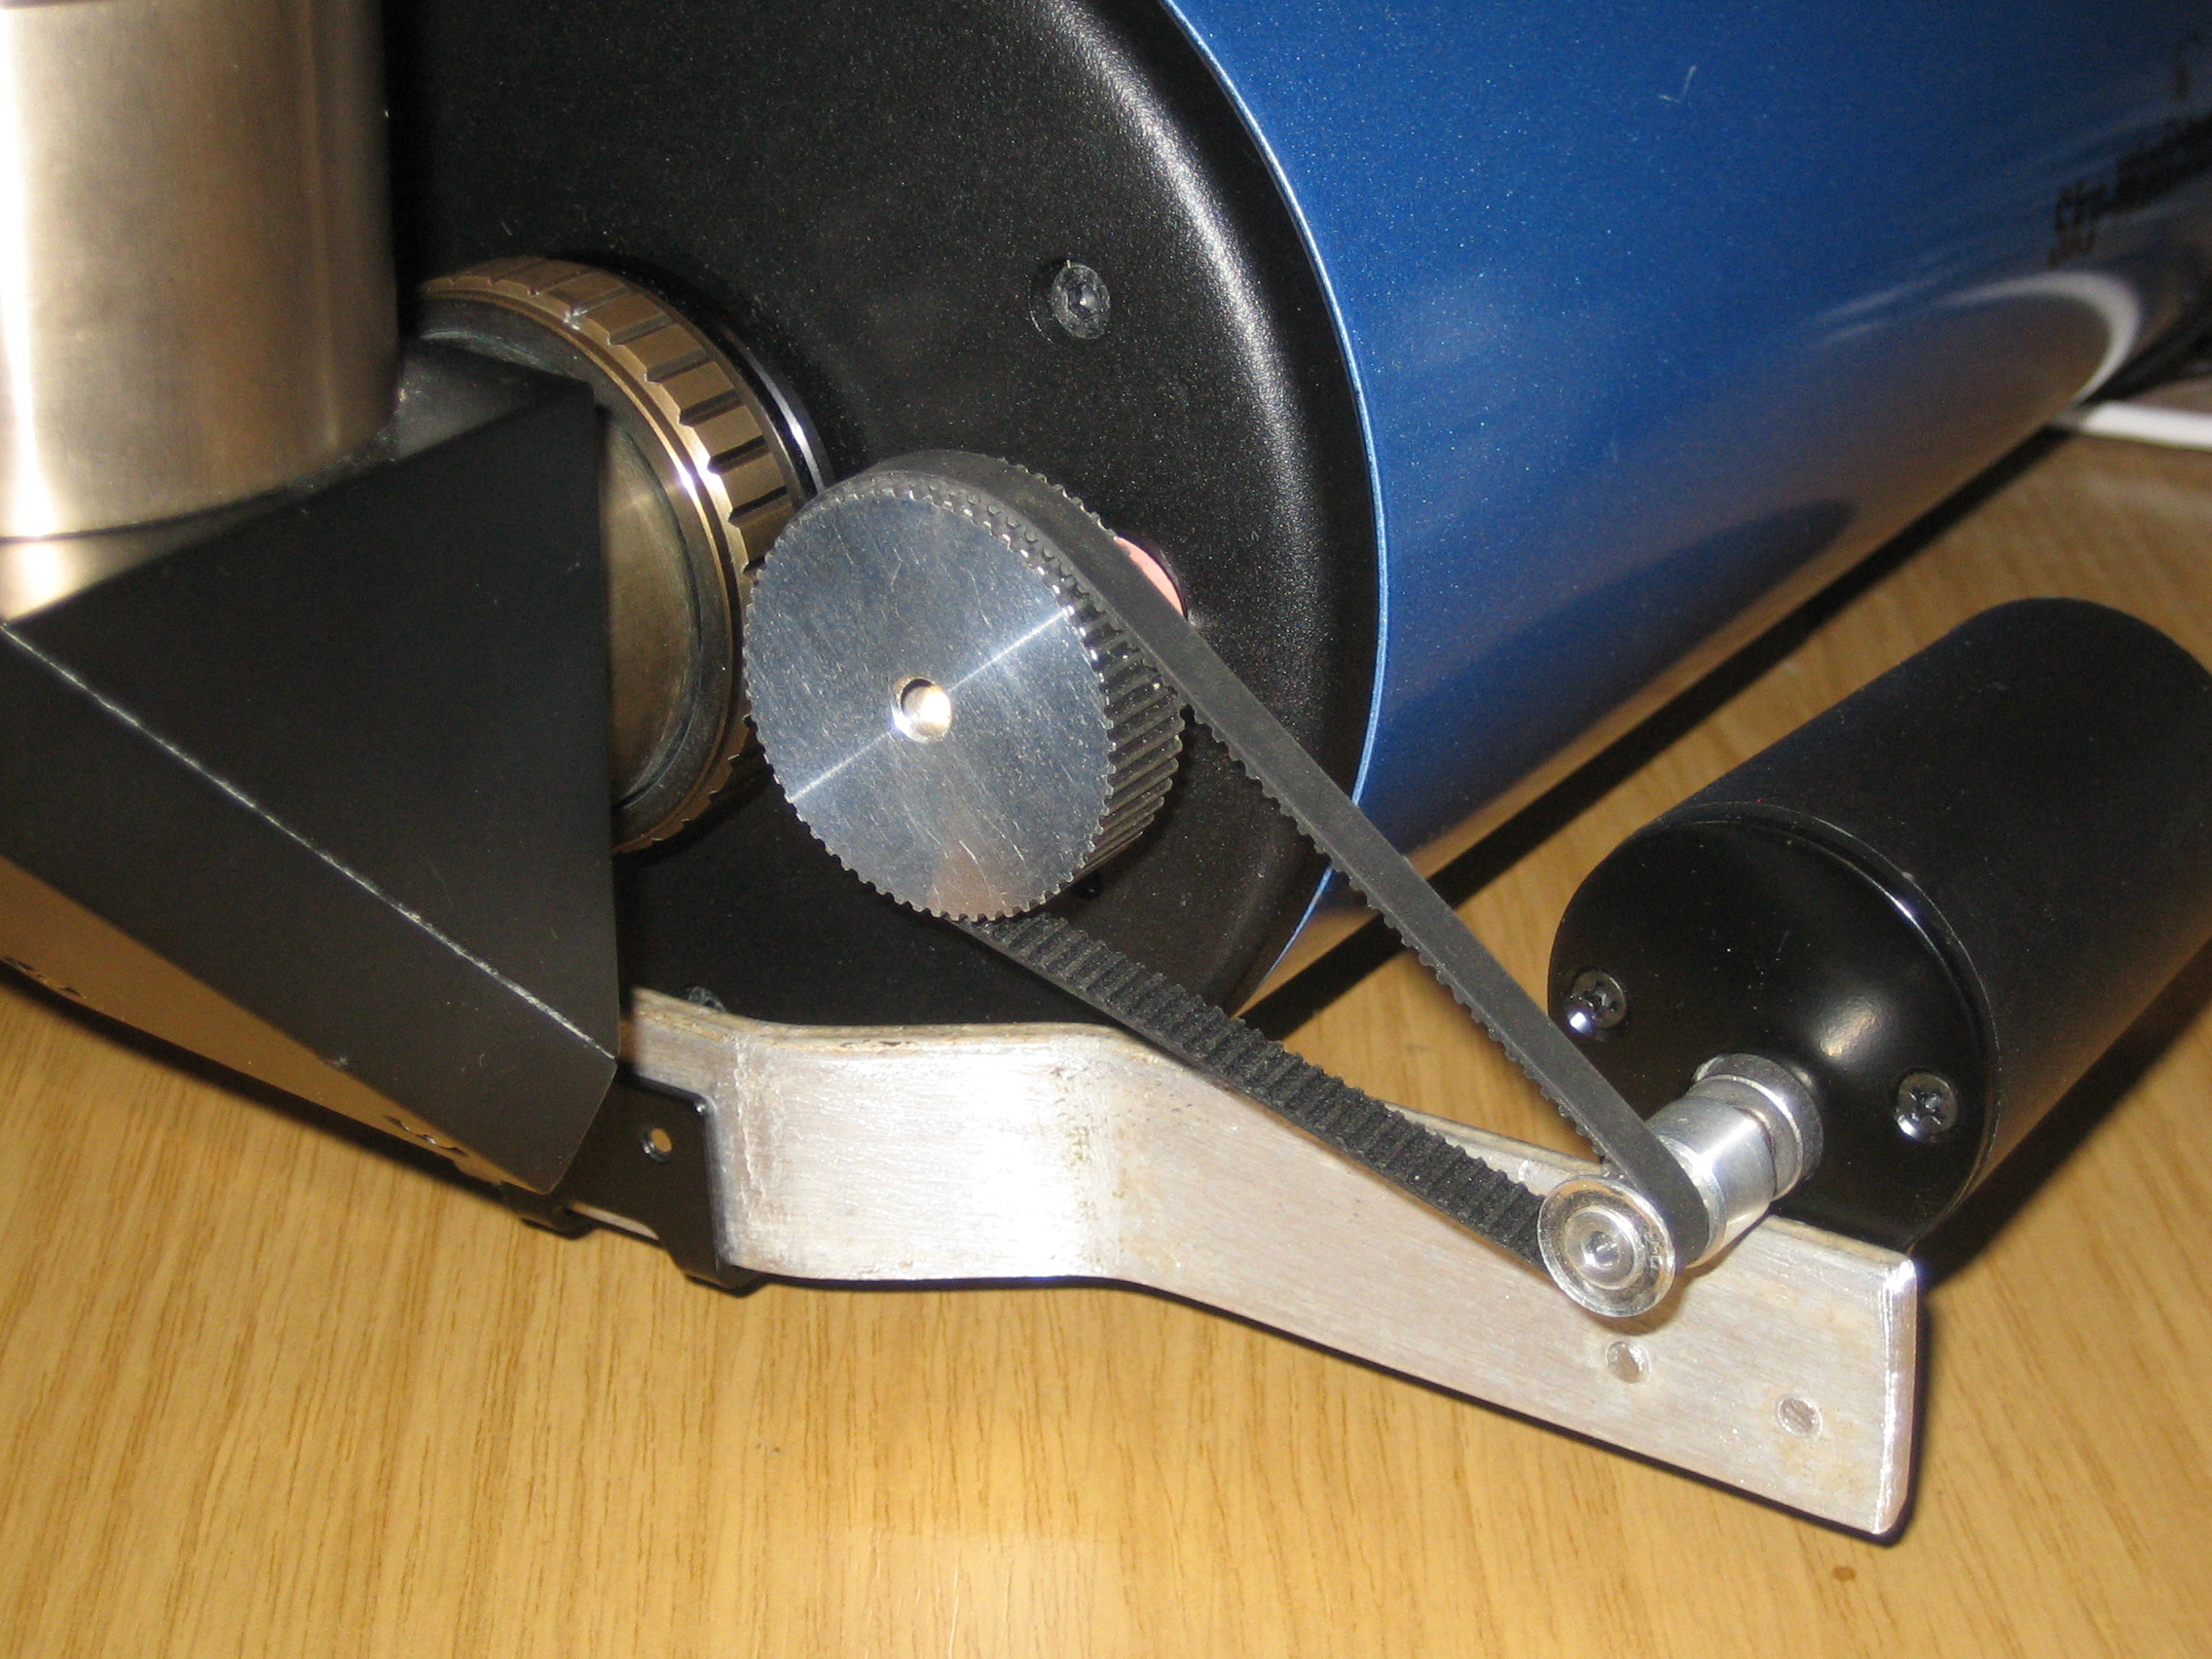
And here’s the whole lot assembled:

All it needs now is a bit of paint.

Initial tests on the bench suggest that it works nicely, so now I’m waiting for some clear skies for a final test.

Having assembled it all I think I could easily have got away with a 100 tooth belt and may well swap to one, but I’m not going to order a new one now when the postage will cost more than the belt, so it can wait until I need other bits.

The one thing I haven’t yet done is fix the Skywatcher bracket to the dovetail. I’m still pondering on the best way to do that. I can tap the dovetail to accept a couple of screws to hold it in place, but I think if the heads protrude at all they’ll scratch the OTA. I might need to countersink them into the face of the bracket to avoid that.

Posted in Astro Equipment, Astronomy, Projects | Tagged , | 2 Comments

Splitting Eggs

Though it’s much warmer today we’ve had four or five days on the trot where the temperatures have barely risen above freezing, getting down to close to -10C on one occasion.

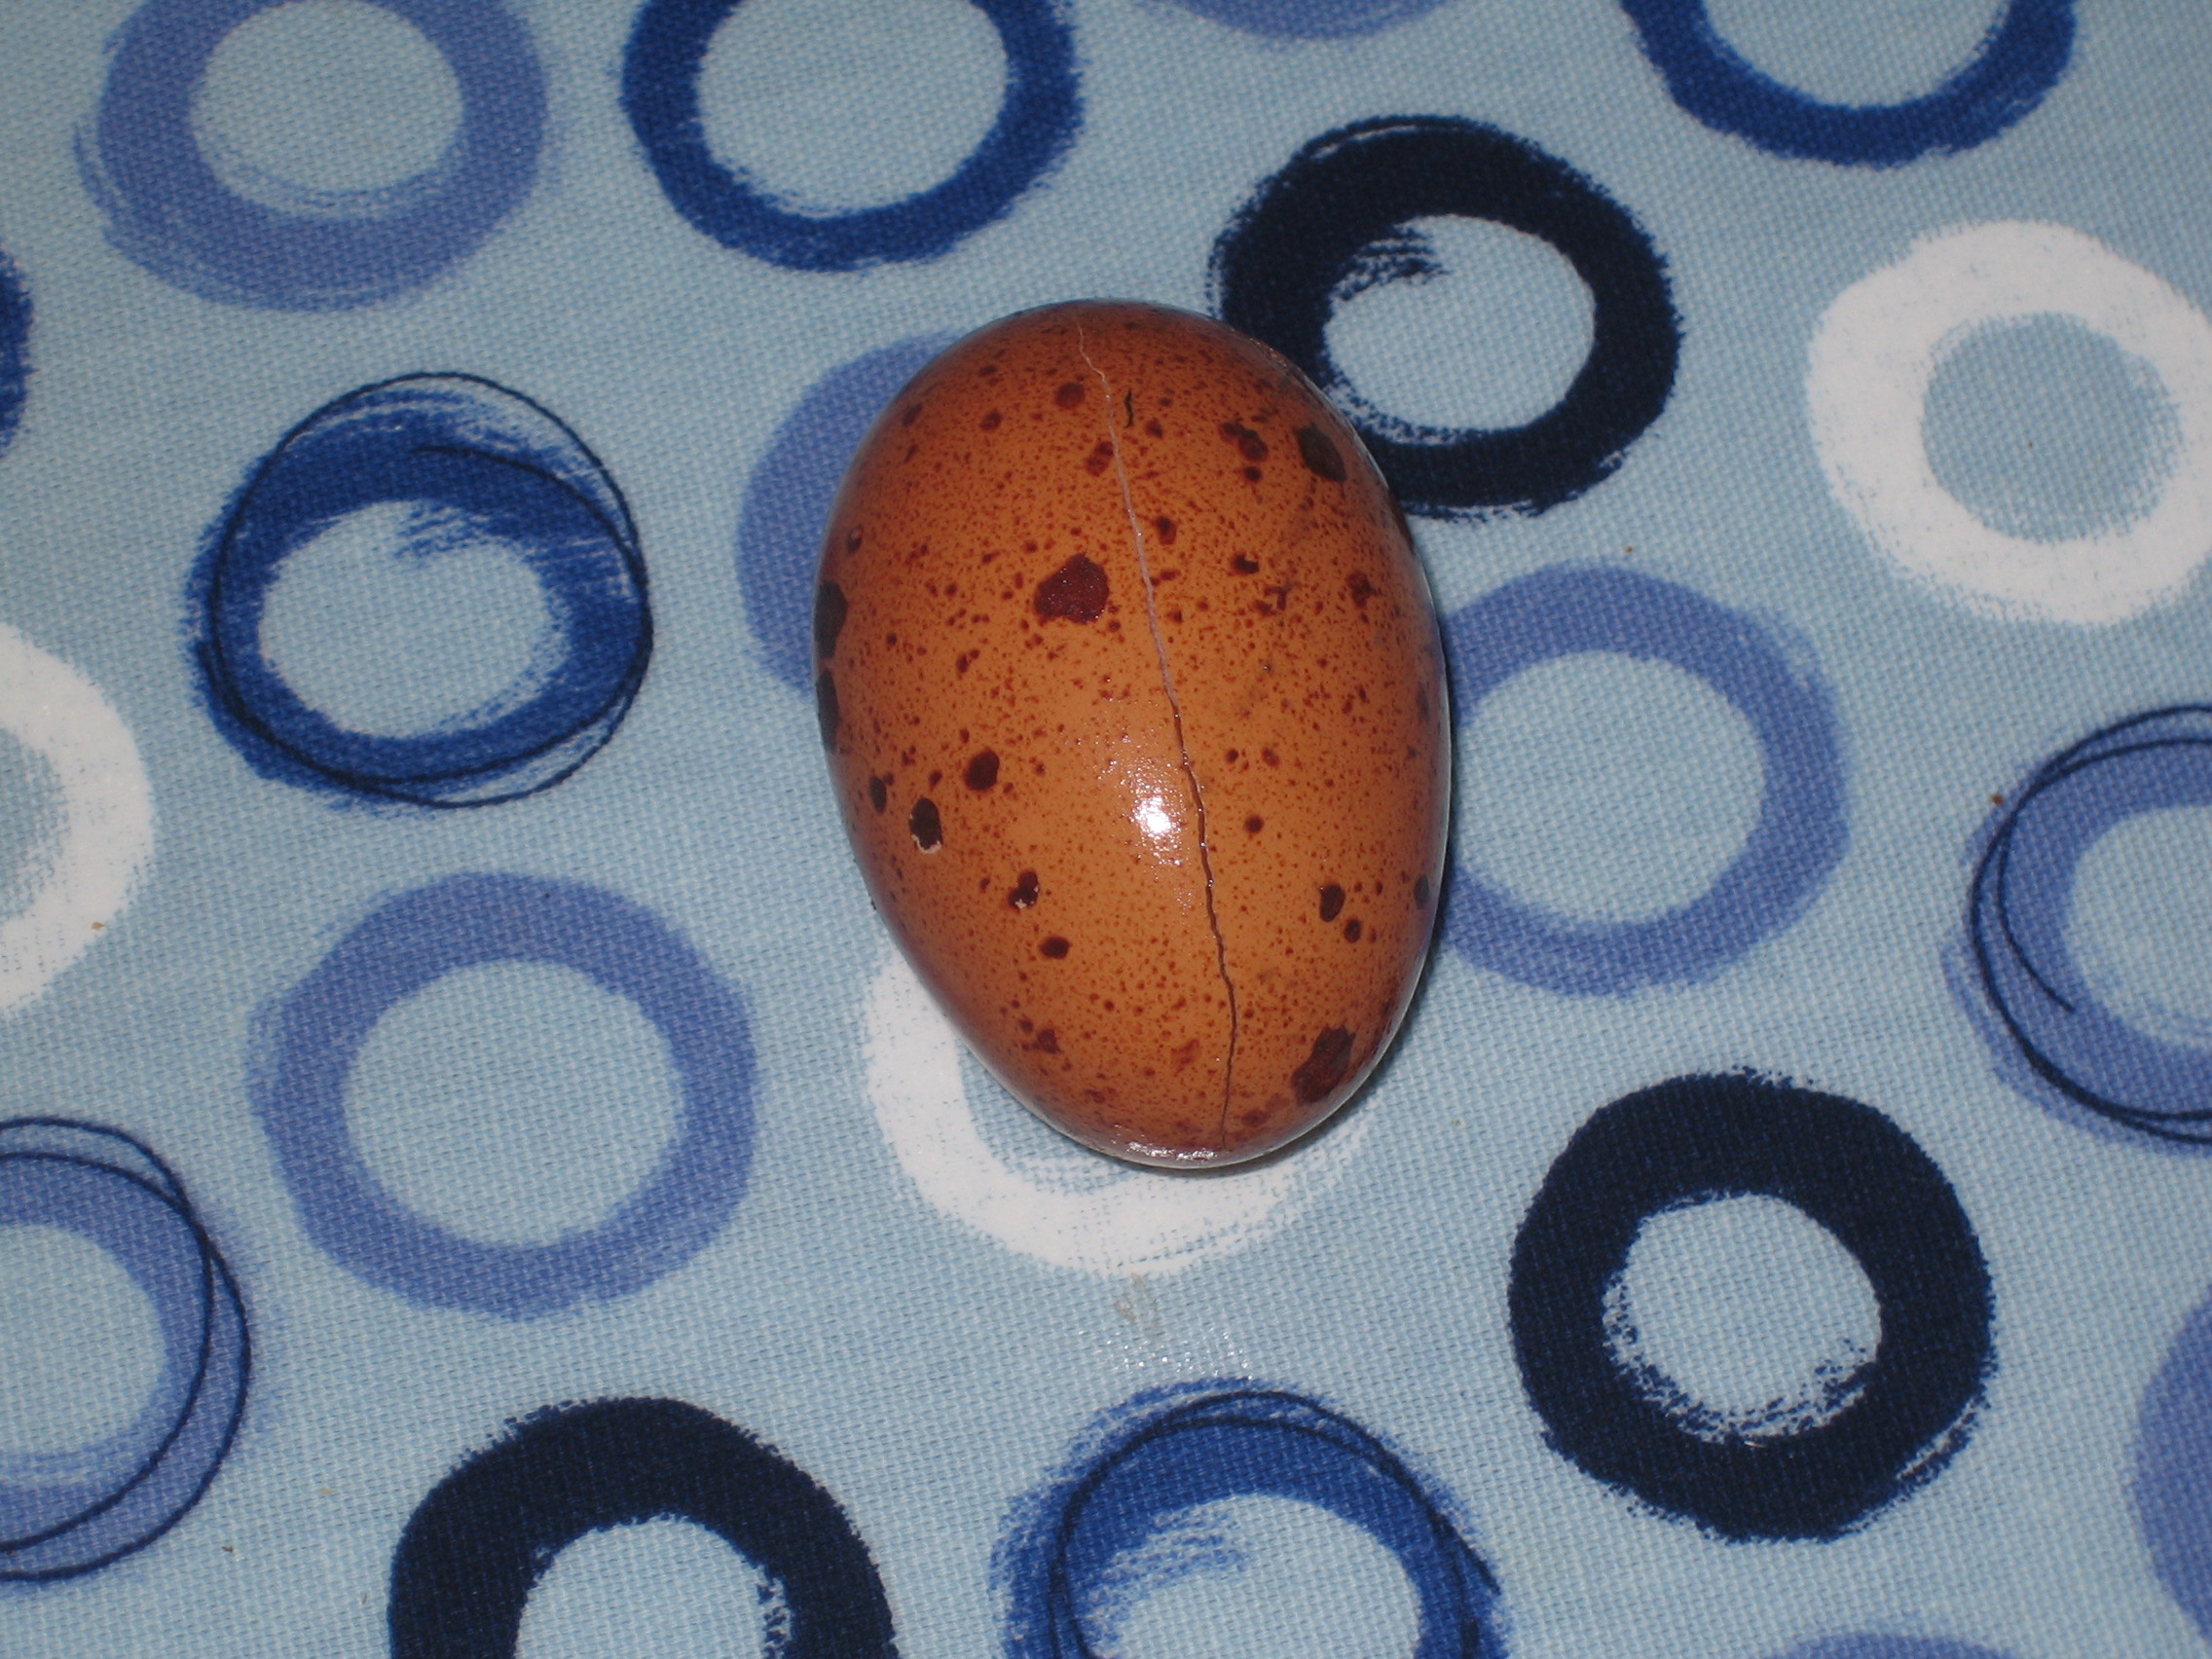
One of the unexpected results of this sudden cold snap is that I’ve not been able to collect the chicken eggs as regularly as normal because some of the nesting boxes have been frozen closed and the eggs have therefore been in the houses overnight. This has meant that a few eggs exposed to the overnight cold have frozen inside, with predictable results:

I’ve never seen this happen before despite keeping chickens for eight years now.

Posted in Chickens, Smallholding | Tagged | Leave a comment

Solar PV Generation Update, Feb 2012

It’s the start of another month and time to review our solar PV installation once more…

Generation for January was 120kWh, almost double the estimated production for this area during January. In fact, every month so far we’ve exceeded not only the estimated generation according to the SAP model the government want us to use (so I understand), but also my own more generous estimate of what the performance should be for my installation.

Total production for the last five months has been 829 units, worth about £370 at the current FIT rates, plus a saving of up to £125 that we’ve not had to spend on electricity depending on how much of that electricity we actually used on-site.

I’m genuinely surprised that the figures are so high. I don’t see any particularly obvious reason for it. Whilst the winter has been mild, it has also been very wet and overcast and I was expecting relatively poor figures. I wonder if the temperature has an effect and if so, how much?

Posted in Environment, Projects | Tagged , , | Leave a comment

EQ3-2 Mount Tune-Up (Part Two)

Whilst I had the mount on the bench I thought I’d have another look at what seems to be a perennial problem with the Skywatcher mounts at UK latitudes: the mounts are at the limits of their design spec. for the alt adjustment which regularly results in problems with the south side bolt bending or running off the adjustment cam, or both (as in my case).

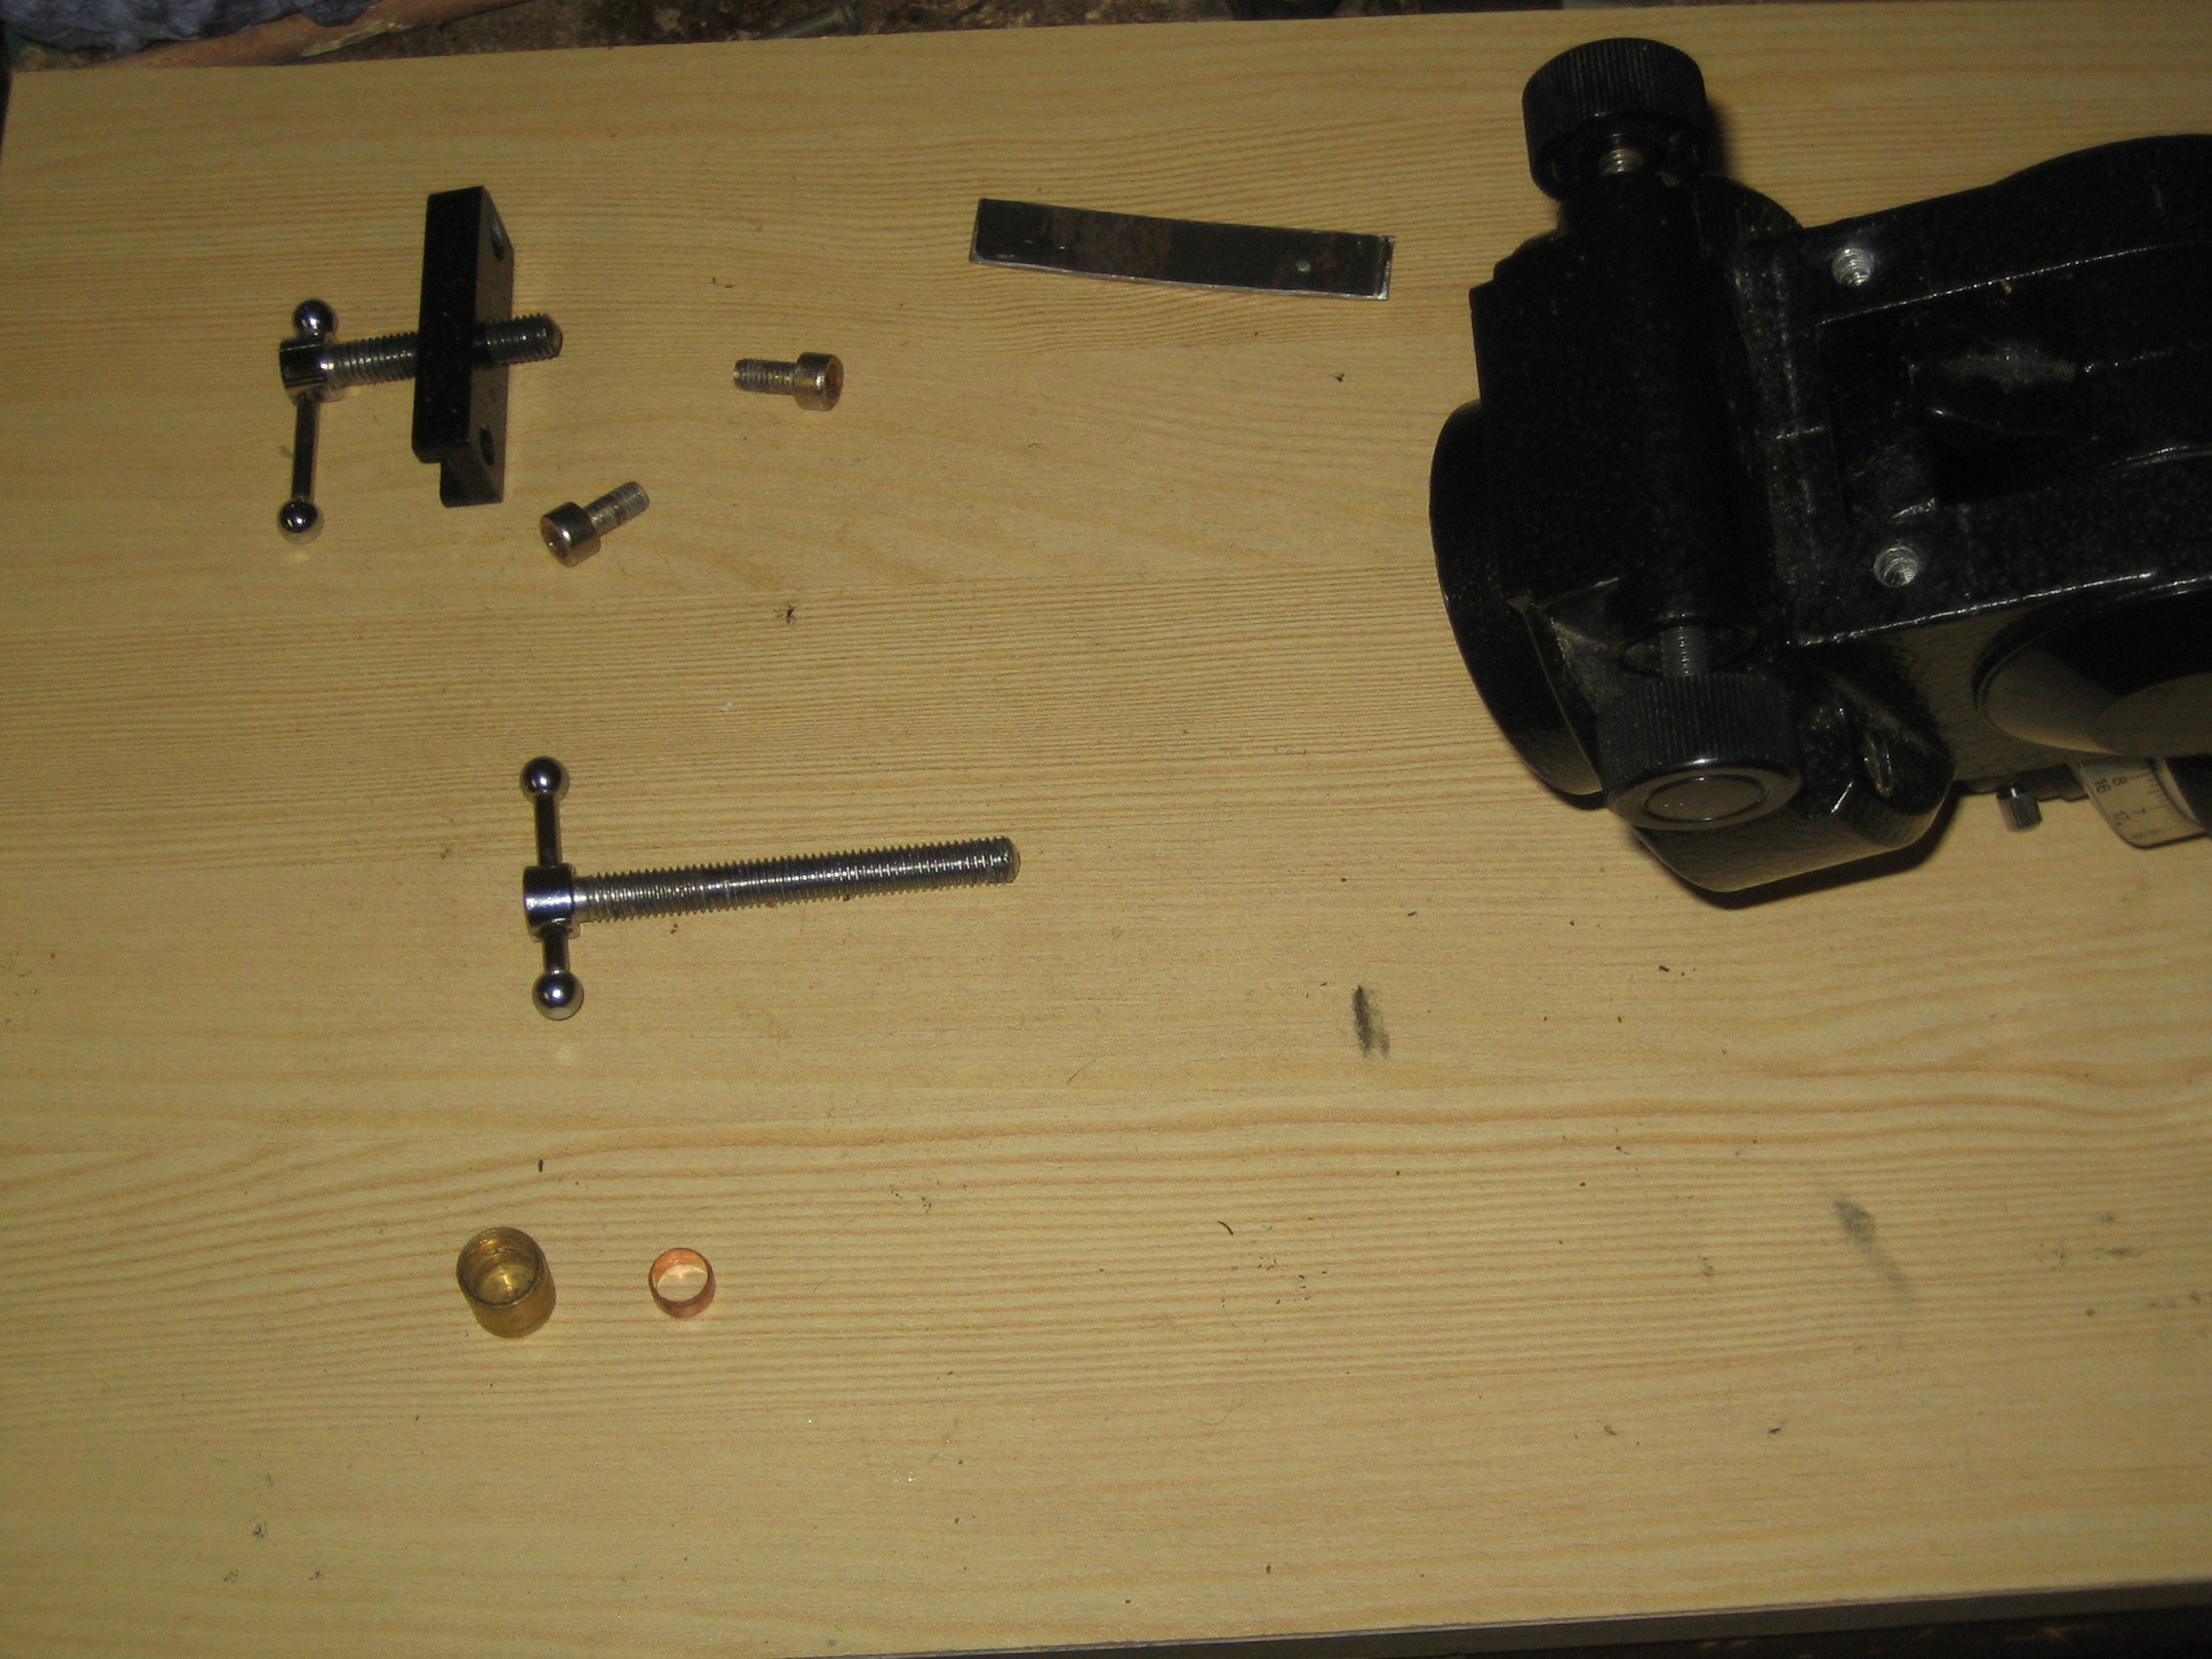
I’d already had the south bolt out to straighten it and not been at all happy with the way the bolt worked since. I know that some people have fixed an extra piece of stainless sheet over the cam with epoxy resin effectively making it harder and longer, but having gone to the trouble of cutting some suitable sheet up I decided that it that doesn’t seem like entirely the right solution. It struck me that what’s required is some sort of “tappet” that rides on the cam and is free to rock as it changes angle relative to the bolt, preventing the bolt being loaded sideways. In a box of plumbing bits I found a 10mm brass end cap and an 8mm olive that would fit inside it nicely. (You can see them in the bottom left of the photo.) The bolt fitted inside the olive with some room for the end cap to rock, though not much. I made obeisance to the Greek Goddess of Adhesives, Araldite, and used a little to fix the olive inside the end cap. I then fiddled the entire thing onto the end of south side bolt so it rests on the alt cam.

Whilst it’s an improvement, it’s not a big improvement and I’m not entirely happy with it. I’m now thinking that what’s probably required is a block with a dished centre to be fixed to the back of the came so the bolt always bears in roughly the same place and can’t slide down the cam as it moves further away. It’s more tricky to do, too. Of course what’s really required is for Skywatcher to redesign the mount for more northerly latitudes, but I can’t see that happening before Betelgeuse goes supernova.

Posted in Astro Equipment, Astronomy | Tagged | 4 Comments

EQ3-2 Mount Tune-Up (Part One)

Having read a posting on Stargazer’s Lounge about converting the EQ3-2 to direct(-ish) drive on the DEC axis, I thought I’d have a go myself. My EQ3-2 mount is one of the older models with a “Sky Scan 2001” logo and finished in something resembling Hammerite black.

The manufacturer of these mounts has a reputation for using something more akin to glue than grease for lubricating the gears and one of the first recommendations for improving any of them is to split the mount, clean the grease off and regrease with something that more closely resembles a lubricant. A little apprehensive as I’d never seen one taken apart before, I took the mount over to the workshop and made a start.

First job is to remove bar for the balance weights from the bottom of the mount and the cover for the top end of the polar scope. Through the hole you should just be able to see the bottom of a 17mm nyloc nut at the bottom end of the DEC spindle. That needs to be undone by turning the nut in the centre of the mount saddle (16mm, oddly).

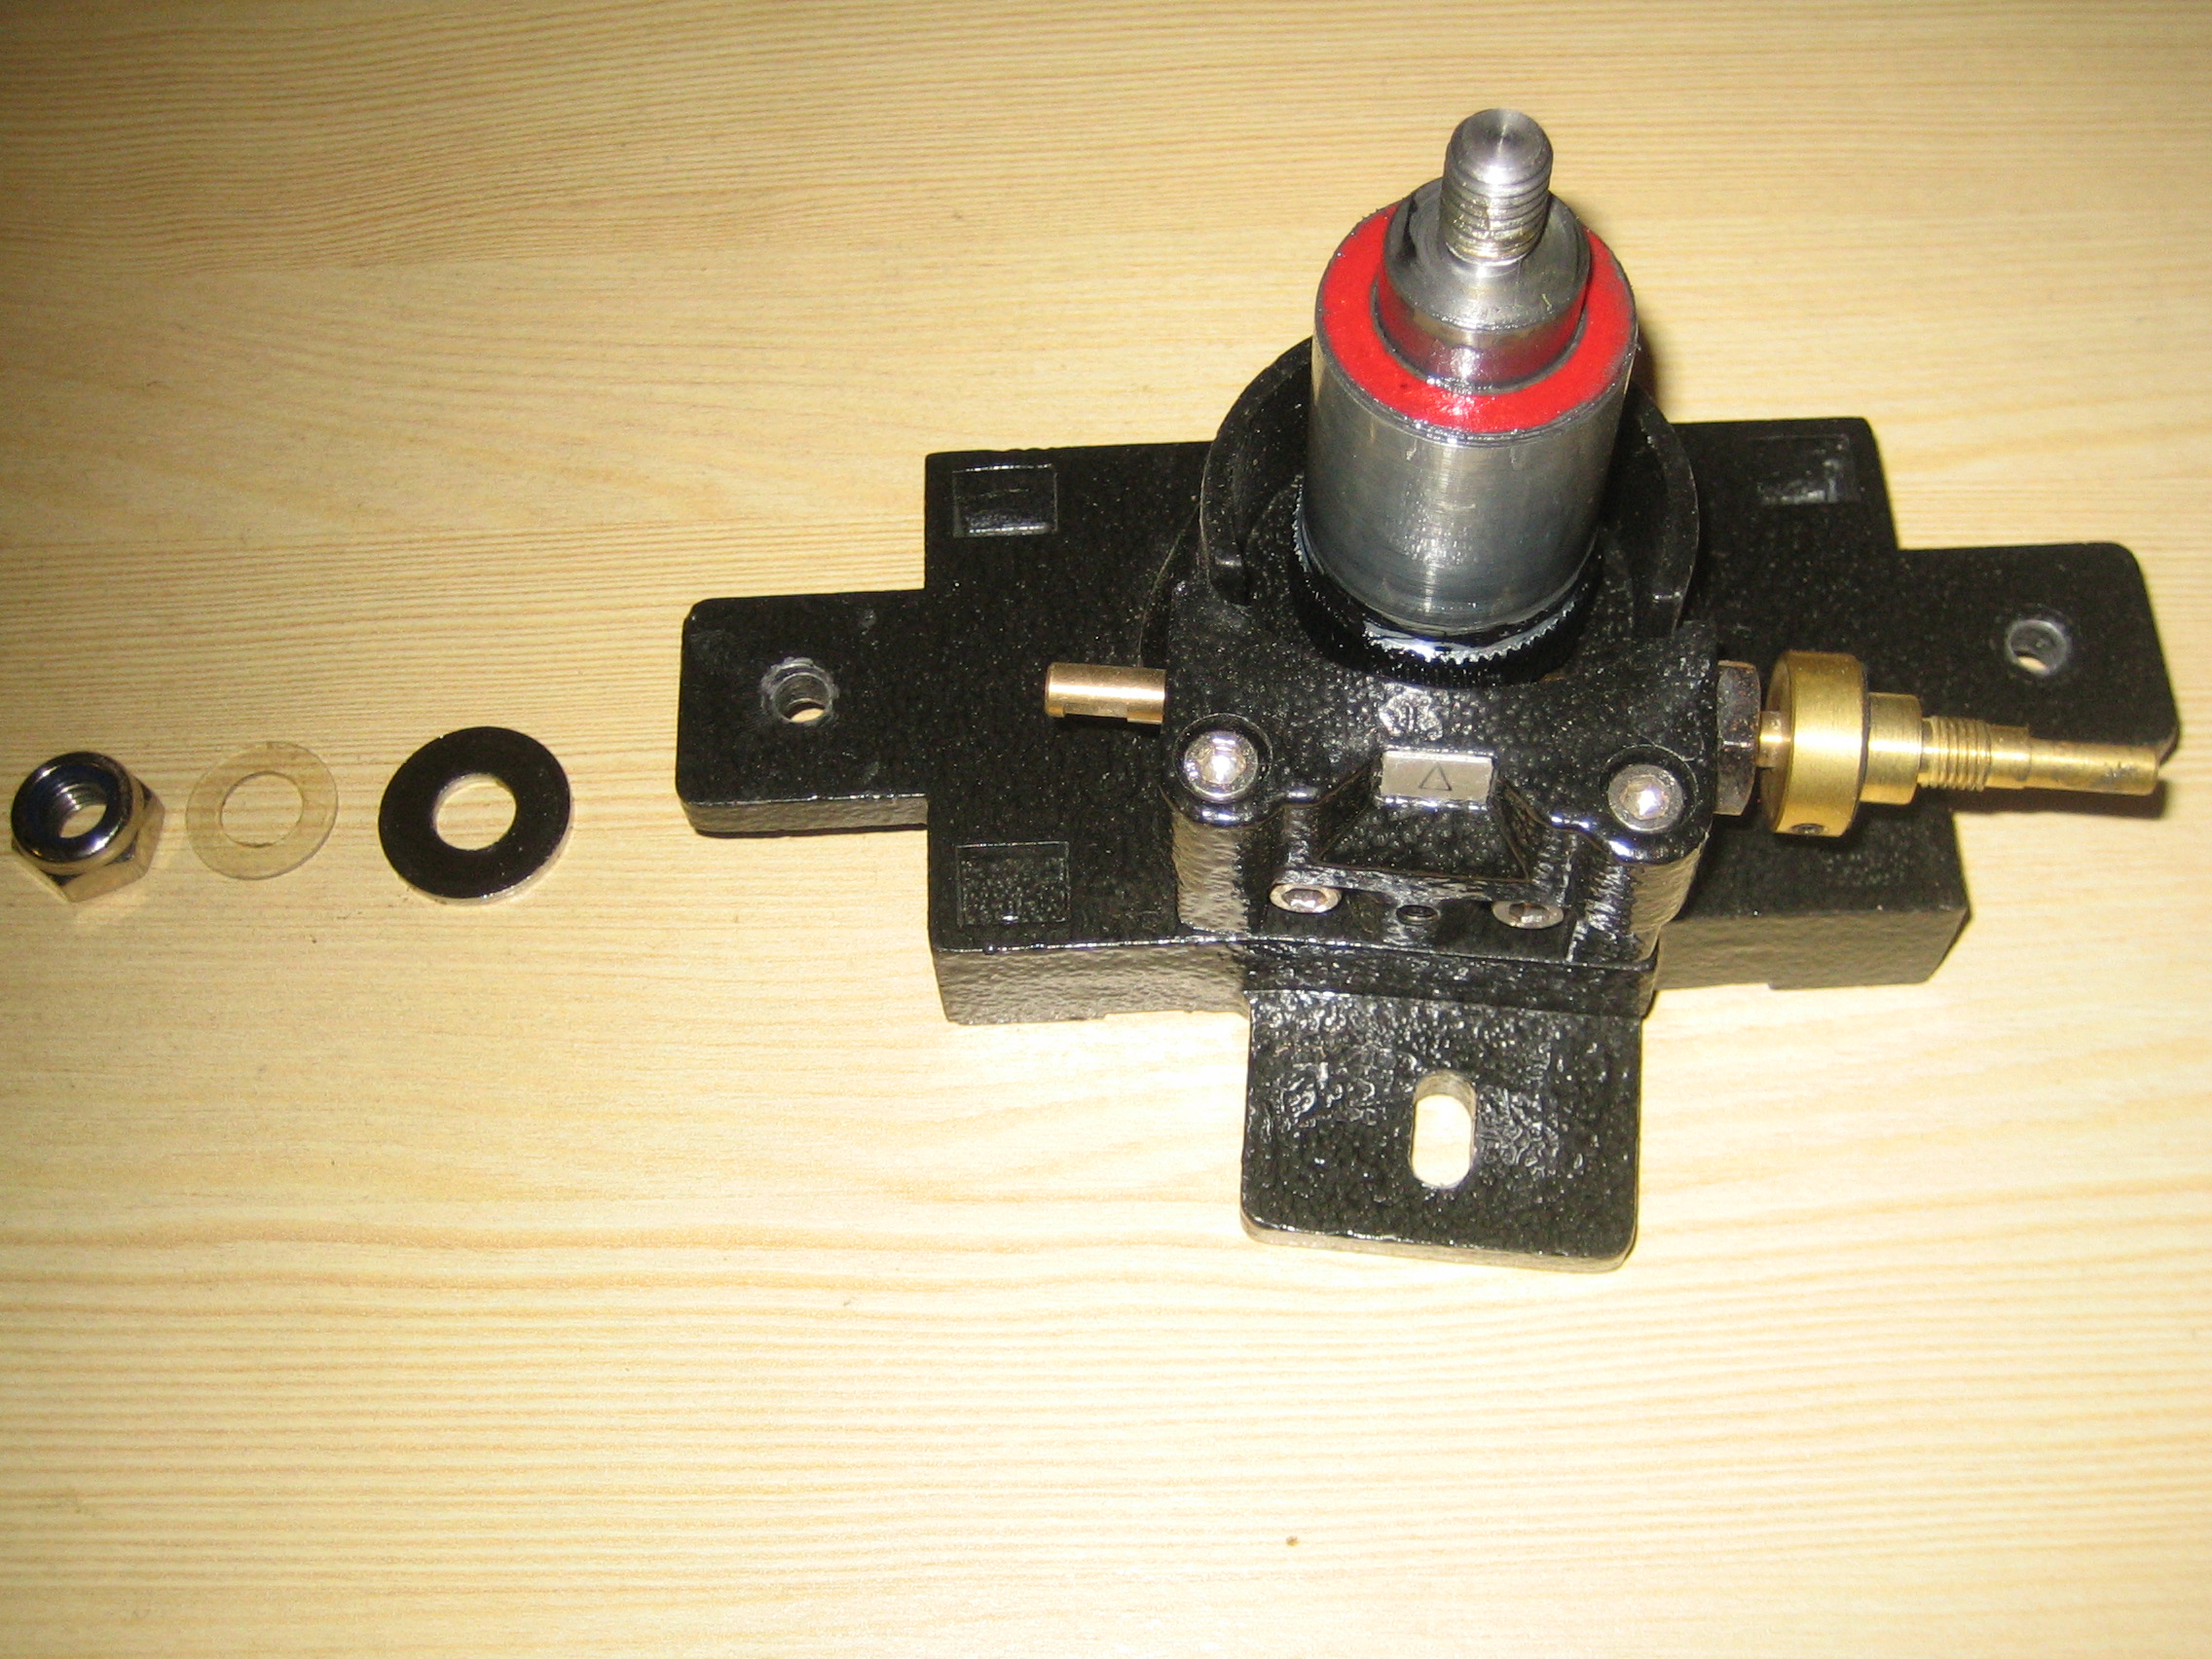
With the nut undone you need to fiddle it, the plastic washer and metal washer out of the inside of the mount. Having small fingers really helps here. Sadly I don’t. Then the entire saddle and DEC drive lifts off. Remember that for re-assembly the metal washer goes on first and the plastic washer goes between it and the nut. More on that later.

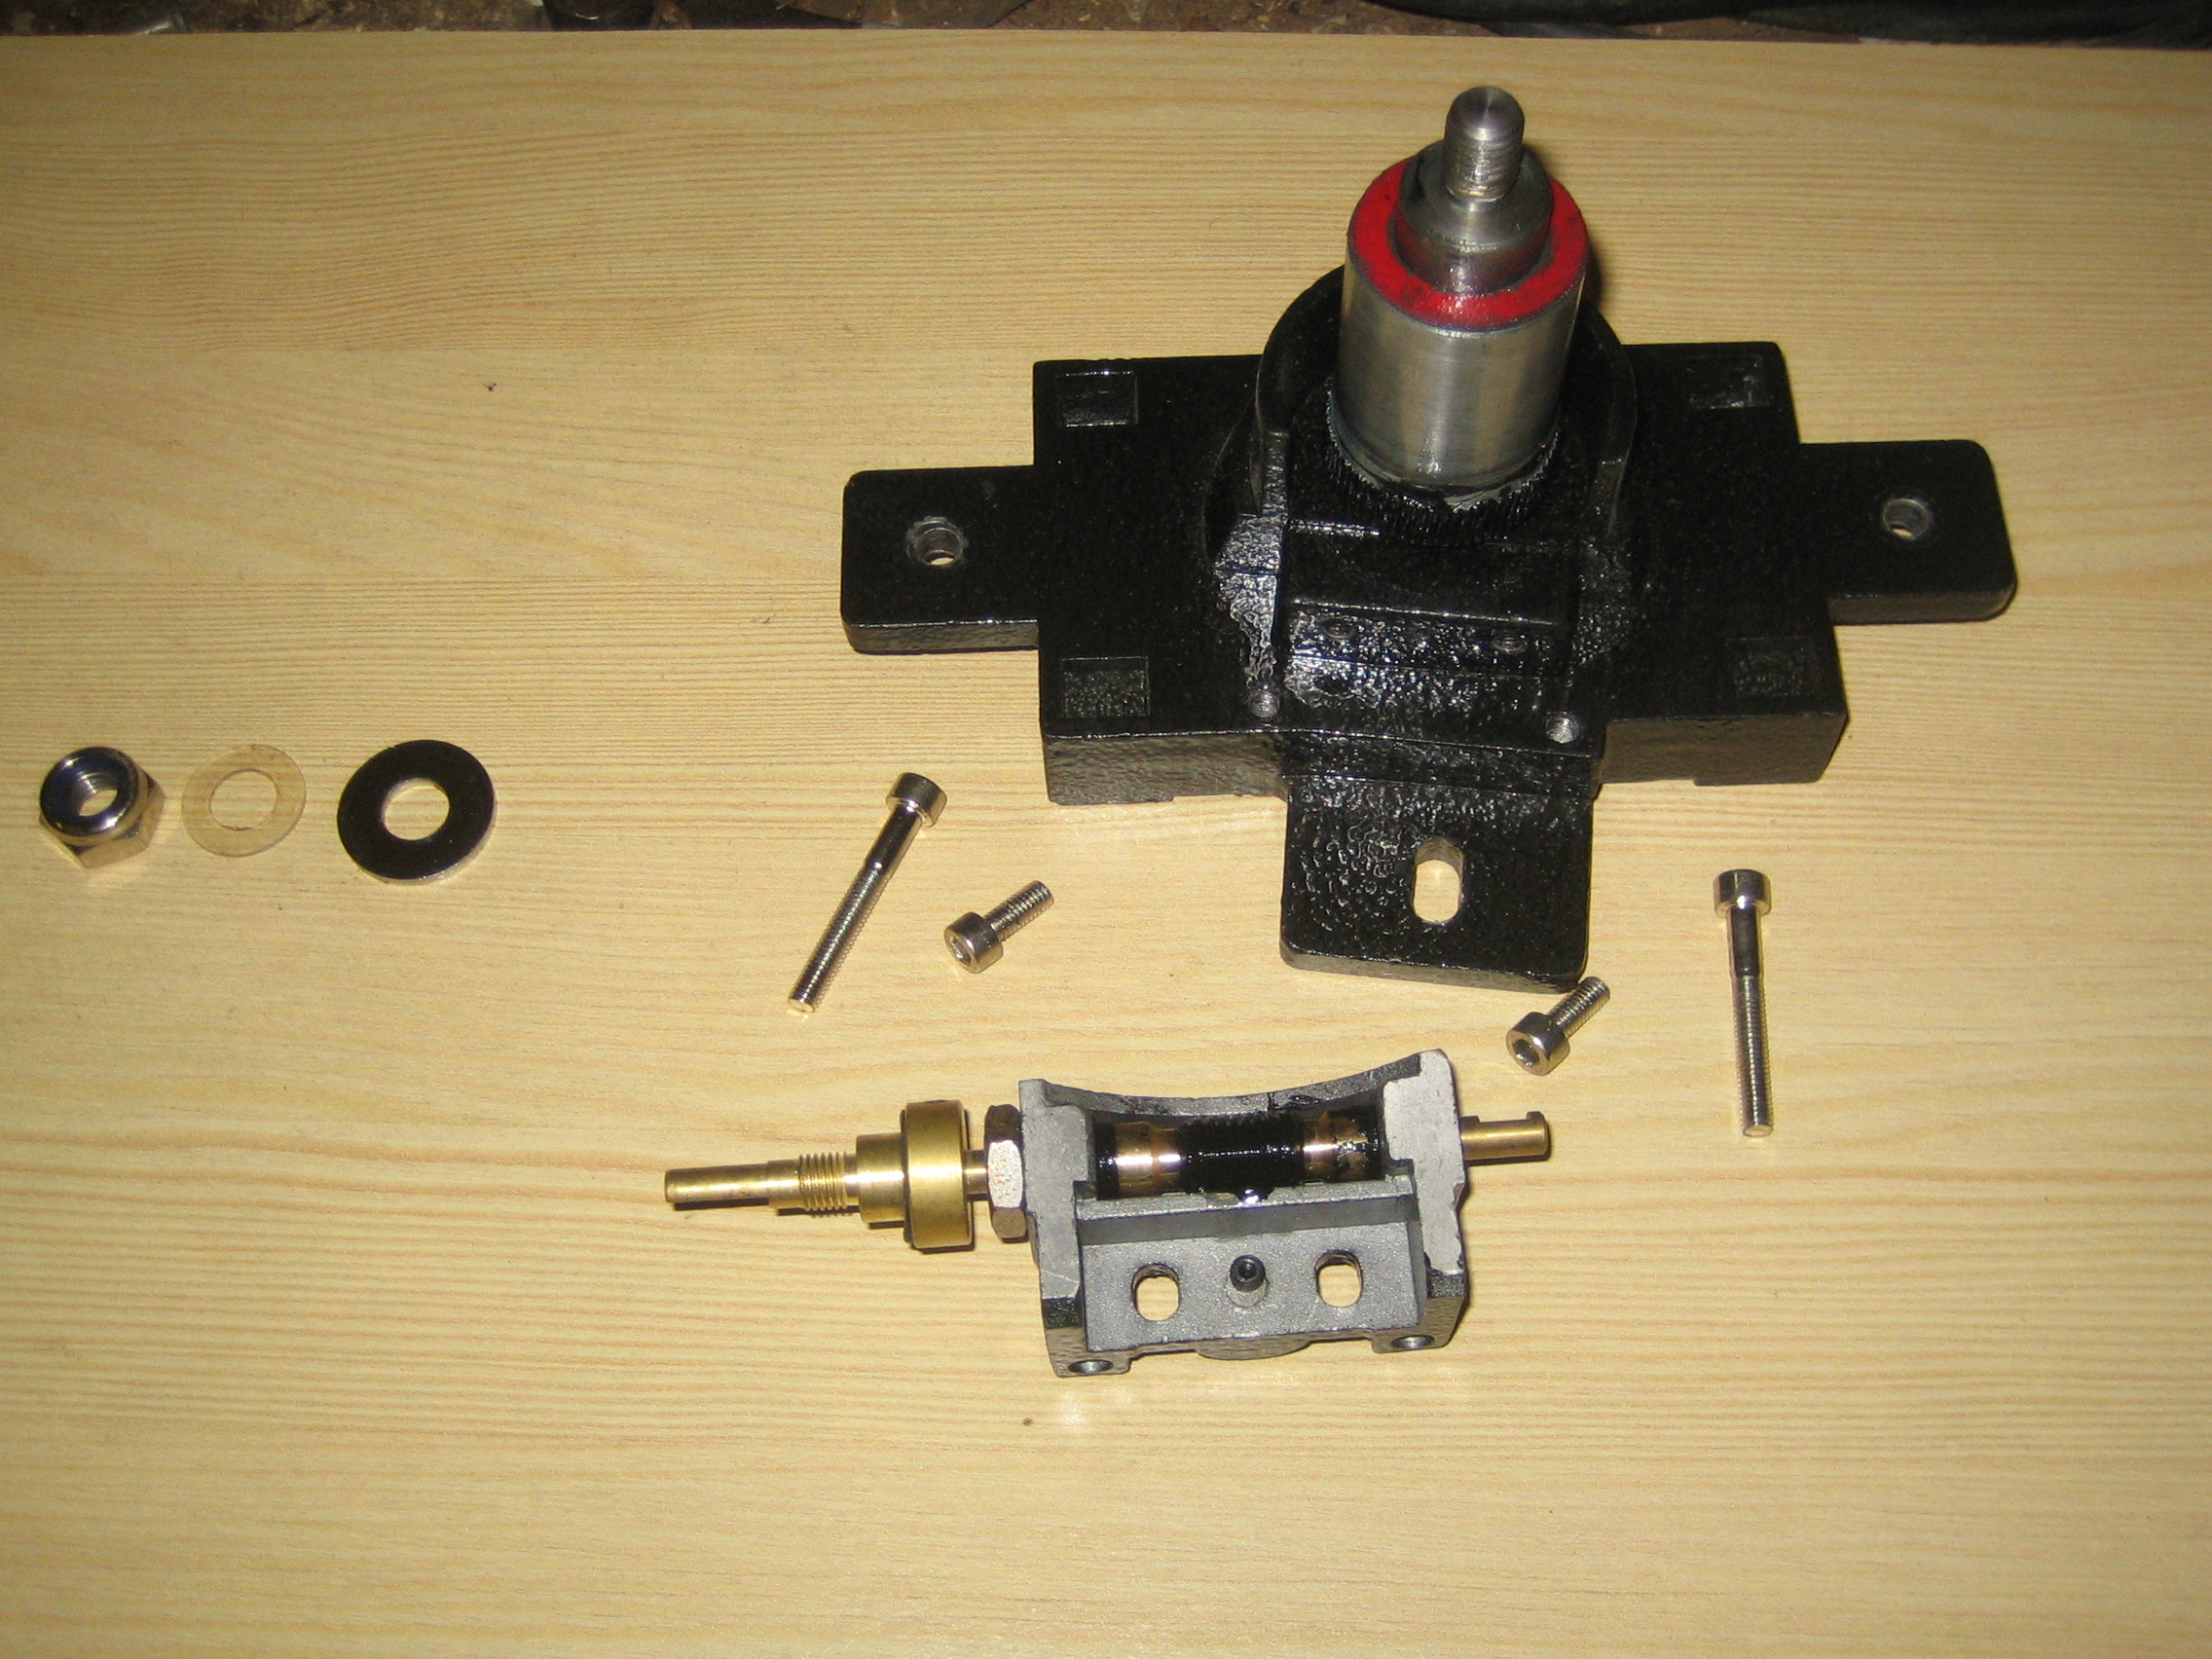
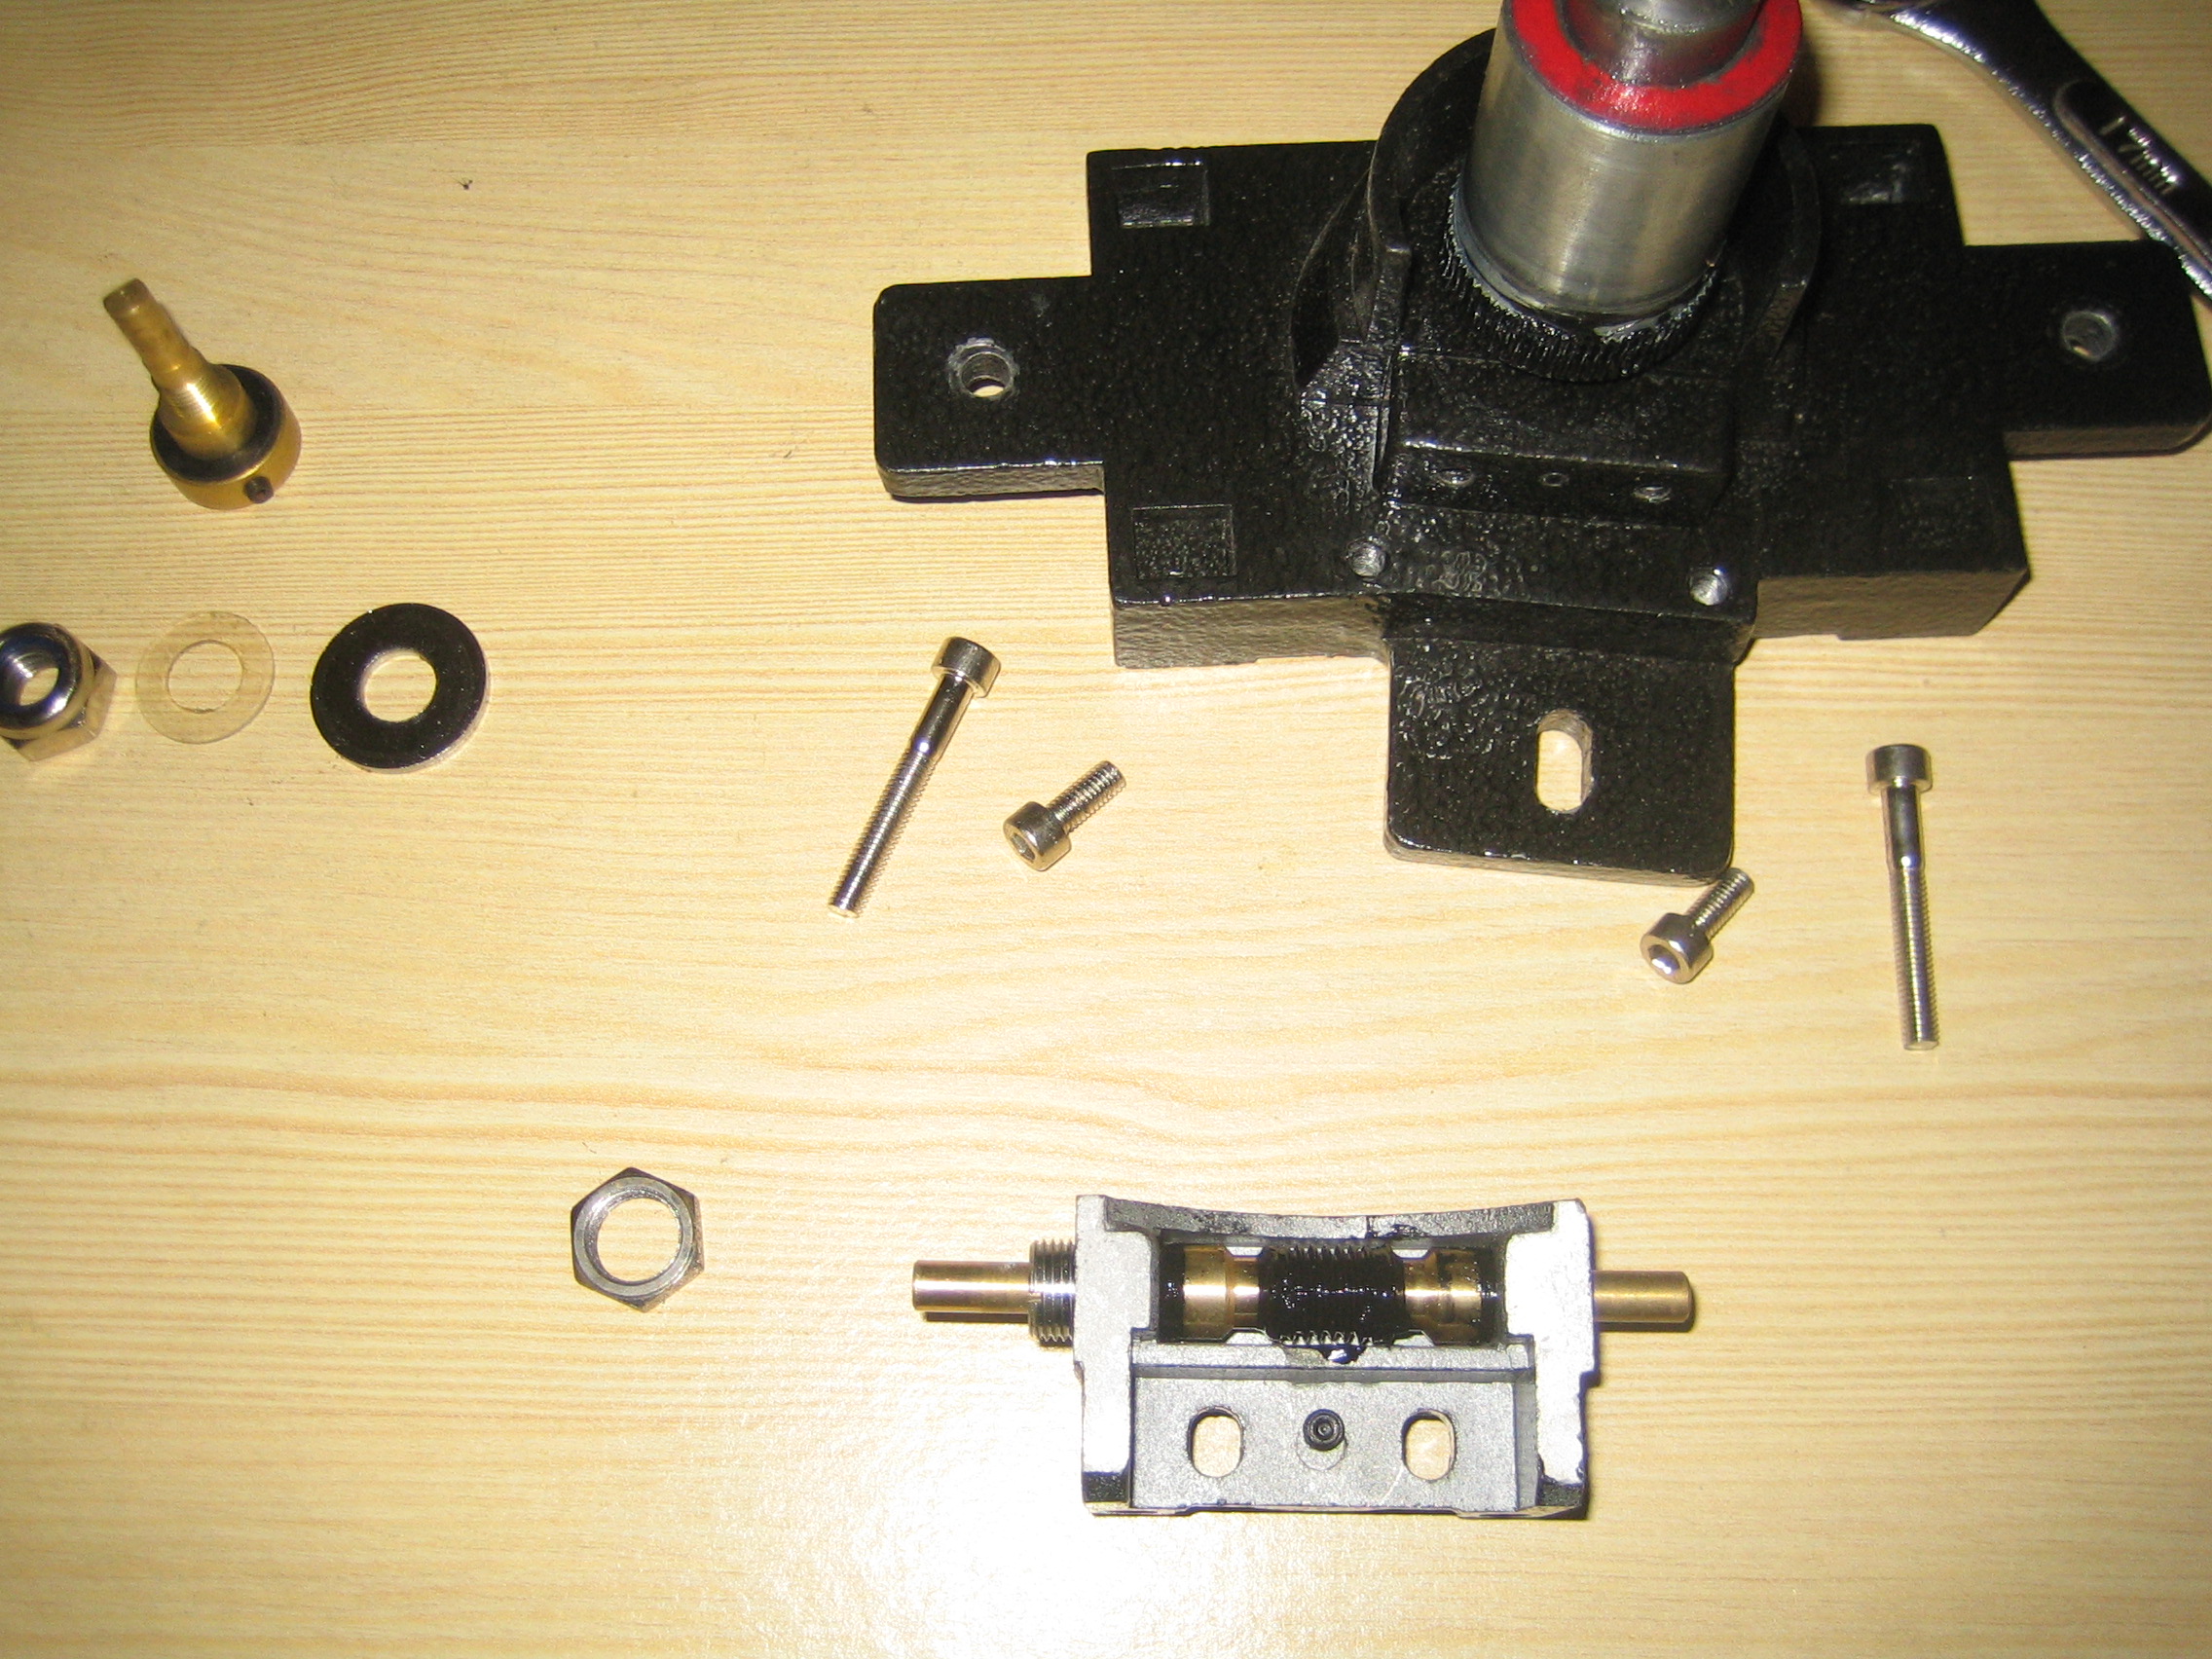
Next to come apart was the worm drive housing. This is held on by four allen bolts, two long ones that fit into the saddle from what is usually the bottom, and two short ones that fit horizontally (and have a grub screw between them for adjusting the tension between the DEC gear and the worm. With those out, the DEC housing just lifts off. You can see the full extent of the horrible black gunk used instead of a lubricant now.

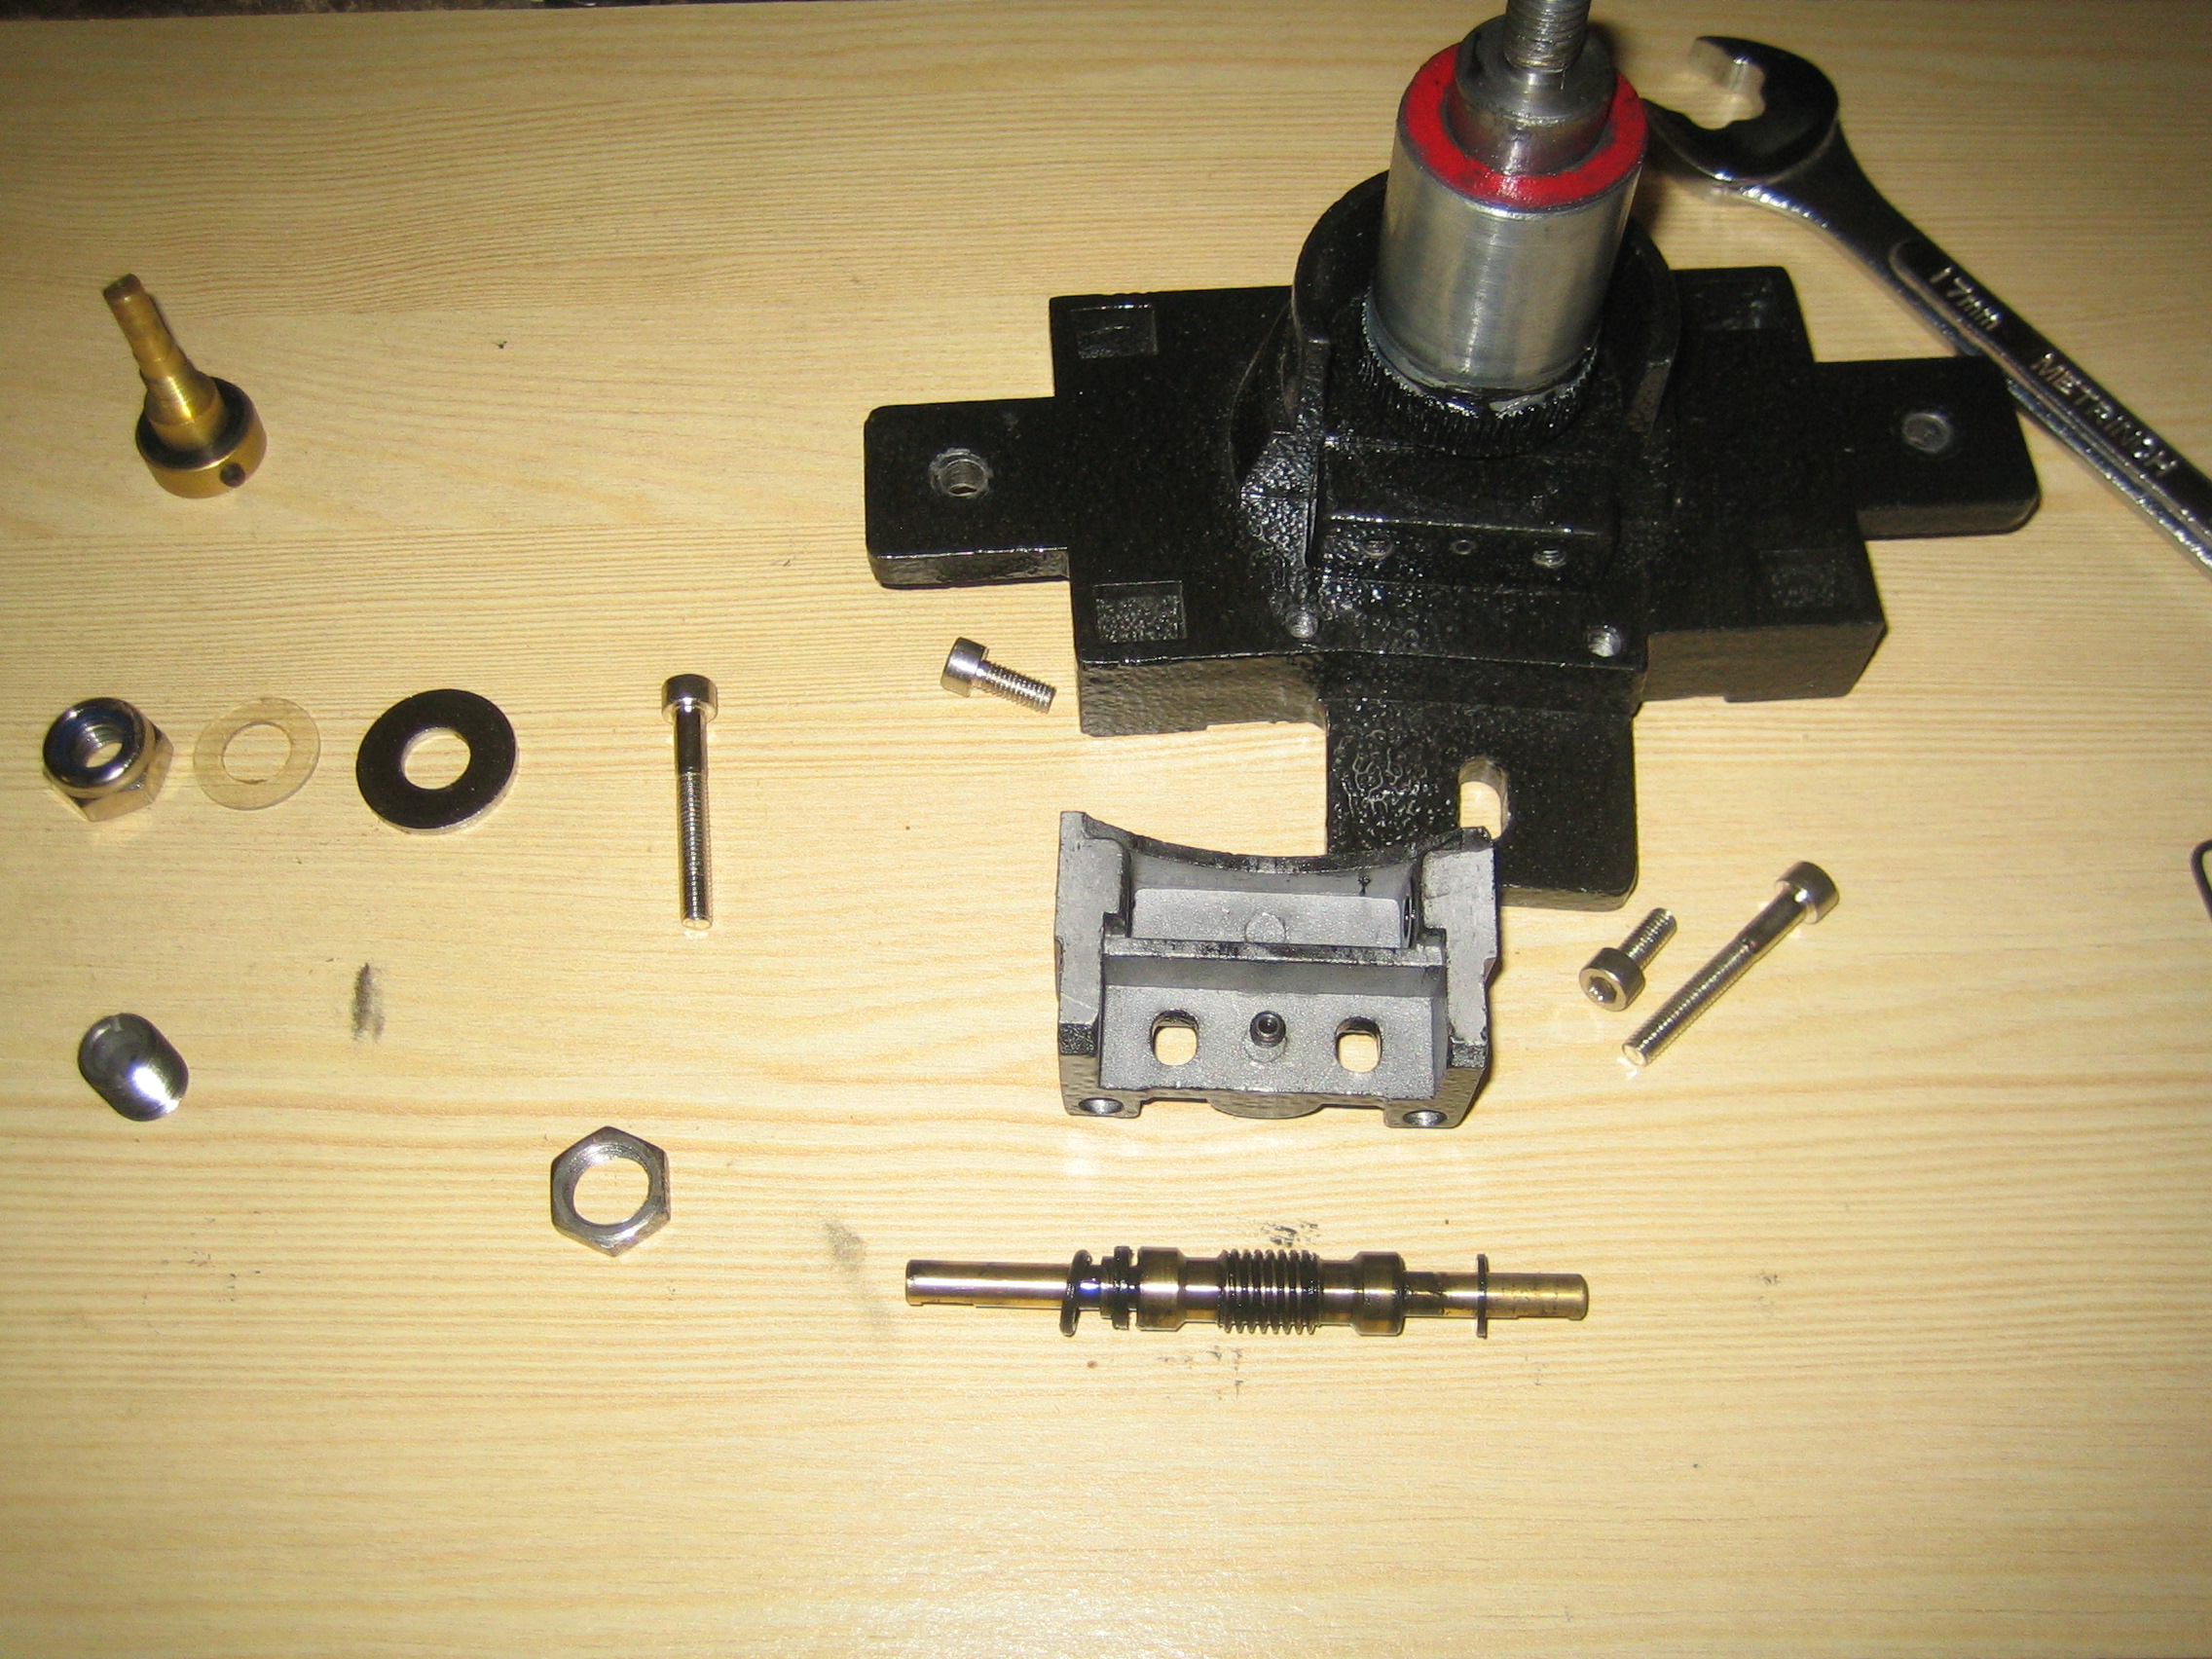
The worm drive will come out for cleaning properly. It’s held in at one end by a bush with an external thread. The bush screws into the worm gear housing and keeps the brass worm drive firmly located in the bush at the other end. The bush is locked in position with a lock nut that has to be undone first.

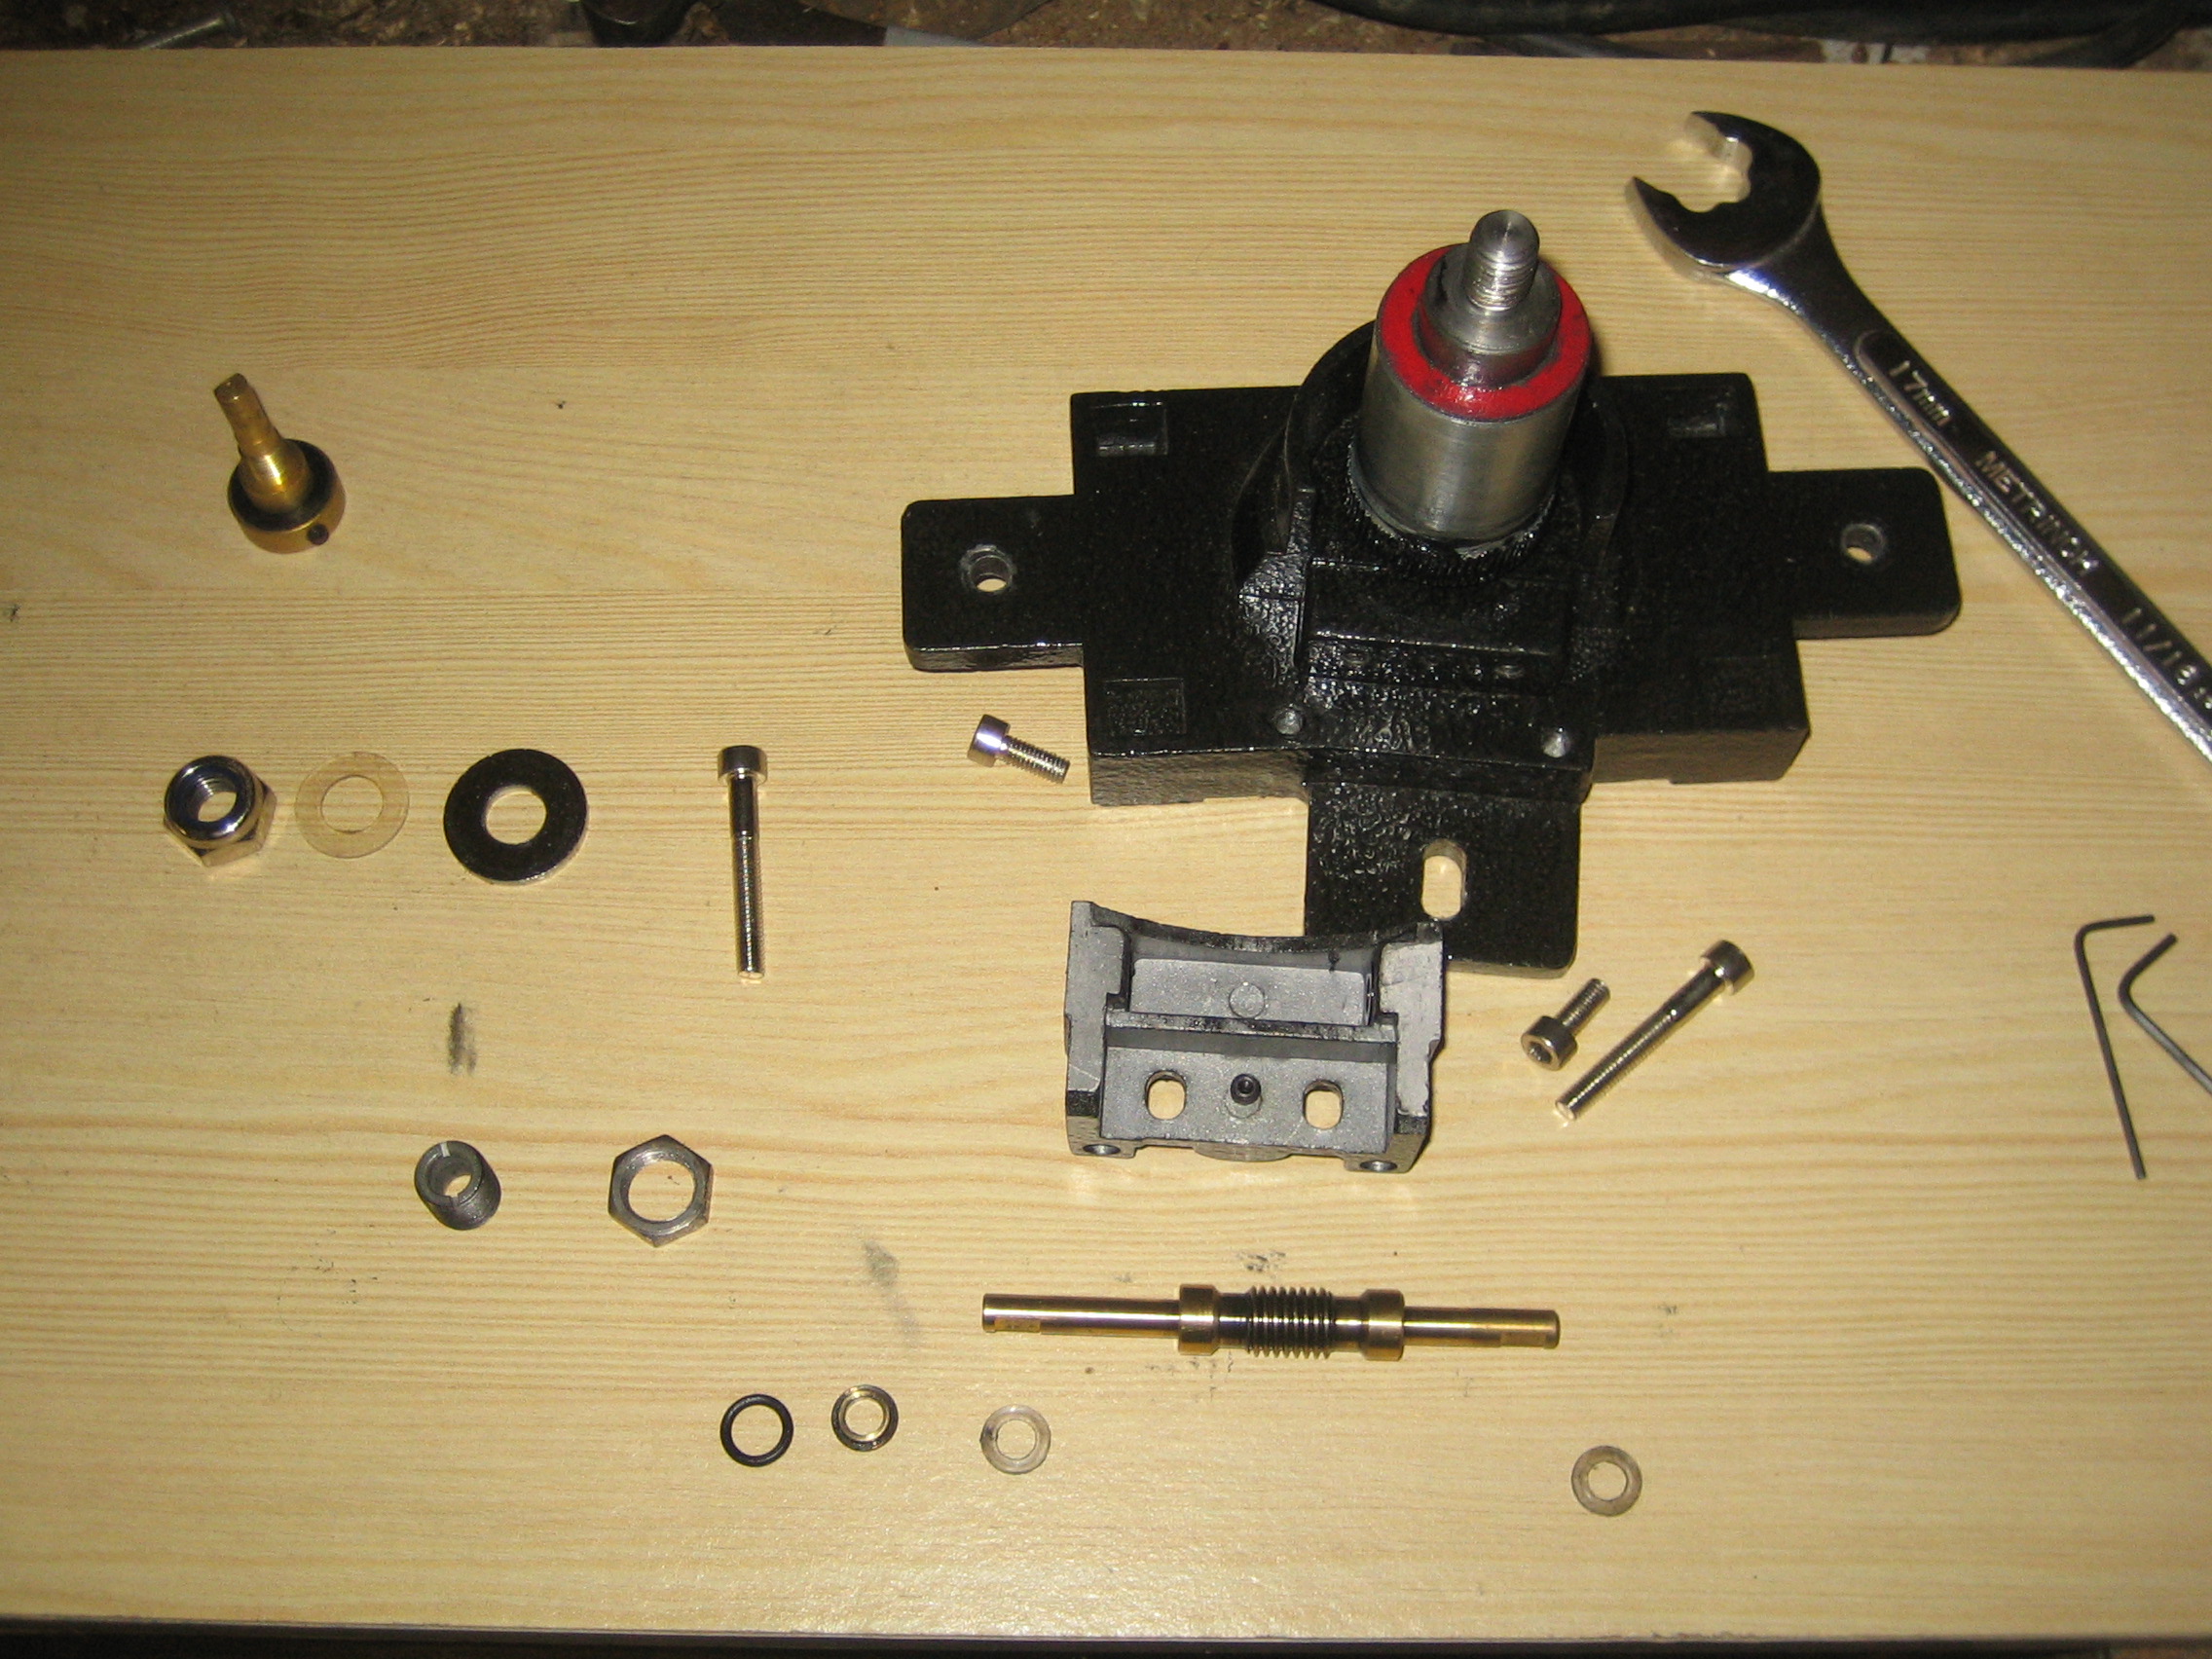
Once the lock nut is off it’s possible to remove the threaded bush. There are probably several ways to do this. The bush has a couple of slots cut into the top edge and I found a screwdriver that would fit one and turned it using that until it was loose enough to undo with my fingers. If you happened to have another nut that fits you could lock the two together at the end of the bush and use them to unscrew the bush. In theory it should then be possible to withdraw the brass worm gear, but I found I had to clean a lot of the black goop off before it would actually feed through the hole.

On the worm drive are a number of o-rings, washers and bushes that also need to be removed and cleaned. I thought the washers were black when I first took them off, but they’re actually clear plastic. Looking at this photo I’m sure there’s another bush that I’ve left in the housing at the right hand end. I’d not be surprised to find another o-ring behind it, either. I shan’t worry too much that I’ve missed those.

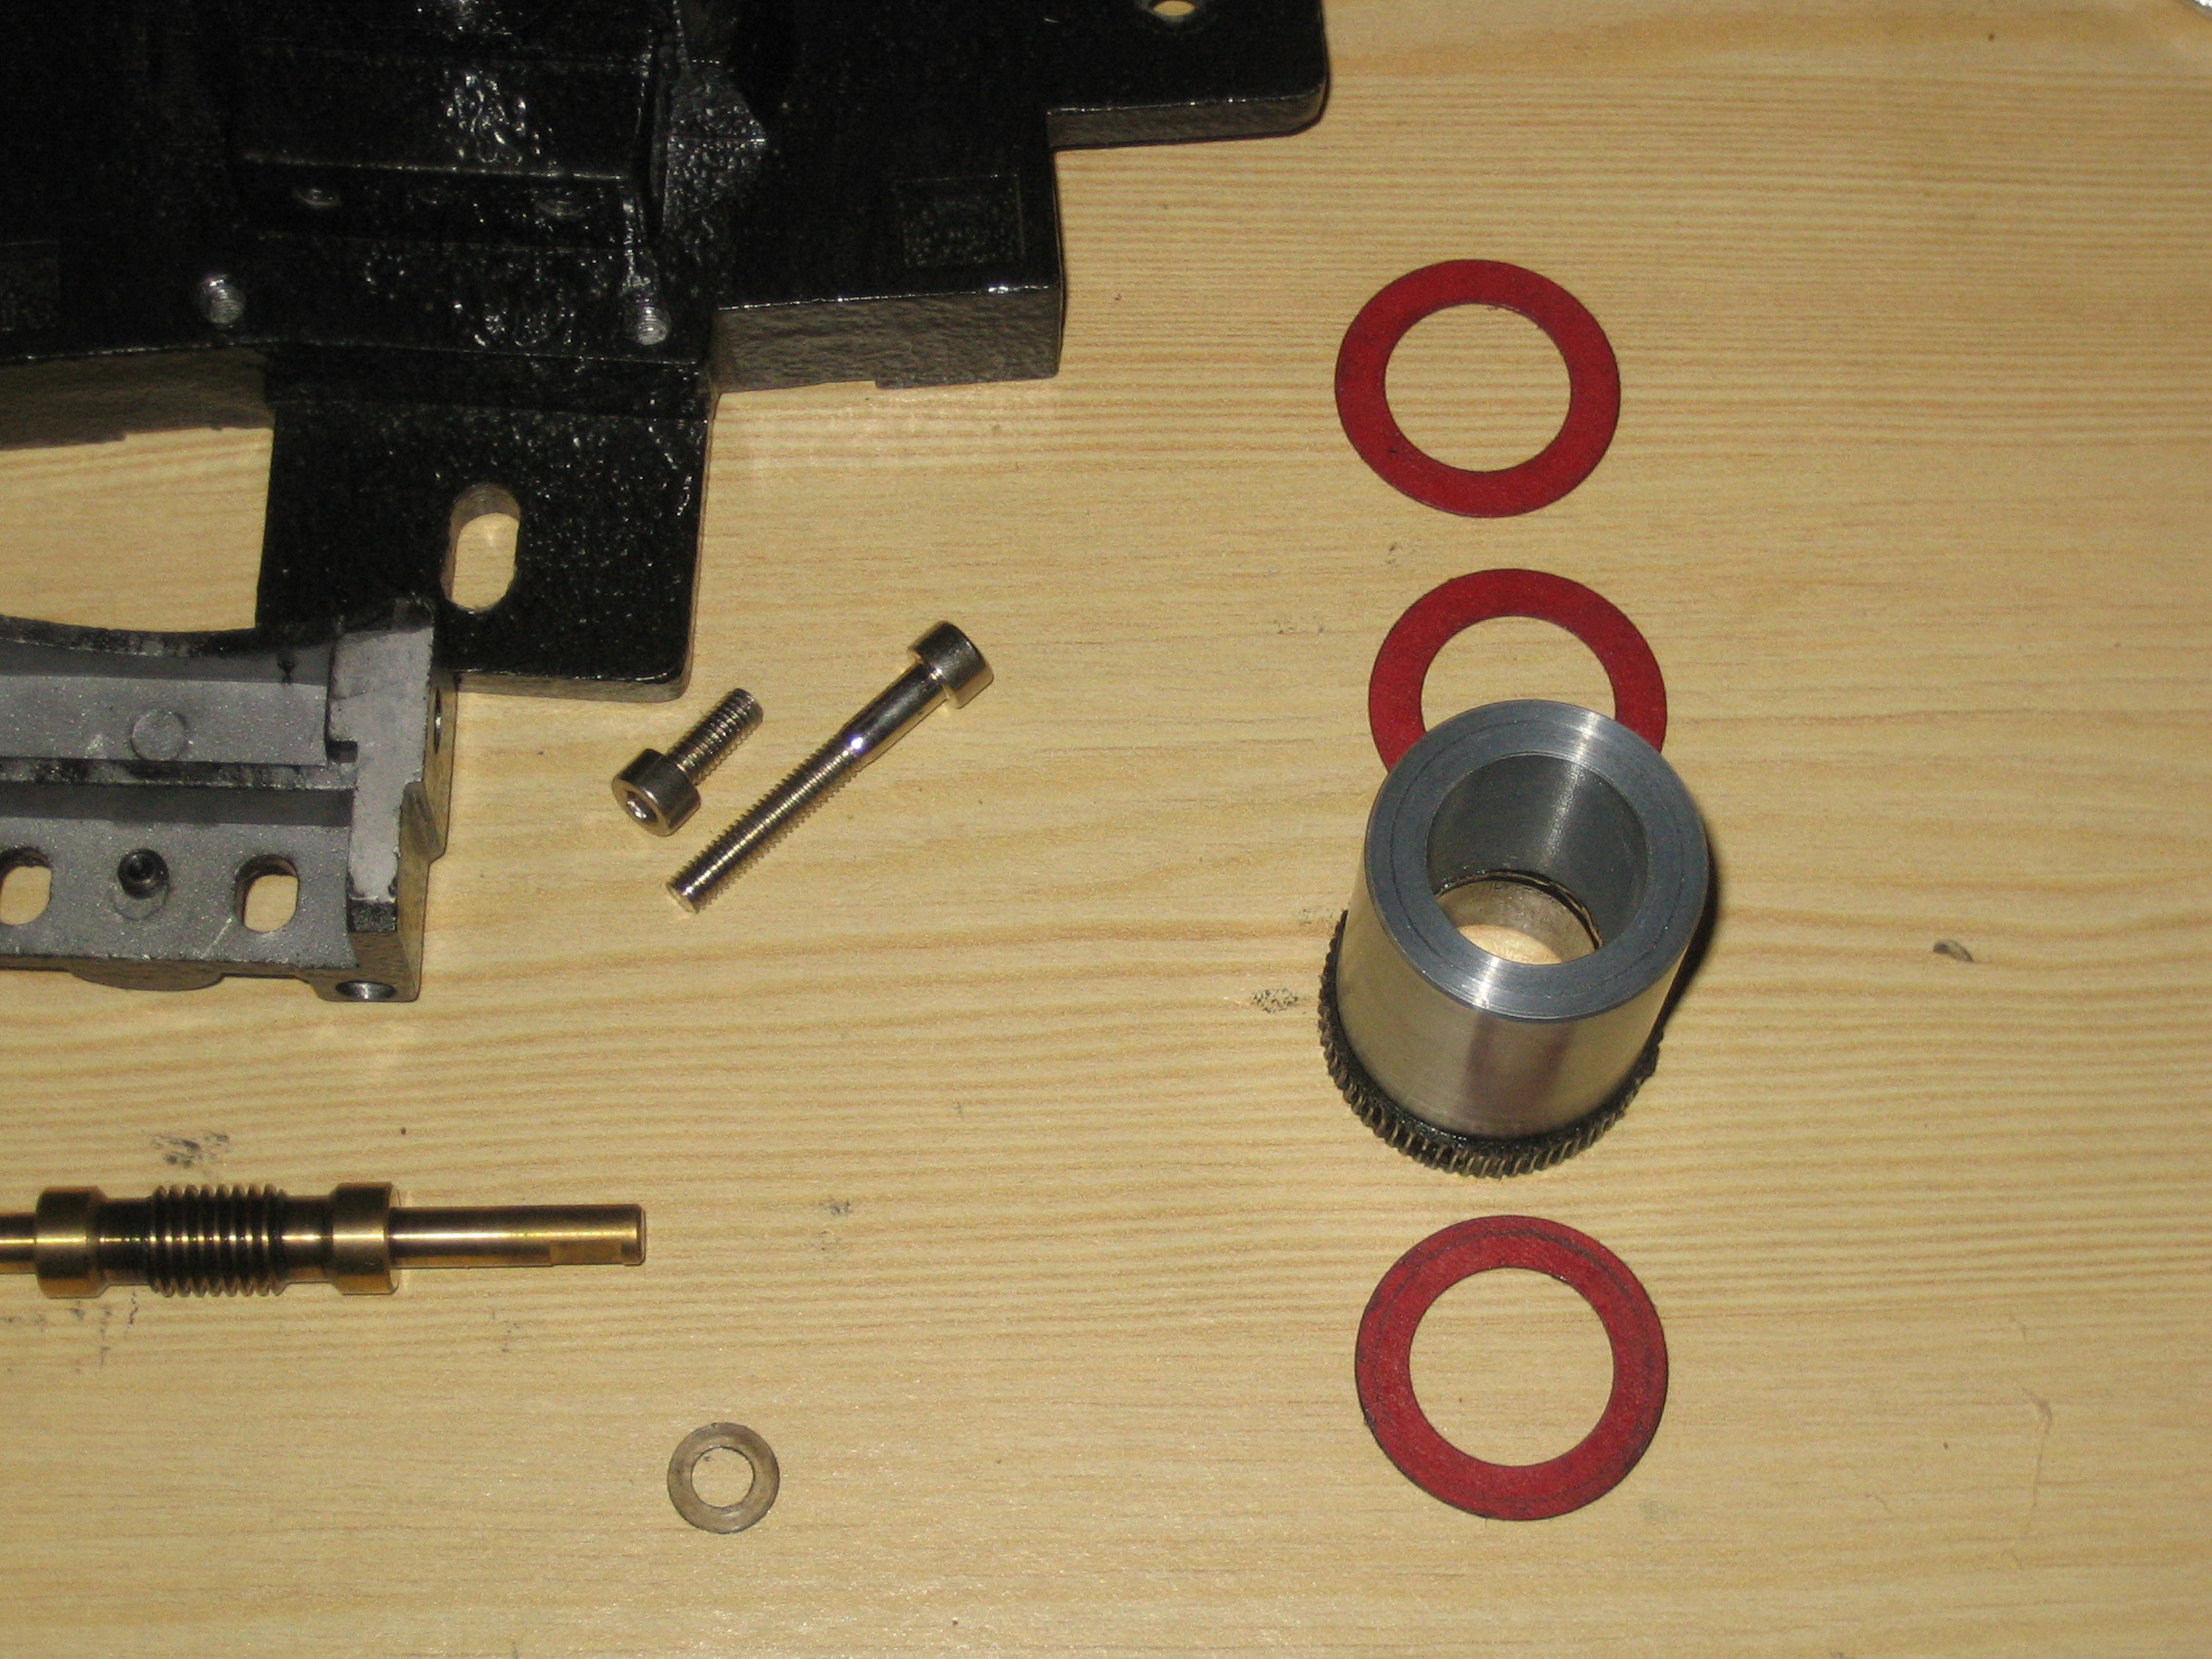
The final item to remove was the DEC bearing. This just lifts off. I found two red washers on the top (as it appears here, but the bottom in its normal orientation) and one at the other end. I then collected up all the icky black bits and took them off to clean them properly. I’m told that isopropyl alcohol or brake cleaner work well for this. Not much else seems to with the exception of towels, curtains, door handles and anything else you never wanted to get the stuff anywhere near.

Once cleaned up, reassembly is simply the reverse of disassembly, as it says in all the best workshop manuals, putting some decent grease onto the gears as you go. There really aren’t too many tricky bits though. The first is to get the worm drive retaining bush screwed in far enough so there is no lateral movement in the worm. It’s easier to get it roughly right and then get the housing mounted onto the saddle at which point it can be wiggled around to see if there’s any play. If you overdo it, the worm becomes hard to turn. The intention is to get everything to run as freely as possible whilst removing as much play as possible.

Next is getting the tension between the worm drive and the DEC axis gear correct. Once the housing is held in place with the long allen bolts, the short ones can be fitted. Try to get them so the housing first as square as possible. The game is to undo the grub screw and take up the slack squarely with the allen bolts without making the worm bind against the DEC gearing. Very small changes can make a big difference here. I found that an eighth of a turn on the allen bolts could make the difference between turning freely and binding.

Finally, putting the washers and nyloc nut back on the end of the DEC axis through the polar scope cut-out. If you have small fingers it might be easy. I found it simpler to turn the mount upside down meaning that the washers could be dropped over the threads and the nut held in place with pliers until the threads were engaged, avoiding dropping them all down inside the polar scope “tunnel”.

Posted in Astro Equipment, Astronomy | Tagged | Leave a comment

Observation Report, 27 Jan 2012

Something of a shock, being about to get out with a telescope three nights out of five, but given a decent forecast my intention was to go out and find M32 and M110, the two galaxies close to the Andromeda Galaxy. I’ve never been able to find them before despite them looking very obvious in Stellarium.

As luck would have it, that part of the Andromeda constellation was quite close to the zenith and I ended up standing the ST120 tripod on a table to allow the scope to tilt almost vertically whilst allowing me to get close enough to get to the eyepiece. I spent some time looking at the main galaxy itself, trying to spot M32 in its outer reaches before it dawned on me that in such a small scope I might only actually be able to see the main galaxy core and that both M32 and M110 would therefore be much further out than I was looking. Sure enough M32 was then easy to pick out as a small fuzzy blob and star-hopping got me to M110 which was difficult to distinguish from a single star even at fairly high magnification.

Whilst in the area I thought I’d look for the Triangulum Galaxy, about the same distance the other side of the main “spine” of Andromeda; another on my “yet to see” list. Finding it by position alone proved beyond me, so I star-hopped from the bottom star of the Triangulum constellation, Mothallah. There’s a set of stars leading down to a single brighter star labelled in Stellarium as HIP7906 which is just over half way to M33 from Mothallah. On this night at least, this galaxy appeared very small and faint and was barely visible with direct vision.

Moving to the north I found Merak in Ursa Major and then star-hopped down a chain of stars to M108 which was only just discernable as an elongated blur and beyond that M97, the Owl Nebula which was very difficult to make out, but clearly forms one corner of a box with a set of three stars between about 6.5 and 8.5 in magnitude. Averted vision was possibly the easiest way to actually see that anything was present at all.

Final target of the evening was M109. Dropping down to Phad at the bottom of the Plough I star-hopped down to a triangle of 8.5 to 9 magnitude stars surrounding the galaxy, but it was just as hard as M97. Eventually I finally saw it, but only with averted vision.

These six have left me with very few Messier objects left to find in the winter sky (M61, M74, M77, M79 and M104) so I might start returning to some of those I found first now I’m finding it easier to recognise what I’m seeing.

Posted in Astronomy | Tagged , | Leave a comment

Observation Report, 26 Jan 2012

It’s been some time since I’ve been out with the ST120 so with a forecast for clear skies last night I decided to have a change and moved it outside to cool down. Unfortunately the weather didn’t live up to its billing and whilst there were regular patches of clear sky there were also regular drifts of cloud. I was keen not to write the evening off entirely however. Top of my list of targets — mainly Messier objects I’d not managed to find last winter — was M50. That seemed like the best choice to try as I planned to find it by a short star-hop up from Sirius.

I used the RDF to locate Sirius and then with a 32mm eyepiece hopped north to find a small triangle of stars including 11 CMa. A little further north and east took me to Theta CMa whose intense red colour was obvious compared to the stars around it. North of Theta CMa is another triangle of stars of about 6.5 magnitude. That triangle points north, just to the west of M50 which came into view as I moved the scope in that direction.

I have to admit that in 32mm and 25mm eyepieces M50 didn’t look exactly overwhelming and even at 60x magnification with a 10mm eyepiece it was indistinct and the stars wouldn’t resolve clearly as a result of the cloud. There was a definite “fuzz” around the brighter stars where others would had been visible had the sky been more clear. Now I’ve found it I think this will be one to revisit when the seeing is better.

Virgo was near fully-risen at this point and my next target was M61, but even Mars (currently in Virgo) wasn’t visible because of the cloud so happy with finding my 70th Messier object I decided to call it a night there. Clear skies are still forecast for the small hours of the morning of the 28th so I’ll see if I can do better then.

Posted in Astronomy | Tagged , | Leave a comment

Observation Report, 23 Jan 2012

Clear skies were forecast today, so I got the Mak 127 out early in the afternoon so it would be cool as soon as I wanted to use it. Then the clouds rolled in and it started to rain. I was certain another night’s viewing would be written off because of poor seeing in the moist air.

Sometimes it’s pleasant to be wrong. By 10pm the clouds had cleared nicely and whilst there was a certain amount of haziness around the horizon, the sky generally was clear, bright and steady. Just as well, as I wanted to try out my new illuminated reticle eyepiece as well as counting the stars in Orion for the CPRE Star Count.

To centre a planet in the webcam image my usual method thus far has been to start with a 32mm or 25mm eyepiece and centre the image then keep stepping down the focal lengths to around 6mm, then add a barlow, and finally swap to the webcam, swapping back and forth with an eyepiece if it didn’t immediately show up on-screen. Plunging straight in, I lined up Mars with the RDF, centred it in the new eyepiece, added the barlow and re-centered and then switched to the webcam. The image of Mars was immediately visible in the capture program and needed nothing more than a little refocusing. I was most happy with this improvement and set about capturing some images.

That done I spent a bit of time just re-familiarising myself with the winter skies. There have been precious few opportunities to get out under good skies in the last six months, so I’m a bit rusty. Six stars were easily visible in the Pleiades, perhaps seven at a push, and the Beehive Cluster was quite clear for direct viewing with the naked eye, so I broke out the binoculars and took a closer look.

As soon as I put the eyecups up to my eyes a large fuzzy blob leapt out of the sky, causing me a few moments confusion. It didn’t look like I remembered M44 at all. It took a few moments to dawn on me that it was M67 I was looking at and a quick slide northwards revealed the Beehive in all its glory. Swinging back to Orion I had to have a look at the nebula. Not a huge amount of detail visible with the binoculars, but the extent of the gas cloud was vibrantly clear and impressive.

Three of the first few Messier objects I saw through a telescope were M36, M37 and M38 in Auriga. I clearly remember spending a couple of nights working out how to find them, probably with the ST80. Auriga was right in front of me now, so I scooted across to the southern end and hopped up to the first one following a “bent tuning fork” asterism. Within five seconds I’d located all three with ease. Having collected almost half “the set” now, it’s surprising how much easier it is to recognise a grey fuzzy blob when you see one…

Remembering that I also wanted to count the stars in Orion I ran through the constellation a few times picking them out. The “rules” are to count as many stars as possible visible with the naked eye within the rectangle formed by Betelgeuse, Bellatrix, Rigel and Saiph. The “belt” stars count, but the four corners don’t. After a couple of recounts I decided that twenty-five was a fair result. I could possibly pick out a couple more with averted vision, but I couldn’t be sure.

By this time it was gone 1am and the sky was starting to become quite hazy so I happily decided to call it a night. More clear skies are forecast for the tail end of the week. Hopefully I can get some footage of Venus and Jupiter, and perhaps go hunting a few binary stars.

Posted in Astronomy | Tagged , | Leave a comment

A (Relatively) Cheap Illuminated Reticle Eyepiece

When imaging with the 127 Mak and SPC900, getting the target somewhere the webcam will pick it up is one of the most awkward things to do. It’s made more tricky by the fact that if the scope is sufficiently far from focus then there won’t be a discernable image on the webcam to start with.

My previous solution to this problem has been to start with a 32mm eyepiece, centre the target and then run up through a range of eyepieces (25mm, 15mm, 9mm, 6mm) checking that the object is still in the centre and realigning as necessary before dropping the webcam in. At that point I turn the gain and brightness full up in the capture program and hopefully I can see something resembling a fuzzy blob on the screen that allows me to adjust the focus.

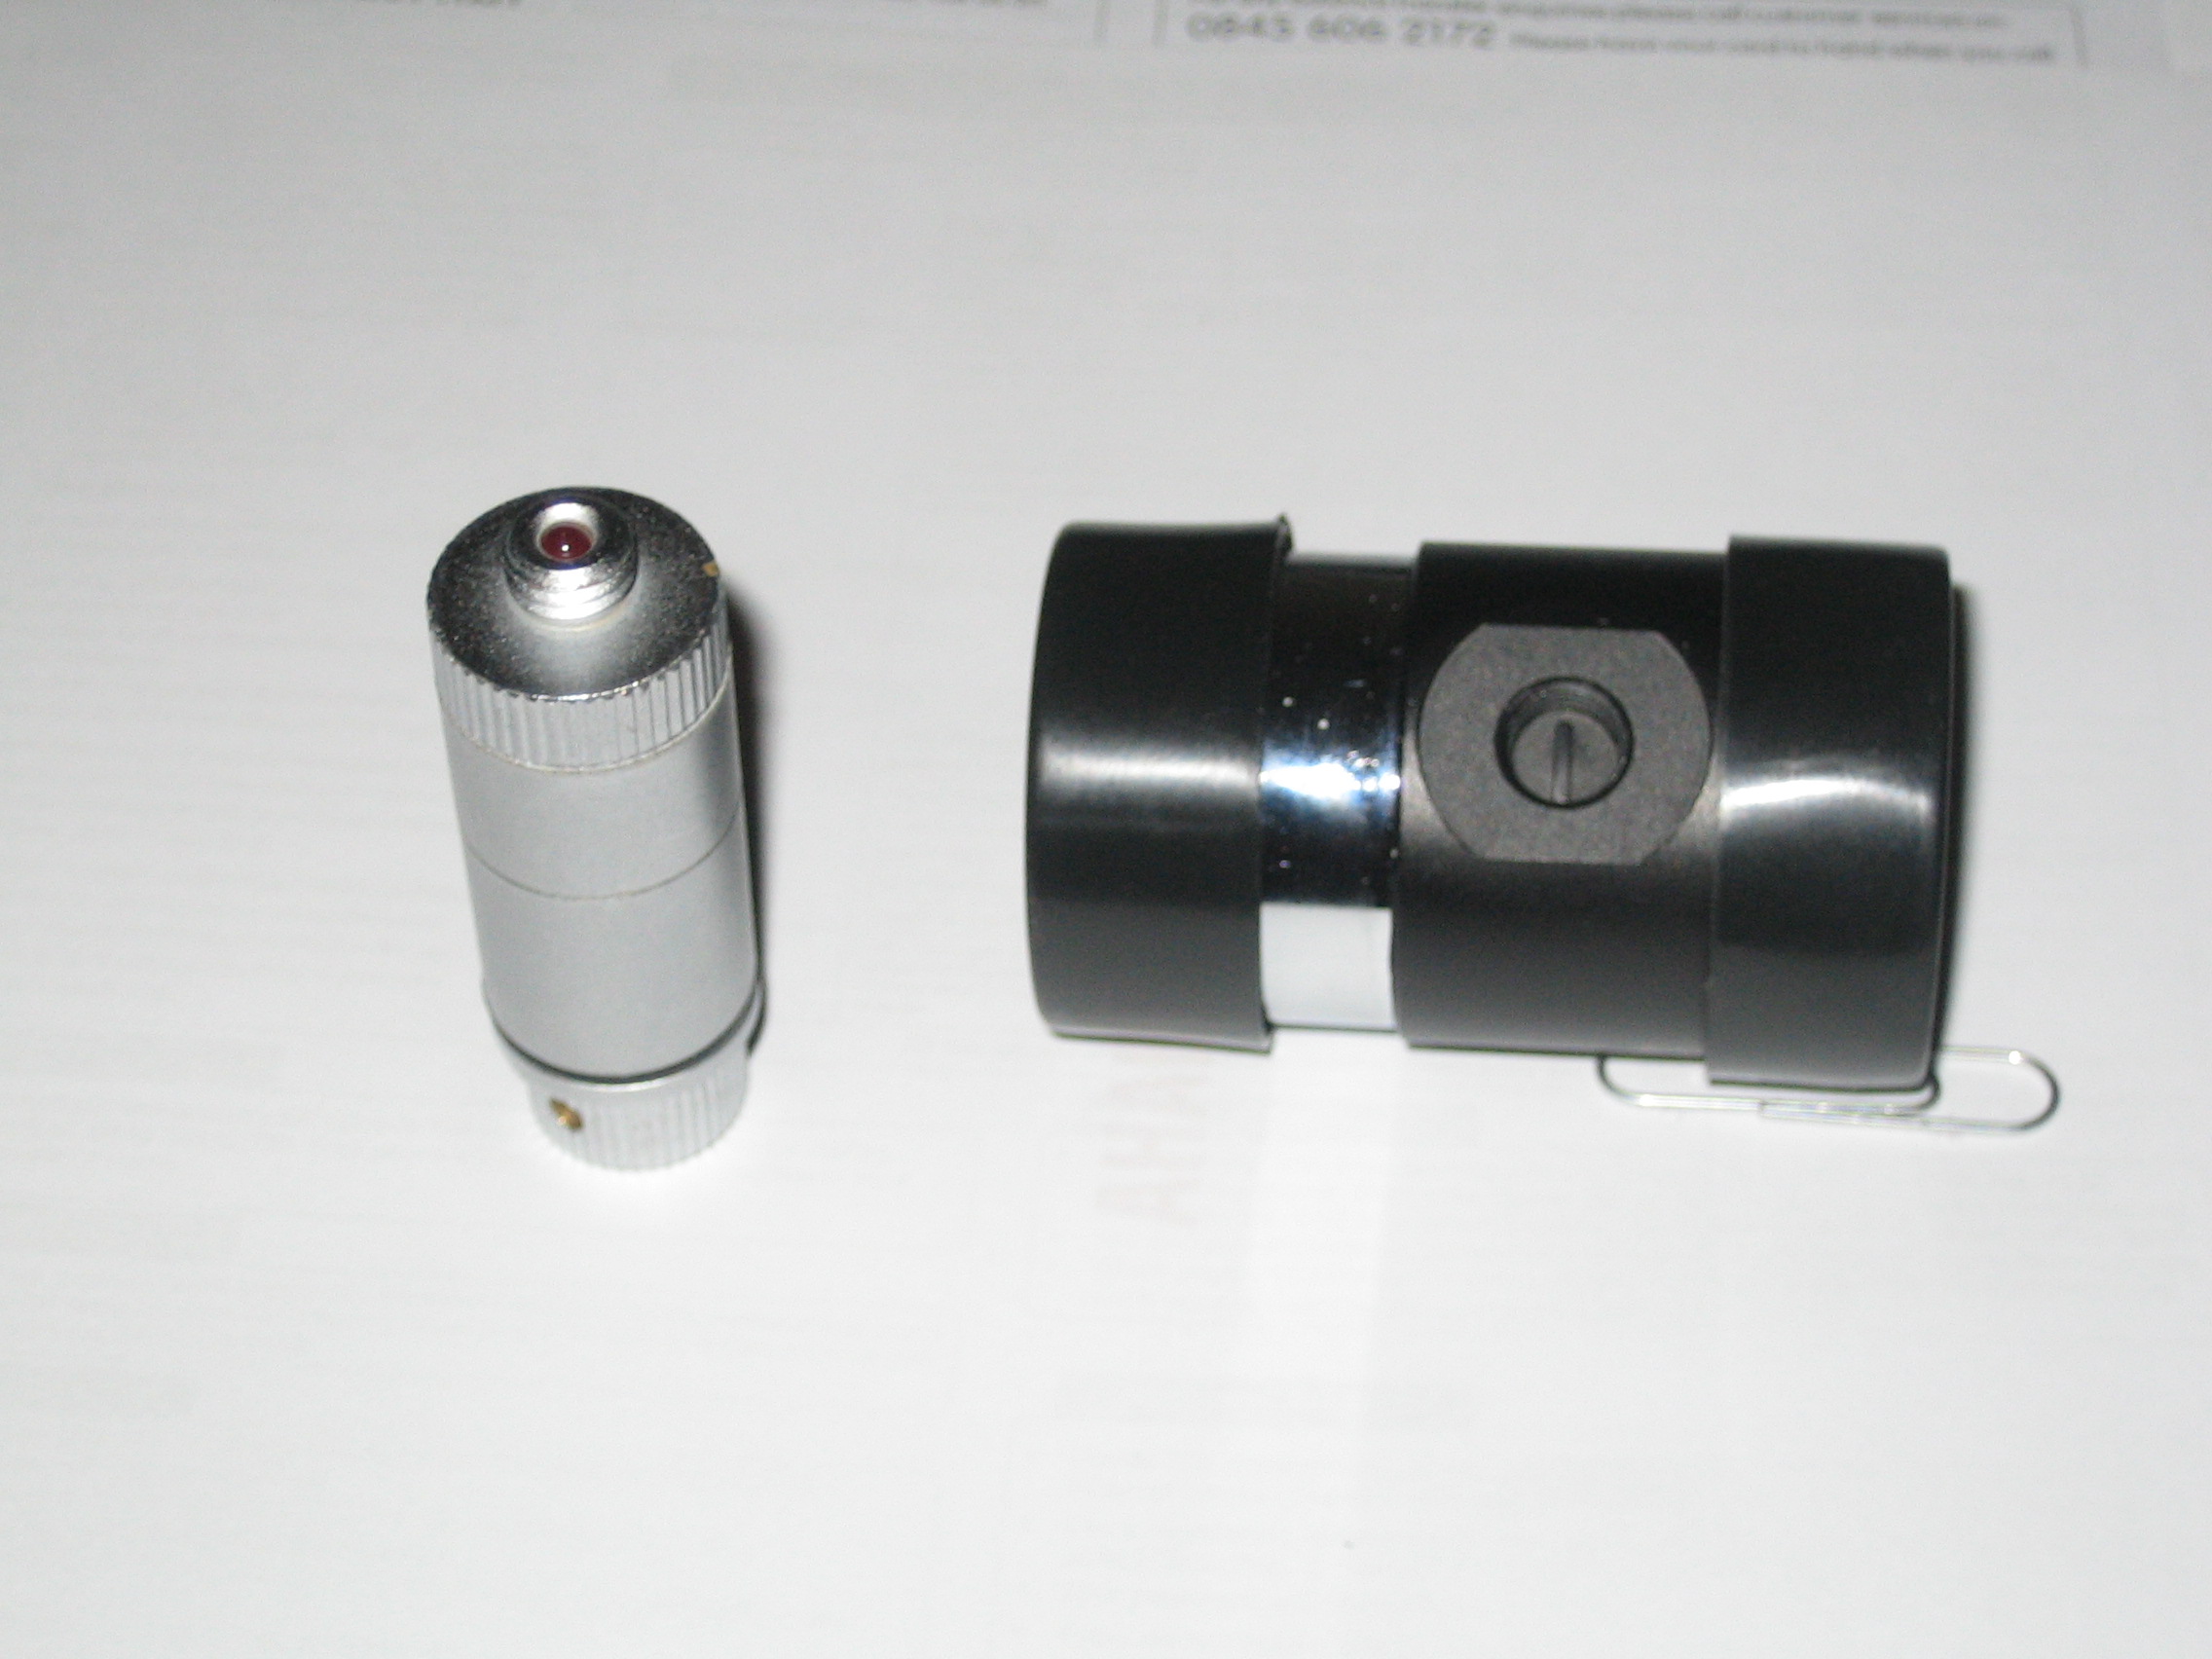
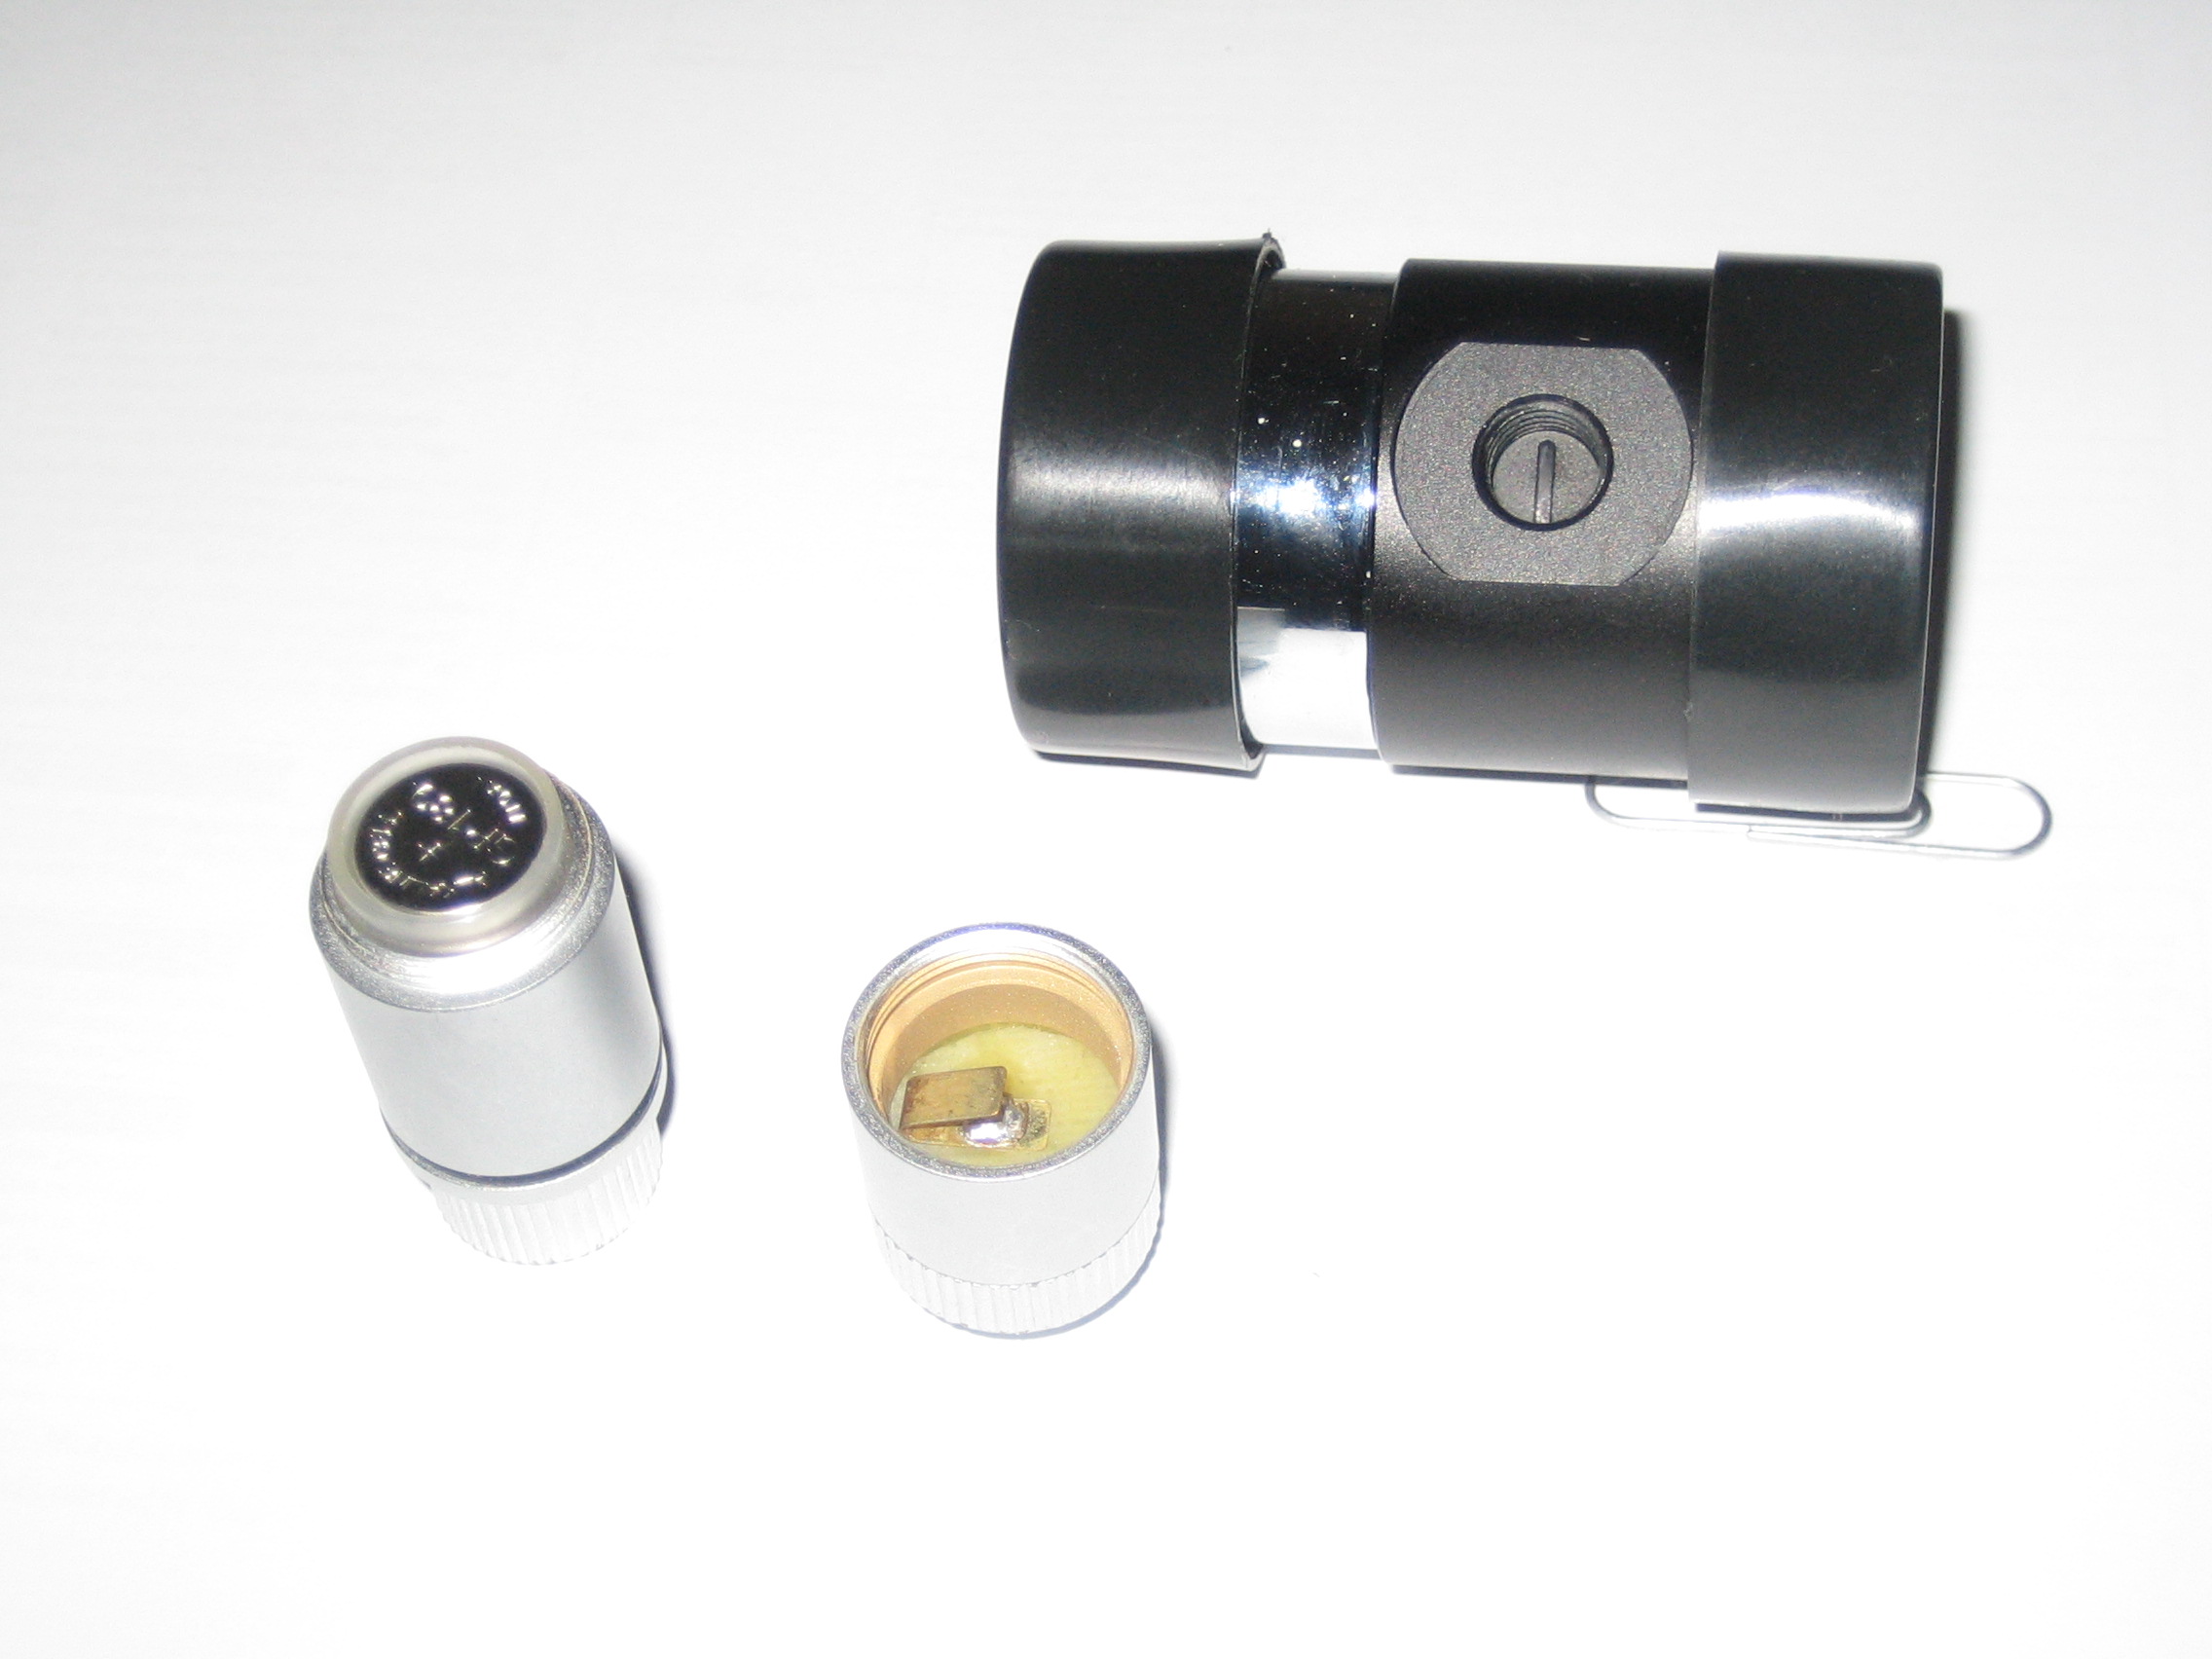
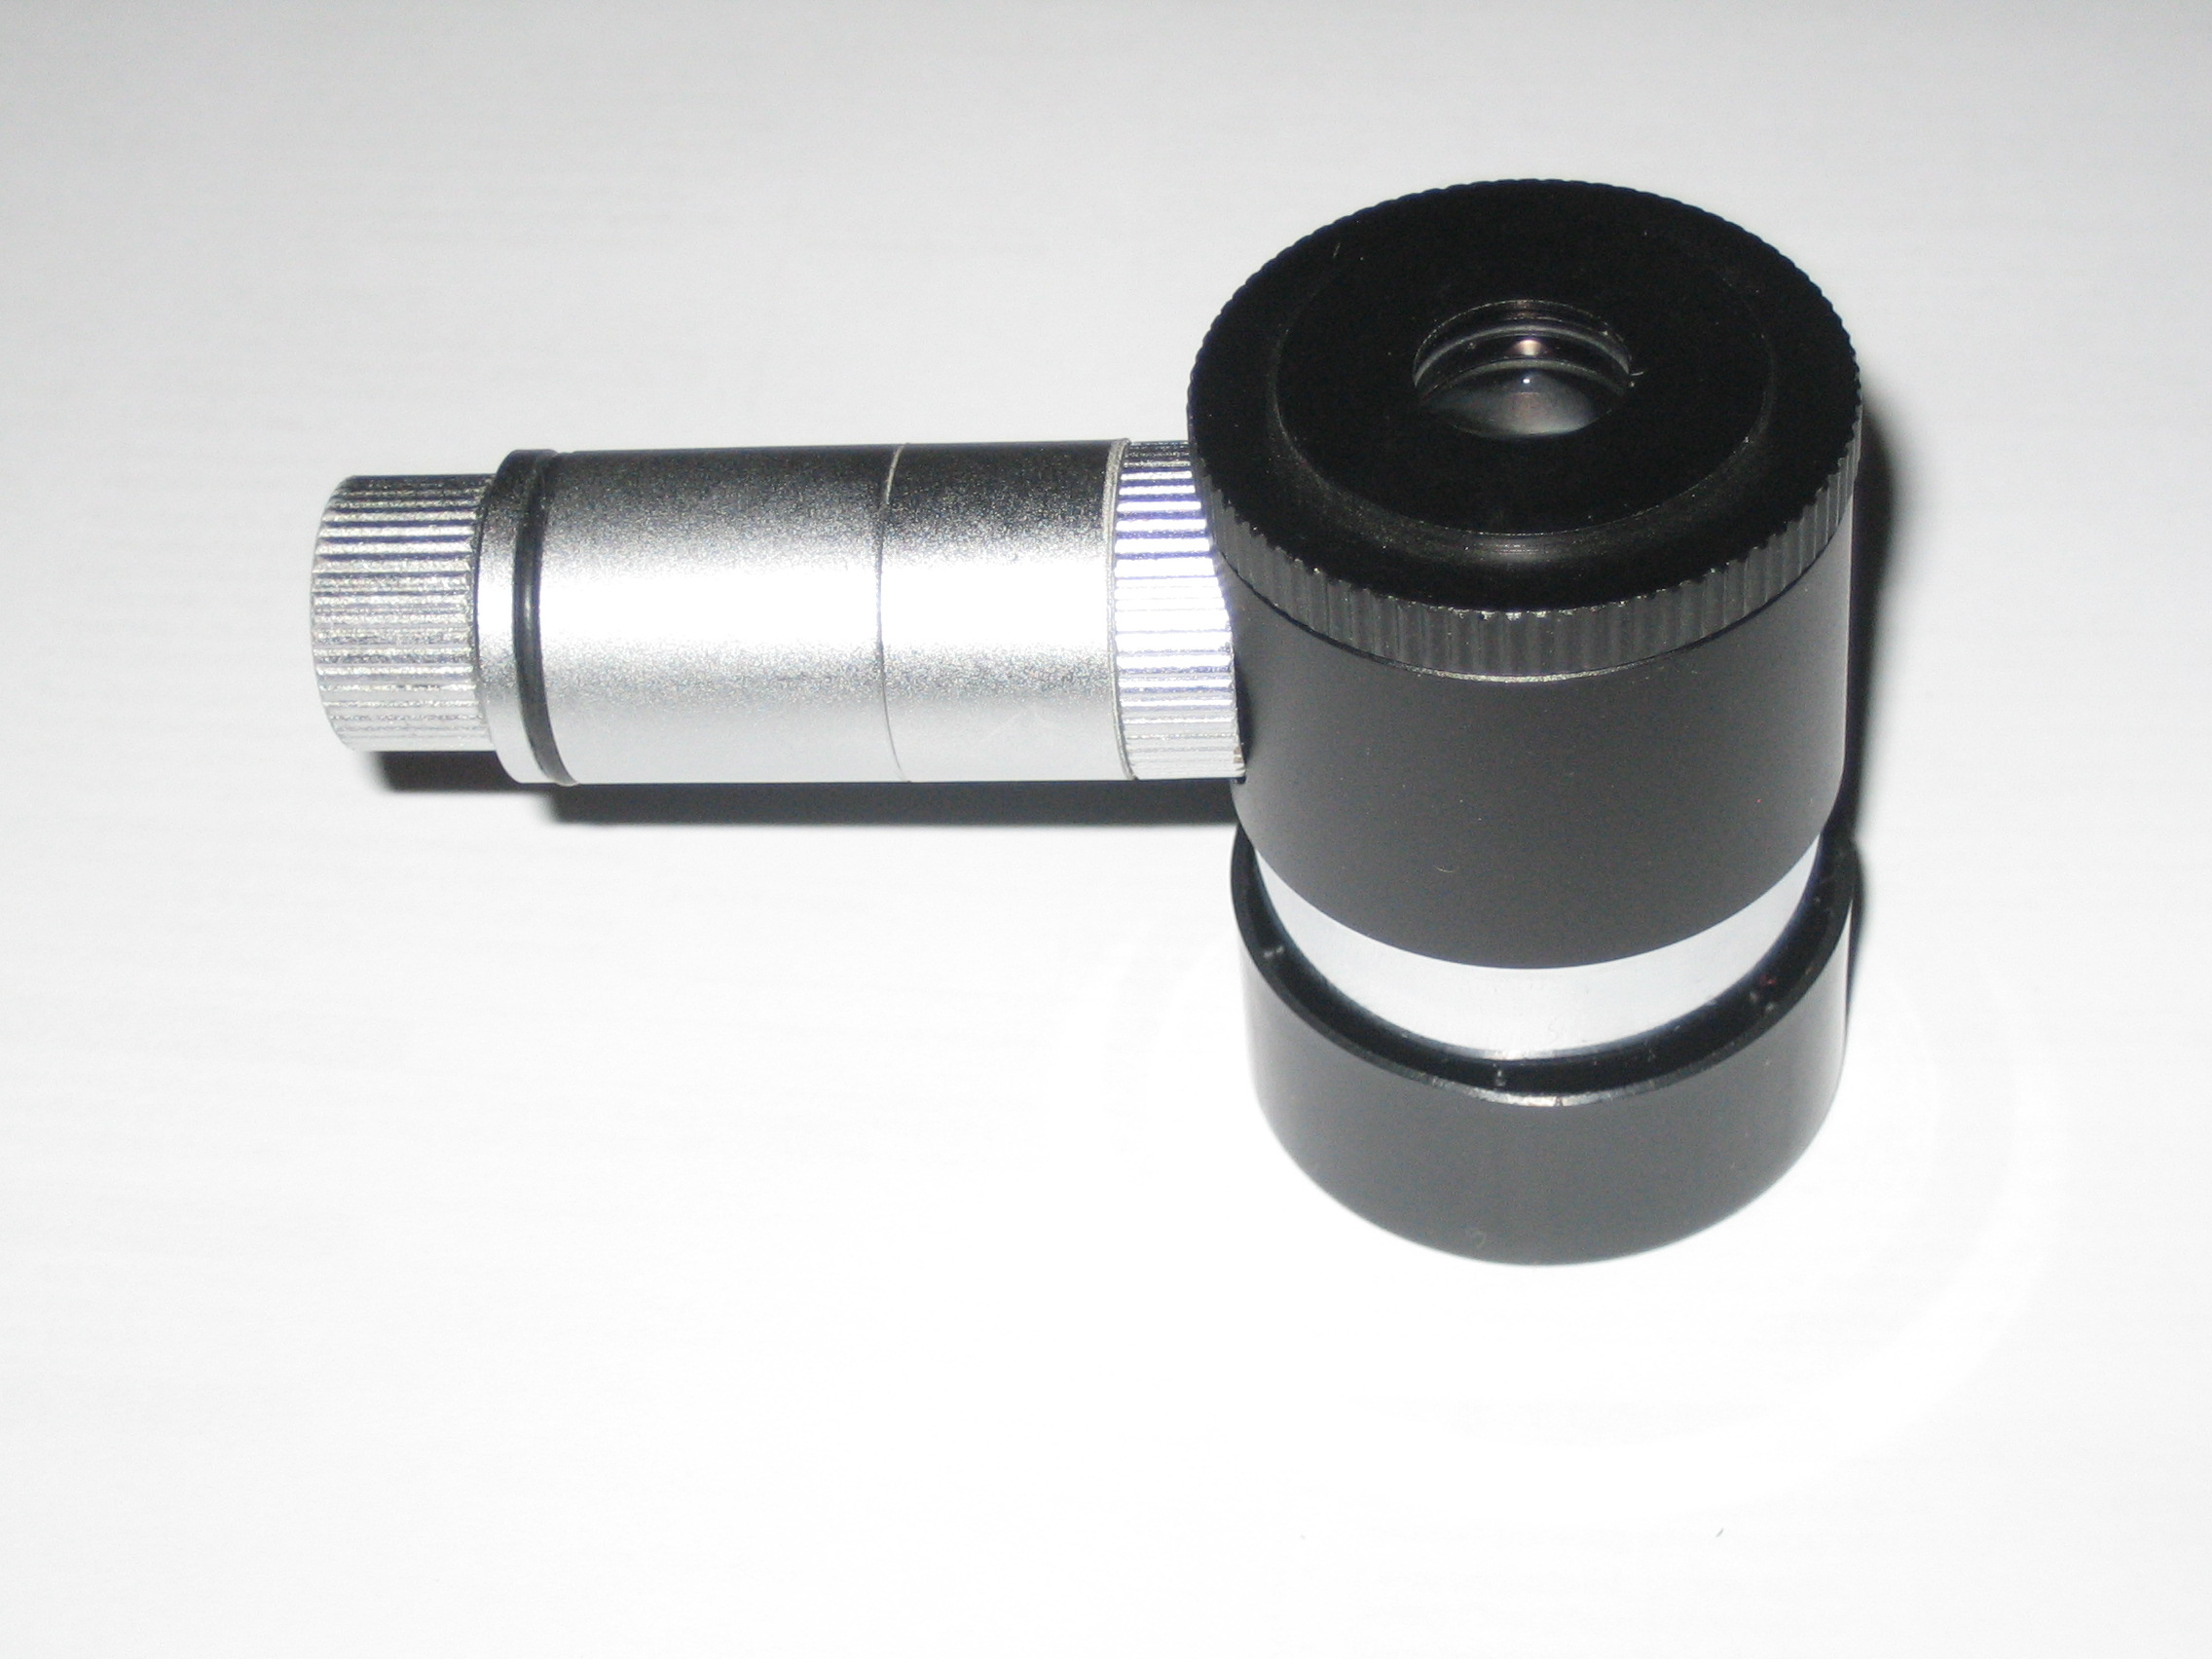
For some time I’ve been thinking about getting an eyepiece with an illuminated reticle to allow me to short-cut this process, but I’ve been put off by the prices. I discovered last week however that Sky’s the Limit who I’ve used for kit in the past had just such an eyepiece with a 12.5mm focal length going for less than £40 so I thought it would be worth a try. Here it is:

The LED is powered by two GP189 batteries (included). The knurled knob at the end of the LED unit turns it on and controls the brightness. There’s also a knurled adjuster on the top of the eyepiece. This is used to get the reticle lines in focus, but it does also change the point of focus of the telescope at the same time.

I’ve had a very quick test this evening looking at Mars and am happy that it does what it says on the tin. Unfortunately cloud prevented me from trying it out a bit more. What was quite surprising was how fast the image of Mars crosses the field of view at 120x magnification. I’m used to it happening, but somehow it seems far more obvious when you have some sort of visual reference.

I look forward to trying it out properly in my next imaging session. The only down-side is that I’ve run out of room in my eyepiece case…

Posted in Astro Equipment, Astroimaging, Astronomy | Leave a comment