Filtering Light Pollution for Wide Field Star Images

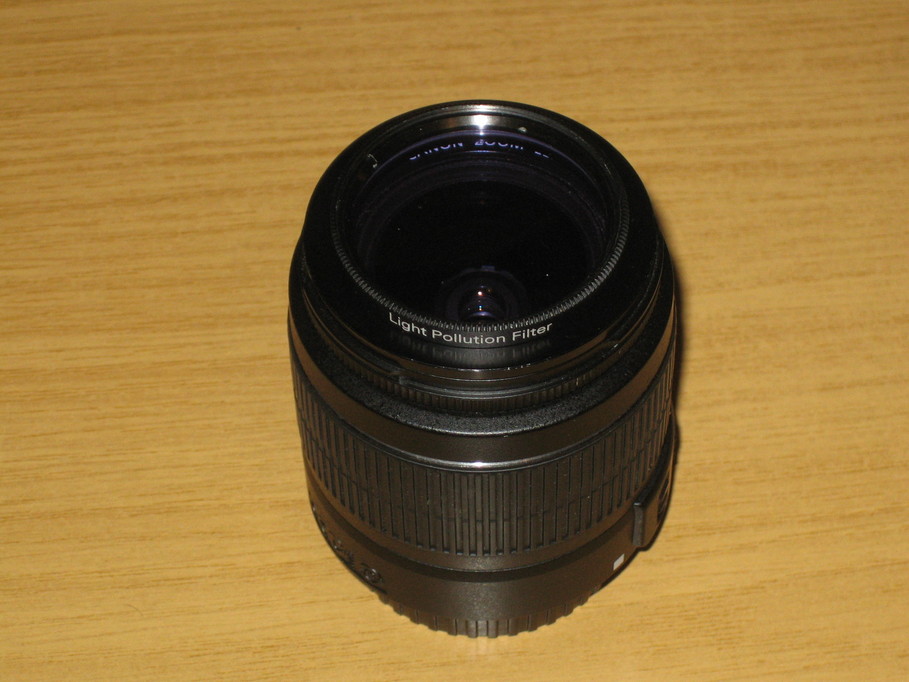
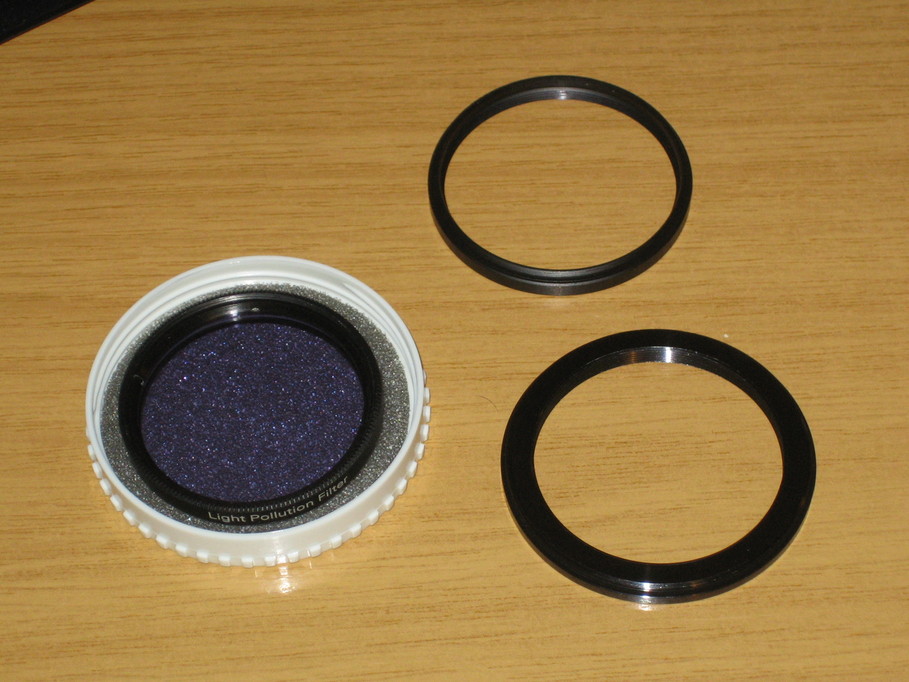
I’ve been taking some wide field images of the night sky with my Canon 450D recently and whilst we have very little light pollution here compared with most places in the UK, even a small amount bleeds into longer exposure images of objects near the horizon. I’ve had one of the Sagittarius area of the Milky Way that was completely ruined because of this, so I decided to get a light pollution filter. Whilst a clip-in filter might be the best solution they’re not at all cheap, so I went for the option of a 2″ filter (which has a 48mm thread) and step-down rings to fit the lenses I wanted to use it with (my kit 18-55mm lens and a “nifty fifty”):

And here’s what the kit lens looks like with the filter attached:

I’ll be trying it out as soon as we get a clear moonless night so I can see the Milky Way.

Posted in Astro Equipment, Astroimaging, Astronomy | Tagged , | Leave a comment

Just Give Me a Buzz

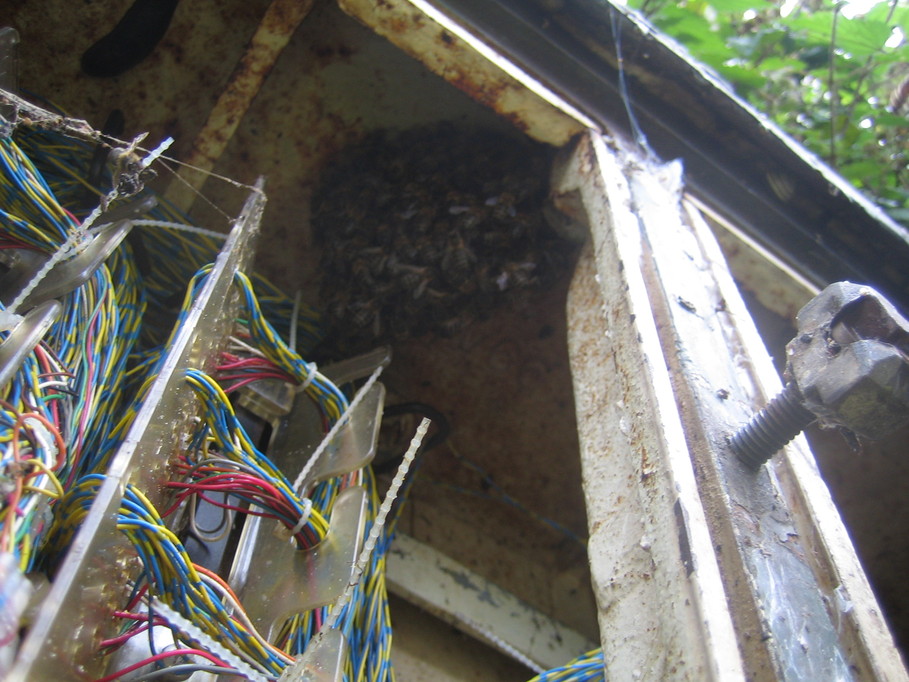
I received a phone call from BT last week. “Oh dear, what have they broken now” I thought. But no, it transpired that an engineer had been out to visit a “green cabinet” in a local hamlet and had to make a hasty retreat when a load of bees emerged from inside. Unfortunately they needed to get in because several local homes had a service failure. I said I’d go and have a look to see if there was anything I could do. When I opened up the cabinet I discovered this:

The honey bees were building comb from the roof of the cabinet, right where your face would be if you opened the cabinet and looked inside. Nice. The sad thing is that these bees were pretty much dead already. There’s no way they can build a colony that will survive the winter in the time left this year, even if they don’t get robbed and killed by wasps or die of cold. Neither did I particularly want to add a small number of bees of unknown health to one of my existing colonies. As they were going to be a pig to remove alive, I elected to sacrifice them by clearing them out with a vacuum cleaner.

I spoke with BT again and arranged to meet up with another jolly decent engineer who would supply all the necessary bits (actually, without fail every single BT engineer I’ve ever met has been decent; it’s the bureaucracy that lets the engineers and the company down). It took about an hour, in the pouring rain (bee suits aren’t designed with being waterproof in mind) to get everything cleared up, but hopefully those people without a telephone service should now be sorted.

Posted in Bee-keeping | Tagged , | Leave a comment

My 10″ Dobsonian ‘build’

I’ve quoted the word ‘build’ because in some respects this turned out not to be. However, there’s a fair bit of woodwork involved, so I reckon it still counts…

Some months back I wrote that I had obtained a 10″ mirror set and focuser to use as the basis of a project to build my own dobsonian scope. Well, it languished under my desk for quite some time waiting for me to find time to sort a tube out to house it all. And waited… And waited…

Then the opportunity to acquire the tube only from a Skywatcher 250PX flextube came up. It was a little bit “second-hand”, having a few dings in the tube and so on, but was basically sound. In the knowledge that it would actually move the build on a fair bit I decided to purchase it and shortly thereafter it was sitting in my workshop.

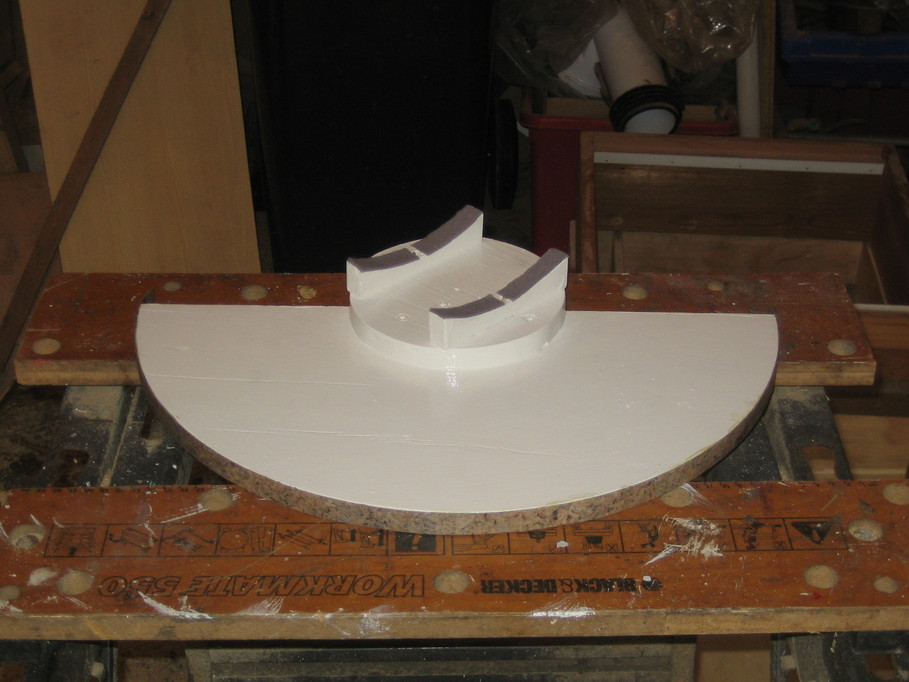
My plan had been to build a standard “small dob” design as outlined in the back of Berry and Kriege’s “The Dobsonian Telescope”, but the major problem with that was fitting the cradle to carry the bearings onto the tube. There just wasn’t any neat way to do it to allow the trusses to open and close. I didn’t have the bearing attachment fittings from the original tube, but eventually decided that making up something similar would be the most sensible way to attach the scope to the alt bearings. To match the outside diameter of the tube I measured the circumference, made up a paper template of the same size which I used to mark out some pieces of 12.5mm softwood and cut them out using a bandsaw. I also cut two 150mm diameter circles from the same timber to which I screwed and glued the curved sections in the correct positions to match the mounting holes in the tube. Finally those circles were screwed and glued to two 18mm ply semi-circles (the alt bearings) such that when the straight section of the bearing was horizontal, the tube was at 45 degrees. Once painted white I drilled out the mounting holes, lined the faces that would press against the tube with self-adhesive felt and glued a length of worktop edging trim to the running edge of the bearing using contact adhesive. That gave me two of these to support the scope on the rocker box:
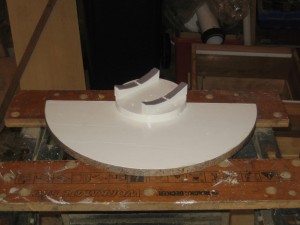
Berry and Kriege recommend using bearings of 1.8 times the tube diameter, but I went for 1.8 times the mirror diameter instead.

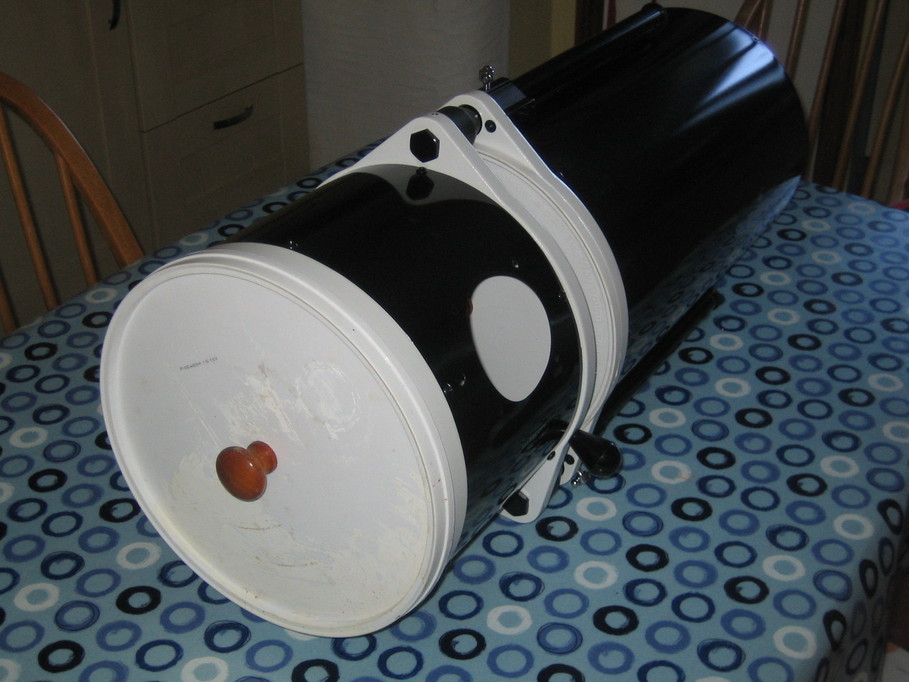
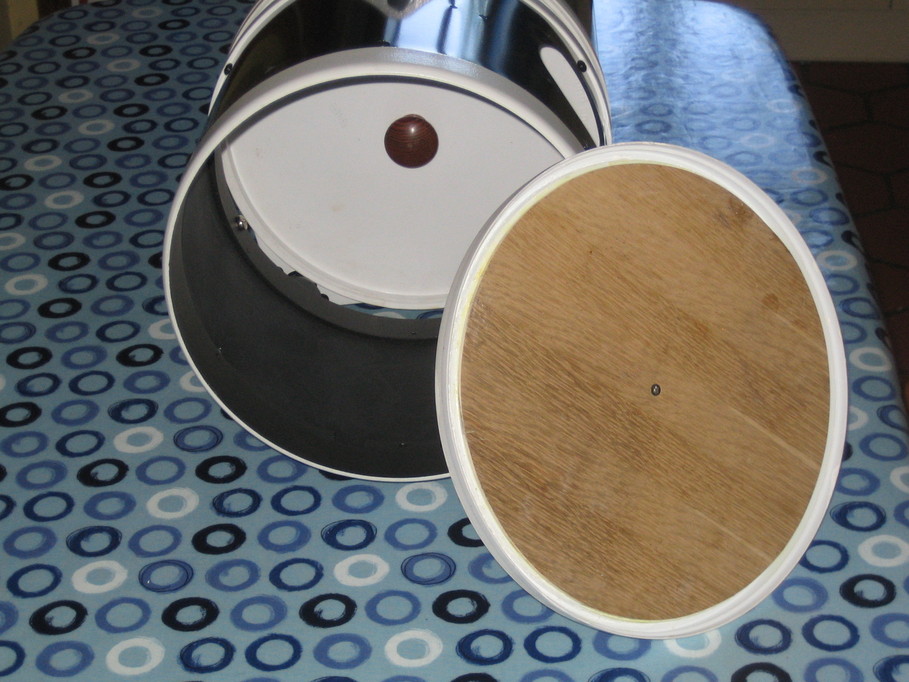
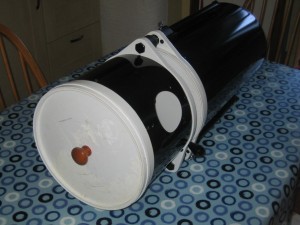
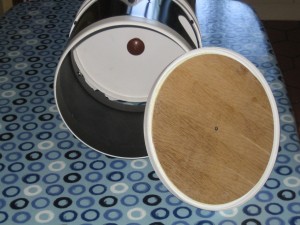
It was then possible to finish off the tube by fitting the mirrors and focuser, but I didn’t want the mirrors to get dirty or damaged and I didn’t have any caps for the open ends of the tube. Whilst casting my eyes around the workshop wondering what to do I noticed a couple of empty emulsion paint tubs. They looked a likely size. Sure enough, they fitted very neatly. I cleaned them up, cut a couple of discs of 3mm ply to fit inside the tube, glued the ply to the underside of the lids, fitted some scrap wooden knobs and ended up with two usable covers for the tube:
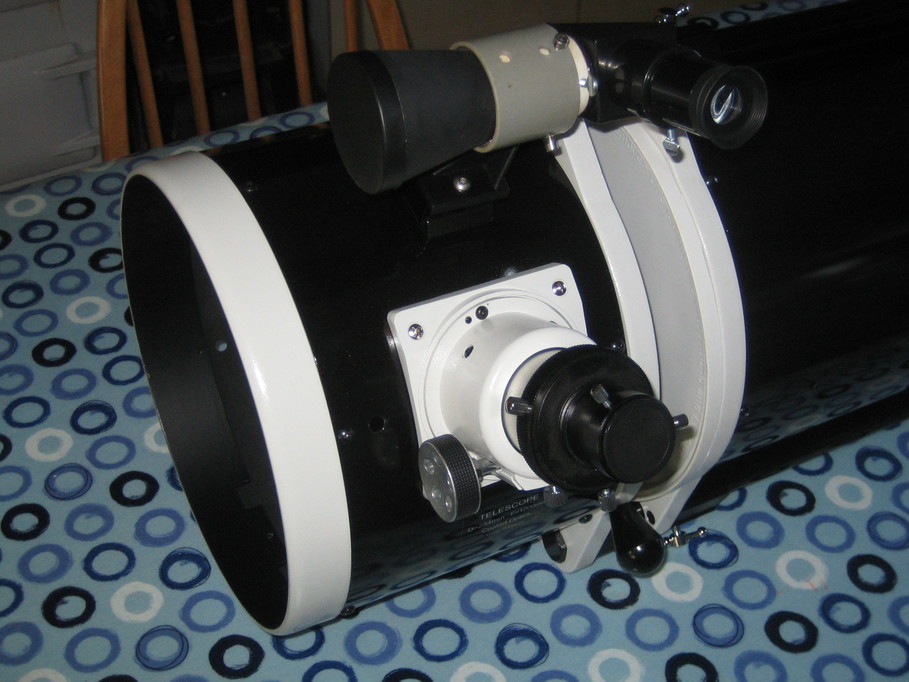
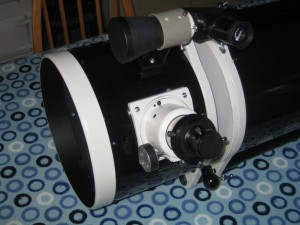
Those done, I fitted the primary, secondary and focuser using stainless allen bolts. I also fitted the binocular objective finder that I made a short while ago:
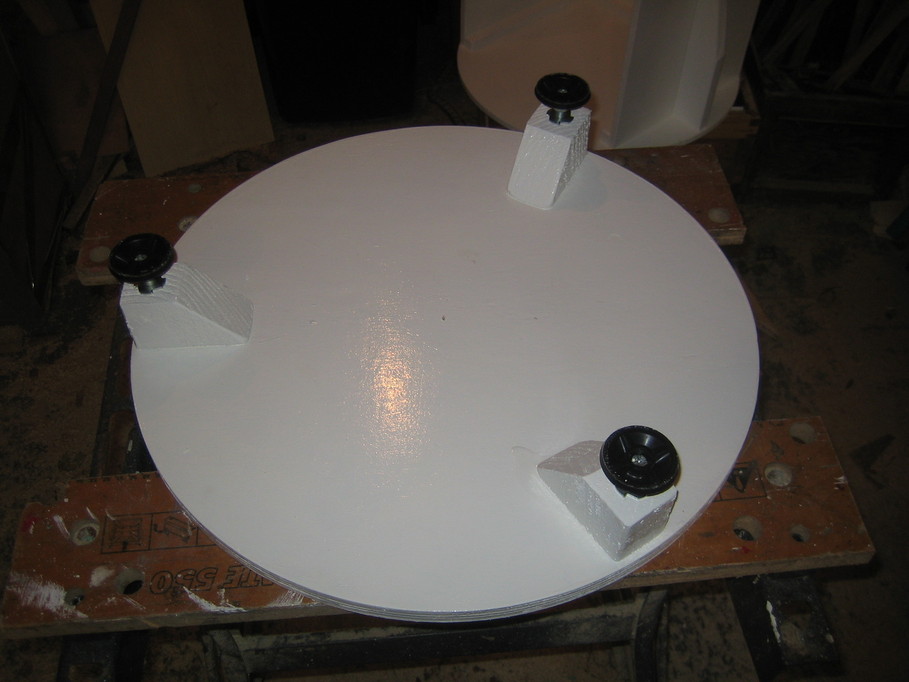
The next step was to build the ground board. For this I used a 500mm disc of 18mm ply. I wanted adjustable feet because there’s very little level ground around my house, so I cut some blocks, drilled out a 12mm channel down the middle of each and tapped in an M10 T-nut. These were glued and screwed to the ground board and some M10 adjustable feet (£2 for four from ebay) screwed in:
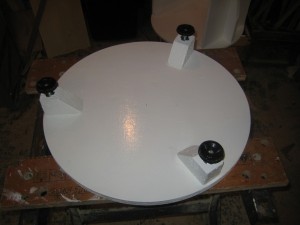
The channels allow room for the threads on the feet to move up and down without fouling the ground board.

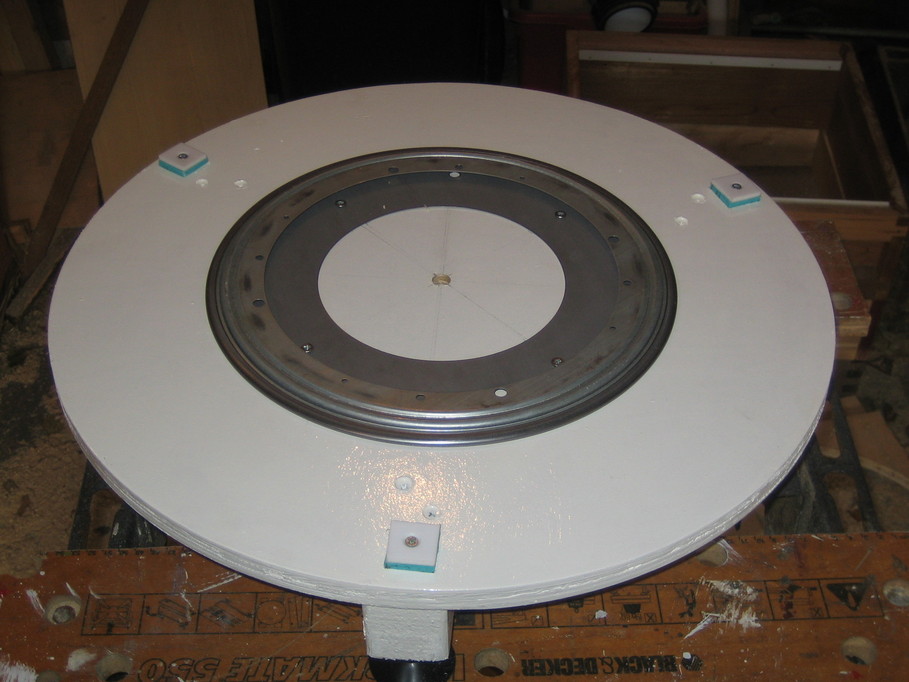
On top of the ground board I fitted a 300mm lazy susan bearing (£12, also from ebay) as the alt bearing and some 30mm square teflon pads for the outside of the rocker box bottom to rest on, shimmed to the same thickness as the lazy susan bearing using some scrap plastic from a broken box that many years ago held a child’s colouring set:
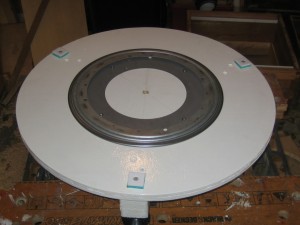
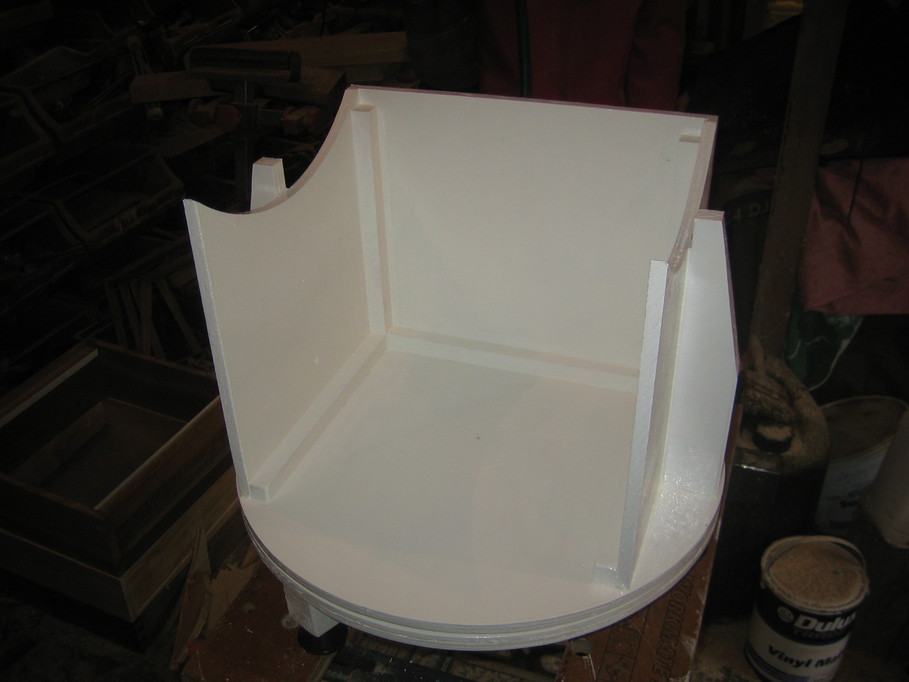
To construct the rocker box I fitted the alt bearings to the tube (more stainless allen bolts) and measured the distance between the outside edges of the bearings. That set the width for the rectangular front of the rocker box. For the sides B&K recommend they be the same width as the cradle, but I didn’t have a cradle, so I estimated what it would be had I had one and used that instead — basically the tube diameter plus 25mm. As luck would have it when I tried all the dimensions out on the ground board, it (only 🙂 just fitted. I’d used a home-made jig for my router to cut the bearings, so I adjusted it to give me a 3mm larger circle and cut the tops of the rocker box sides using that. To get the height correct I calculated the distance from the centre of rotation of the tube to the back of the bottom edge and added 75mm, then subtracted the bearing radius and 3mm to get the required height at the bottom of the curve on the rocker box sides. You’re following this so far? Good. There’ll be a test at the end 🙂 These three parts were cut from 12.5mm ply.

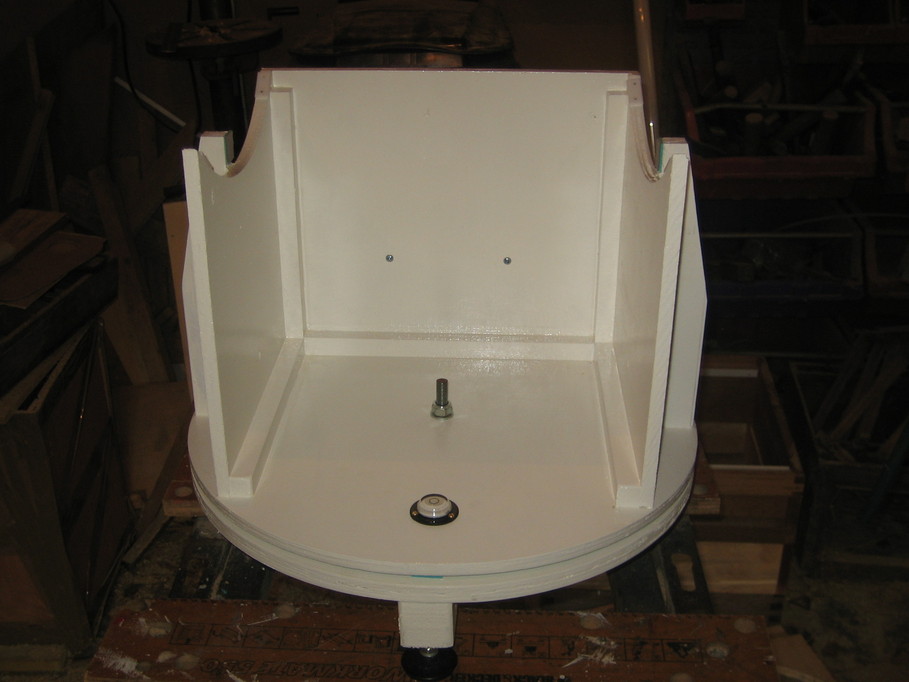
To finish the rocker box off, I cut another disk to match the ground board, this time from 12.5mm ply, some lengths of softwood to brace the joins and two side braces which extend about 25mm above the height of the sides and stop the bearings moving sideways:
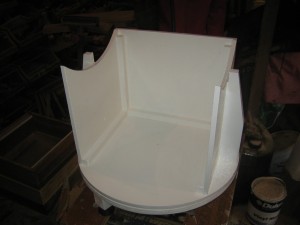
Finally I fitted some 40mm lengths of 3mm teflon sheet to the top edges of the sides using nails tapped below the surface of the teflon, and drilled the centre of both circular boards to take an M12 bolt. The bolt passes up through the bottom of the ground board and is fixed in position with a half nut. It then passes through the rocker box bottom and is held gently with a washer and nyloc nut. I also fitted a buikhead level and a carrying handle to the front:
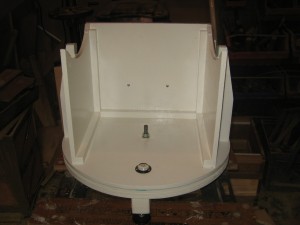
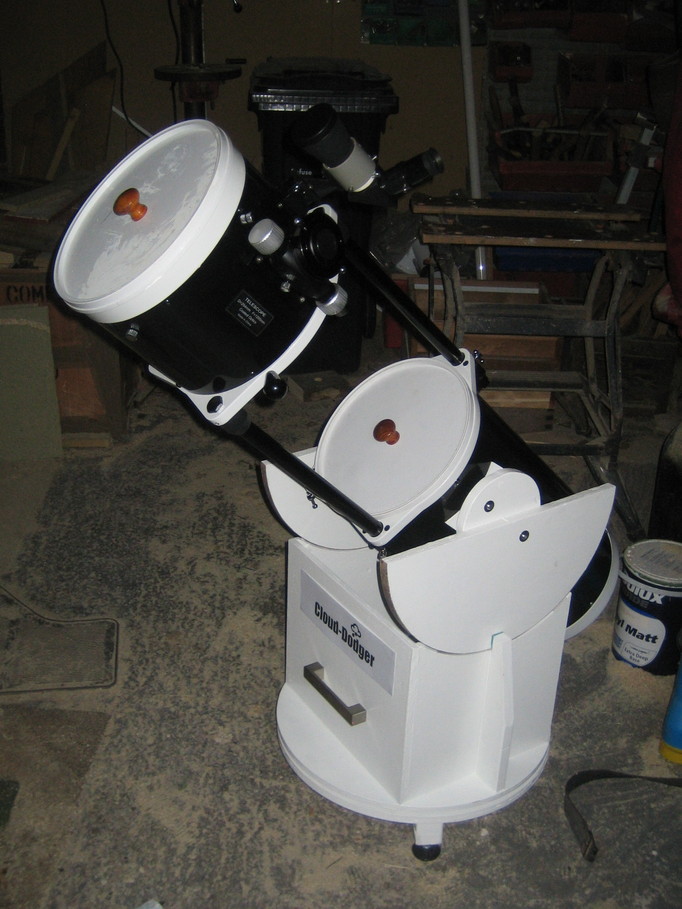
Other than some of the non-essential parts, which is generally something I avoid, all that remained was to put it all together:
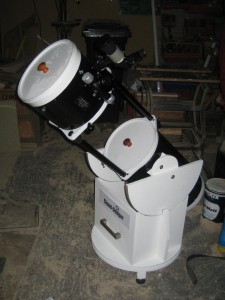
You may notice in that last image that the focuser has changed. A focuser from a Skywatcher MN190 came up and I decided to fit that instead. I’ll do a first light report separately and some notes on how it works out.
Posted in Astro Equipment, Astronomy, Projects | Tagged , | Leave a comment

Solar PV Generation Update, August 2012

Well, at last we’ve had a little sunshine this summer, though ten days in July is a pretty poor showing even so. Can’t complain though; it’s a whole lot better than May and June.

Generation for July was 407kWh. Lower than I expected again, but by less than 10% this time. This brings the total for the eleven months since installation to 2914kWh, which is equivalent to about £1320 in FIT payments and up to £430 in electricity we haven’t had to purchase from the grid.

Looking at the data models, the one the solar installers are required to use predict generation of 2903kWh per year, so we’ve scraped past that after eleven months. Based on my own calculations at the time of installation I was hoping for a figure nearer 3222kWh which is certainly still feasible if the August weather isn’t as poor as the rest of the summer. If the expected 11.83% of our annual production does occur in August then we should reach a total for 3300kWh for the first year and I’ll be exceptionally happy.

Posted in Environment, Projects | Tagged , , | Leave a comment

Nginx Rate-limiting with a Whitelist

I recently needed to deploy a rate-limiting solution for a site where certain IP addresses would be white-listed and not subjected to the rate limits. Google found me an example in a blog that turned out not to work, though I’ve no idea whether that’s because the example is incomplete or because nginx has changed since it was written. Here’s the solution I eventually came up with.

First, my servers are behind a proxy, so I needed to pull out the originating IP address and to tell nginx that it should never use whatever IP address the connection actually came from:

real_ip_header X-Forwarded-For;
set_real_ip_from 0.0.0.0/0;

Then, using the HttpGeo module, I set up a match list for addresses that should be rate-limited. This sets the variable $limited to 1 (meaning “rate-limit this address”) or 0 (“don’t rate-limit this address”). The default is 1 and I list addresses I don’t want limiting with a zero value. Address ranges are in CIDR notation:

geo $limited {
  default 1;
  10.0.0.0/24 0;
  192.168.42.42/32 0;
}

Now I set another variable, $limit to the IP real IP address of the connection or to the empty string depending on the value of $limited. If the connection is to be rate-limited then the (binary format) IP address will be used; if not, the empty string is used:

map $limited $limit {
  1        $binary_remote_addr;
  0        "";
}

And here’s the limit zone, keyed using the value of $limit:

limit_req_zone $limit zone=limited:10m rate=5r/m;

When $limit is an empty string, the limit will not be applied. Finally, apply the limit in the location stanza:

location / {
    limit_req zone=limited burst=5;
}

In testing this approach appears to work so far. The site in question goes live next week, so I’ll find out then how it copes in the real world.

Posted in Computing | Tagged , | Leave a comment

Another Attempt at a Cygnus Widefield Image

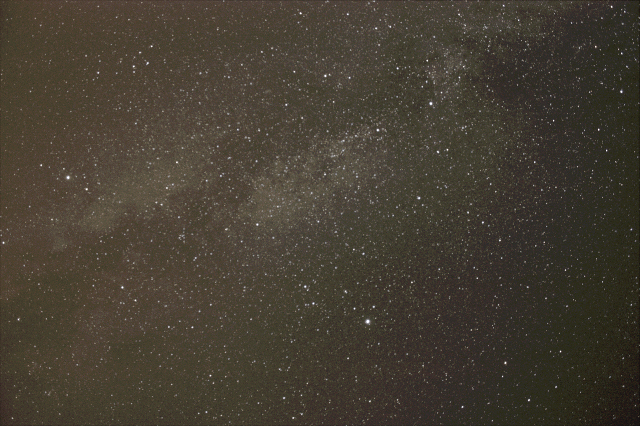
The evening after my previous attempt the sky looked better so I set up again mostly with the same kit (EQ3-2, 450D, 18-55mm lens at 18mm & f/4.5, but this time I used APT to control the camera from the laptop. This made focusing and capture so much easier that I was able to experiment a bit more, tidy up the framing and so on.

This time I took sixty 45 second exposures with ten darks, again stacking them in DSS and tweaking levels and curves in photoshop — another first as I’ve never used Photoshop before.

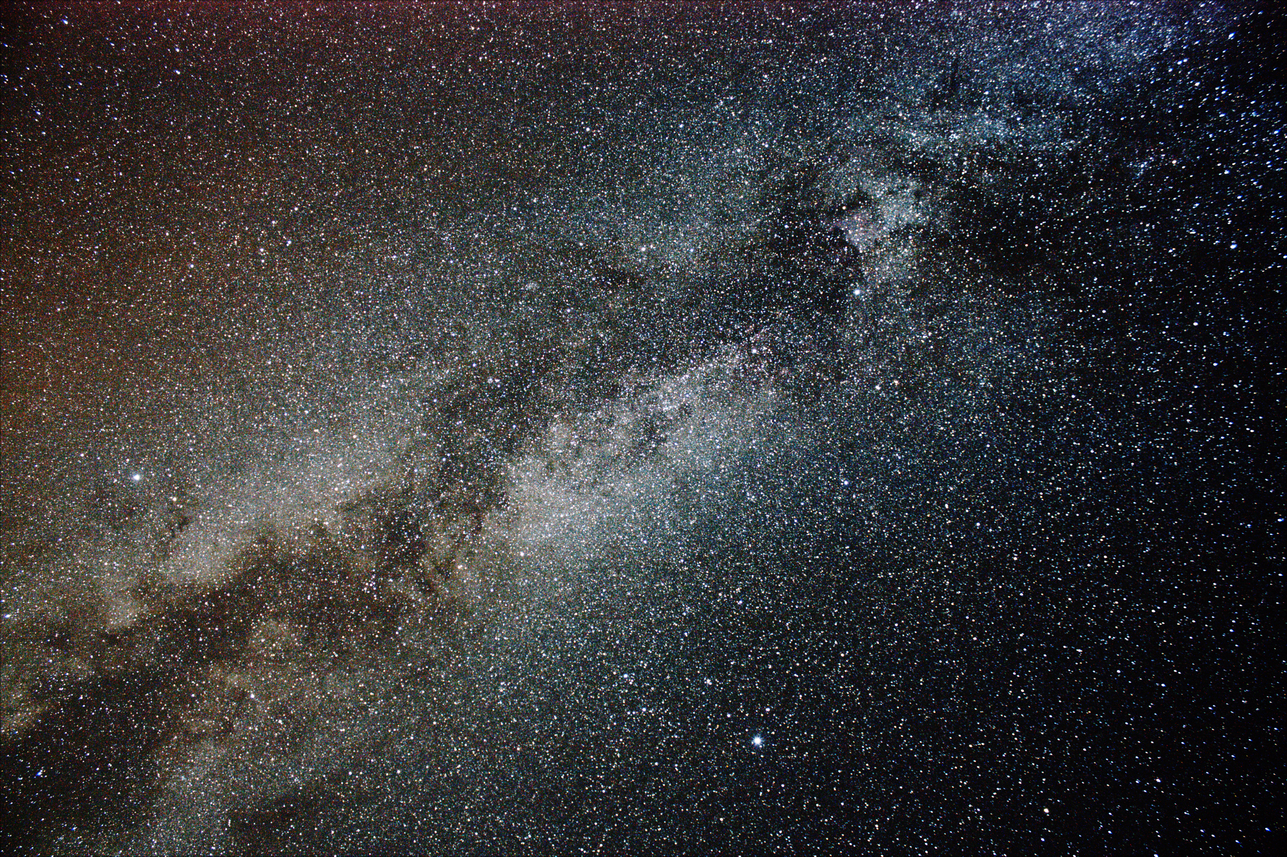
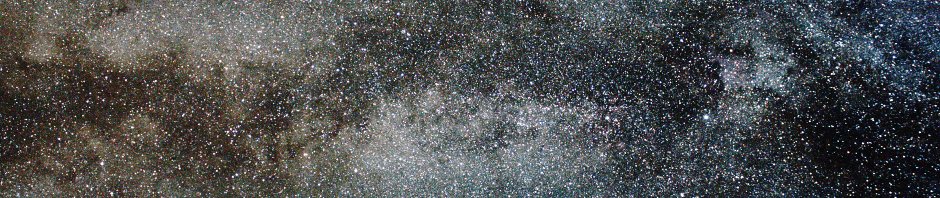
I’m much happier with this result. There is perhaps a little amp glow showing at the top edge of the image and the stars towards the corners are stretched somewhat because the lens isn’t perfect, but it has so much more impact thanks to the depth of colour and the sheer number of stars visible. I’m pleased enough with it that I’ve resized a version to use as my workstation desktop background 🙂 Here it is:

Posted in Astroimaging, Astronomy | Tagged , , | Leave a comment

My First Widefield Shot

Quite a few “firsts” this week. Makes such a change to have so many nights of clear sky. This night the sky clarity wasn’t great, but I wanted to try a widefield shot and wasn’t too worried about the outcome as long as I got a feel for what was required. I mounted up my unmodified 450D DSLR directly on the EQ3-2 and pointed it towards the constellation of Cygnus. I set up the remote shutter control on the camera to take thirty exposures of 45 seconds each with the kit 18-55mm lens at 18mm and opened as wide as possible at f/4.5.

The thirty exposures together with ten darks were fed into Deep Sky Stacker and I did no further processing. Here’s the result:

I’m not particularly happy with the outcome on this one. I have nicely captured Cygnus, Lyra, Sagitta and Delphinus, but the image really lacks dynamic range. I think the seeing was perhaps actually worse than I realised and that thin high cloud spoilt the image.

Posted in Astroimaging, Astronomy | Tagged , , | Leave a comment

My First SPC900 DSO Images

We’ve just had a full eight days of clear skies and I finally managed to get around to testing my LX-modded SPC900. For the test I used my ST120 on the motorised EQ3-2. This is my first ever attempt at such a thing, so I wasn’t expecting stunning results and I wasn’t disappointed 🙂

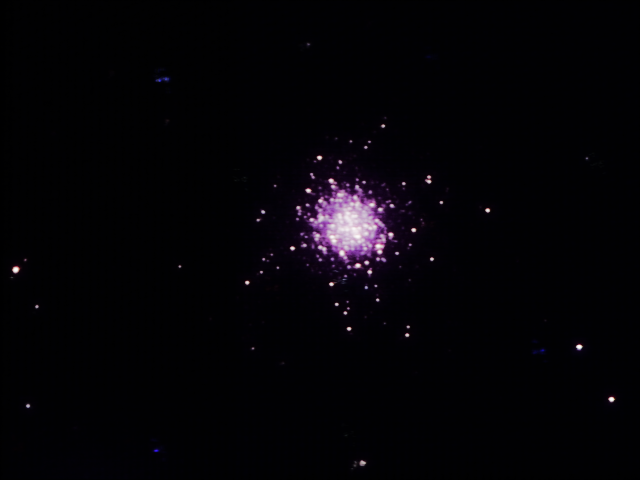
First, M13. This first image is 33 exposures of 16 seconds, no darks, captured with SharpCap and stacked in Deep Sky Stacker. There’s no other processing.

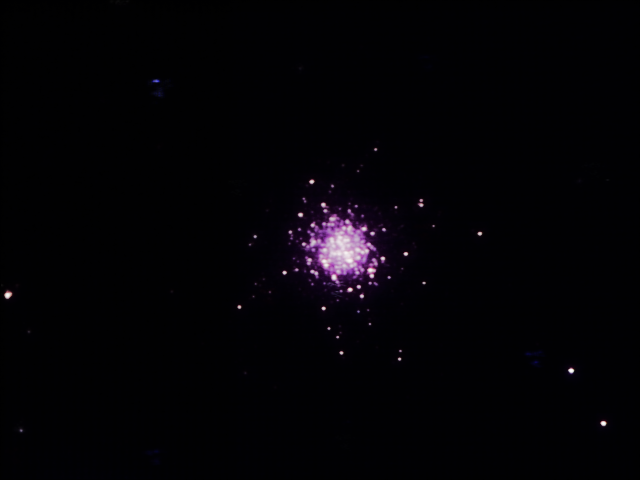
And this one is the same, but 55 exposures of 10 seconds.

I can’t really decide which I prefer. The second looks perhaps a little sharper to me. I should perhaps re-stack and do some processing in photoshop, but I’ll come back to that another time.

I also tried capturing M27, the Dumbell, but whilst I ended up with stars close to being over-exposed, the nebula itself was hardly visible. An attempt on M31 similarly in failure and an image massively over-exposed in the core and no data elsewhere. I think more practice is required.

Posted in Astroimaging, Astronomy | Tagged , , | Leave a comment

Paper Planet Models

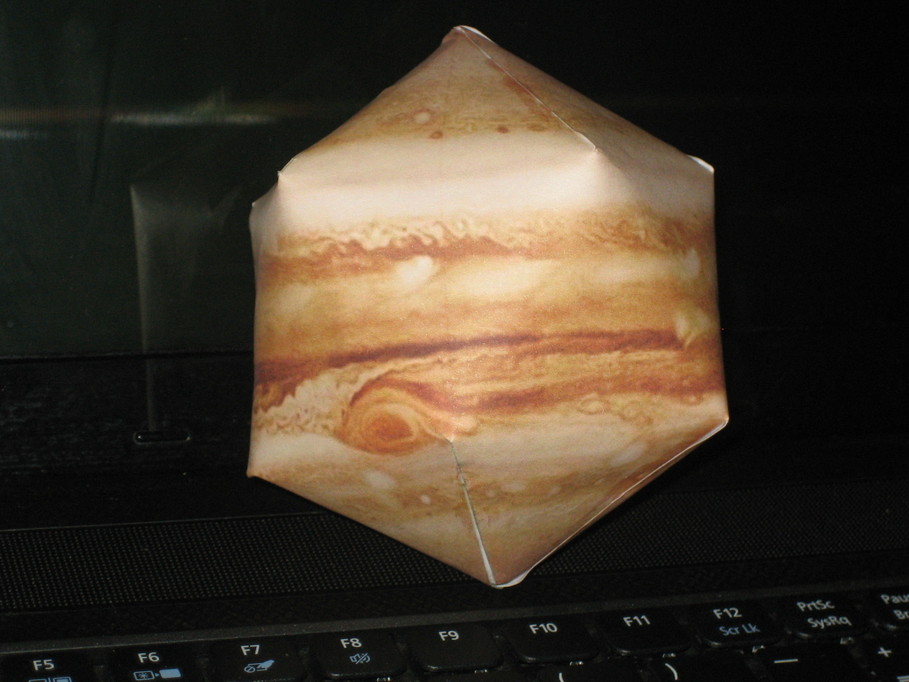
I found a set of “nets” for icosahedron models of planets and moons recently and made one each of Jupiter with my daughter. They’re quite tricky to make the final joins on — you really need delicate slim fingers, not short dumpy ones such as I am gifted with. Anyhow, here’s how mine turned out:

I downloaded the net as a PDF file from here, but found other paper models here and here. As yet we’ve not tried the last two.

Posted in Astronomy | Tagged , , , | Leave a comment

A Very Late Swarm

Yesterday (22nd July) morning I received a phone call about a bee swarm in a local garden. The swarm was in a holly bush right next to the path to the front door of the house and the owners have young children so not collecting it wasn’t really an option, but I’m now left with a debate over what to do with it. It seems very late to allow them to try to consolidate a new colony in time for the winter, so perhaps I should just dispose of the queen and combine them with another colony, though it was quite a large swarm.

I’m genuinely surprised to see one this late in the year. I imagine they’ve been waiting for some time for an opportunity to leave the parent colony, unable to do so because of the poor weather.

I think I’ll give them a couple of weeks to see if the queen starts laying and then make a judgement about how to combine them.

Posted in Bee-keeping | Tagged , | Leave a comment