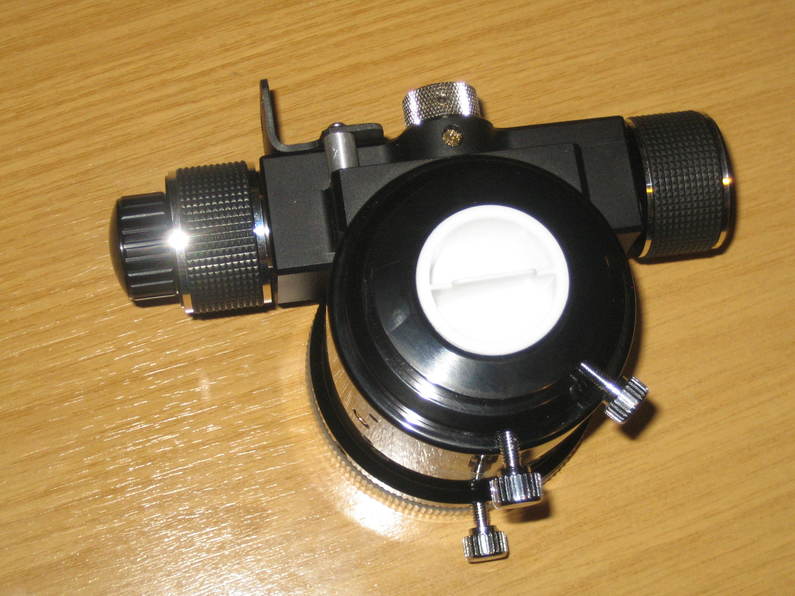
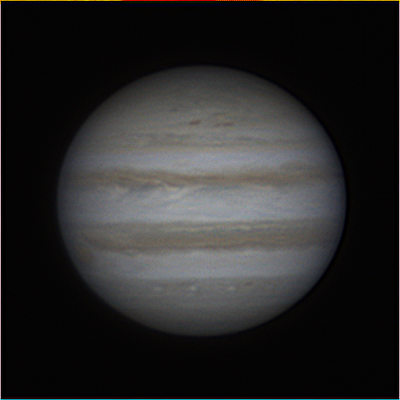
Last year I modded my PST, replacing the “black box” with a slightly modded Revelation dual-speed Crayford that was originally intended for SCTs. I’ve been meaning to do a motor drive conversion for some time and had bought a second-hand Skywatcher motor kit to use but hadn’t really decided how I was going to go about it. Then last week someone posted some photos of a conversion he’d done so I shamelessly robbed a few of his ideas.
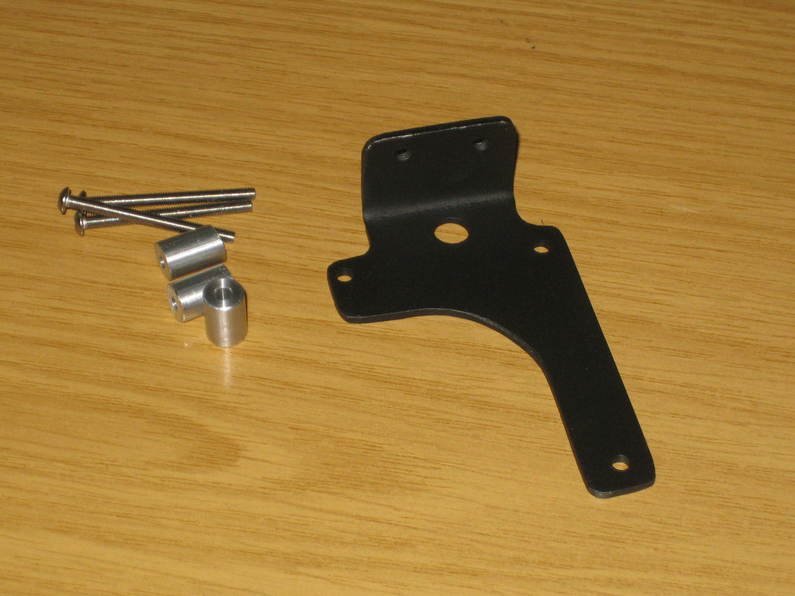
The first obstacle is that neither of the brackets supplied with the motor drive kit actually fit the focuser and don’t really lend themselves to just having a few more holes drilled in them, so I started by making my own bracket from a piece of 2mm steel plate:
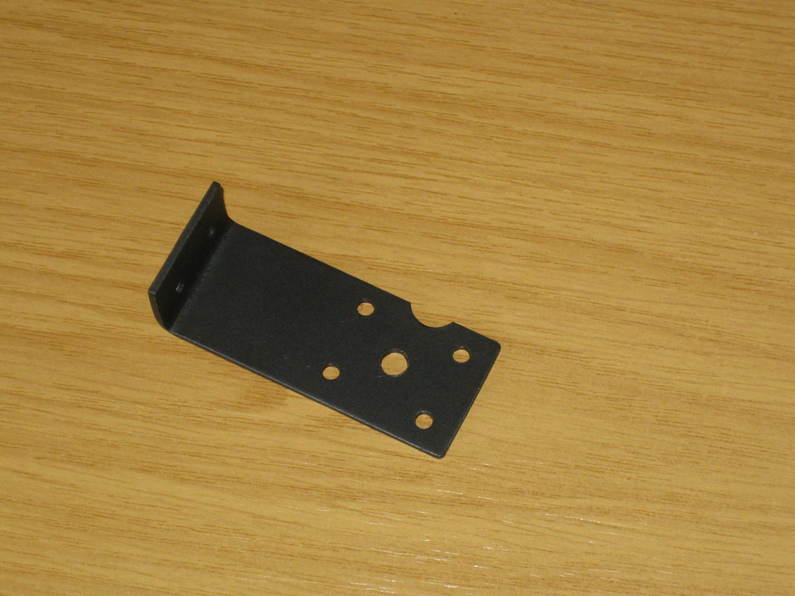
The four smaller holes matched the mounting holes for the spindle assembly on the focuser, the larger one in the middle gives access to the tensioning adjustment and the notch in the edge leaves room for the locking knob.
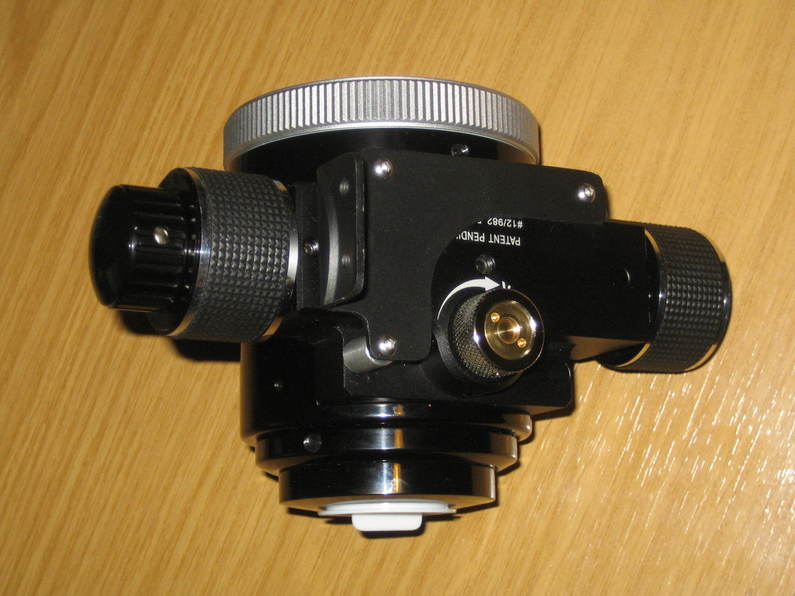
The existing screws fixing the spindle assembly weren’t long enough to attach the bracket as well, so I bought some stainless 12mm M3 dome-headed hex bolts from that ebay and fitted the bracket to the focuser:
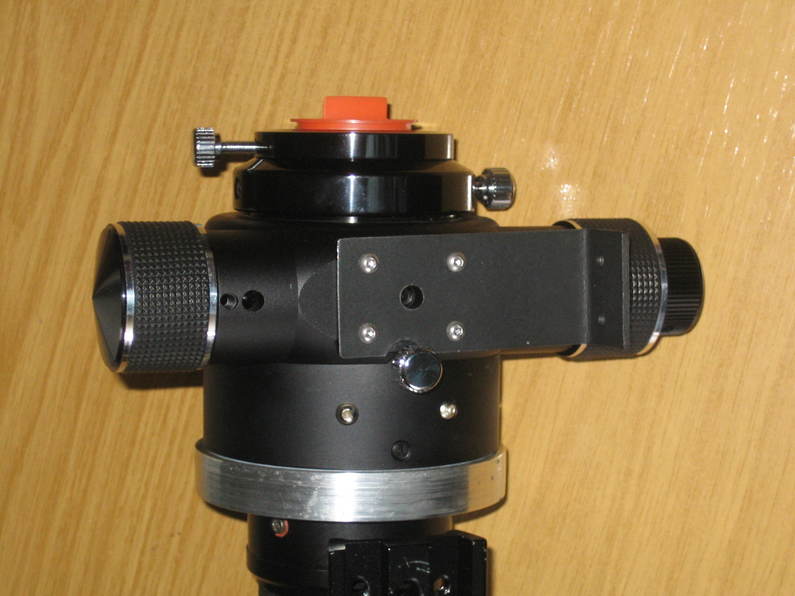
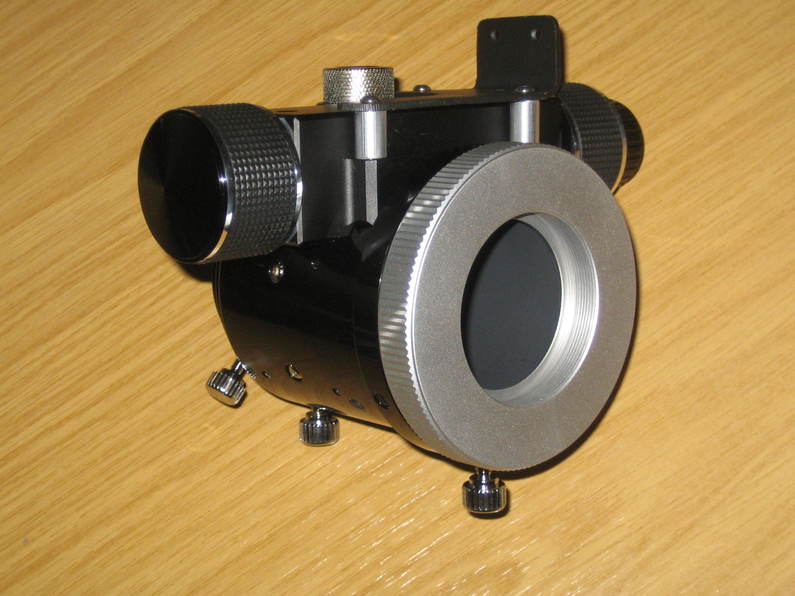
The two remaining holes in the flange I’d threaded to take the standard Skywatcher mounting screws for the motor, so that went on easily:

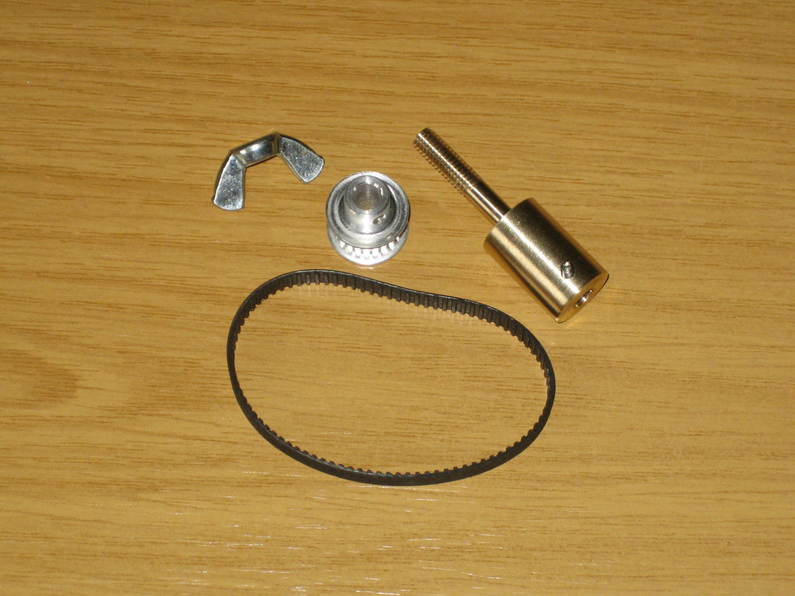
This is the point where I stole the really clever idea. In the photos I saw the motor driving the fine focus knob using a clutch mechanism that could be released just by turning a knob on the end of the motor spindle. The Skywatcher motor output shaft clearly wasn’t going to be long enough for that, so I turned an extension piece from brass that would fit over the 6mm output shaft and then drop back down to 6mm. That carries a 24 tooth timing pulley driving a 90mm belt that loops over the fine focus wheel. The end of the brass shaft is threaded to accept an M6 nut. I was going to make a brass thumbscrew to screw onto that and clamp the pulley in place, but didn’t have enough brass, so temporarily I’ve used an M6 wingnut instead. Here’s all the bits:
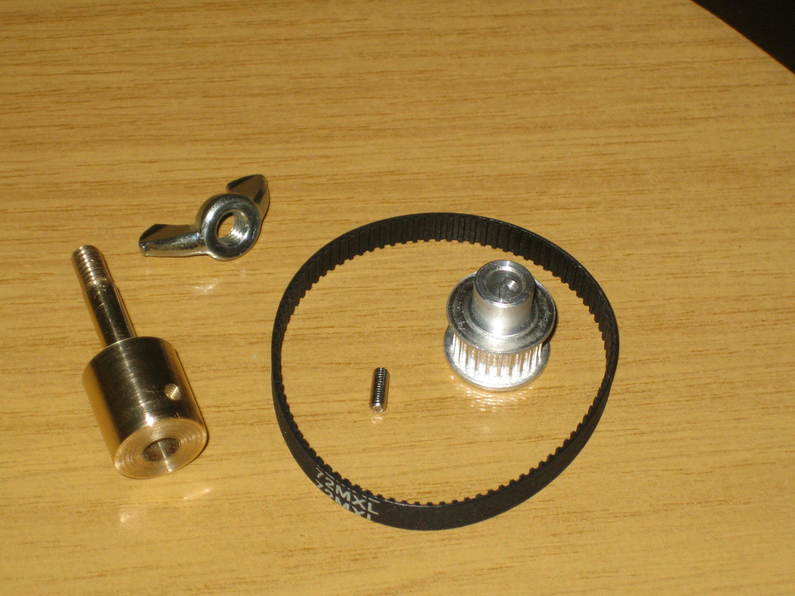
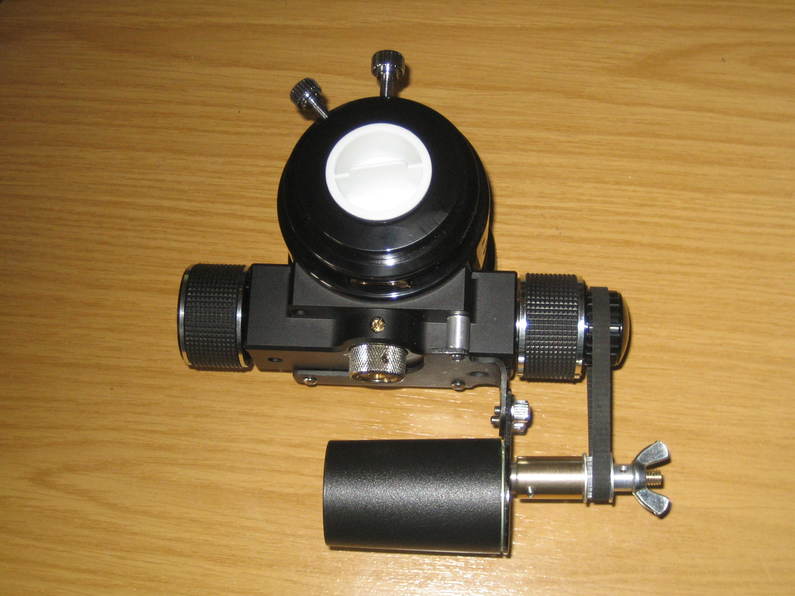
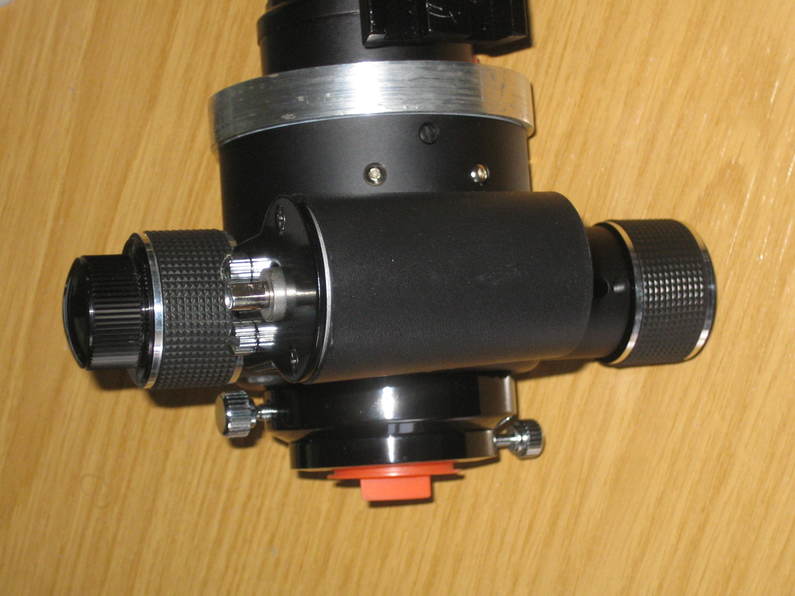
The timing belt and pulley came from motionco. And here it all is assembled:
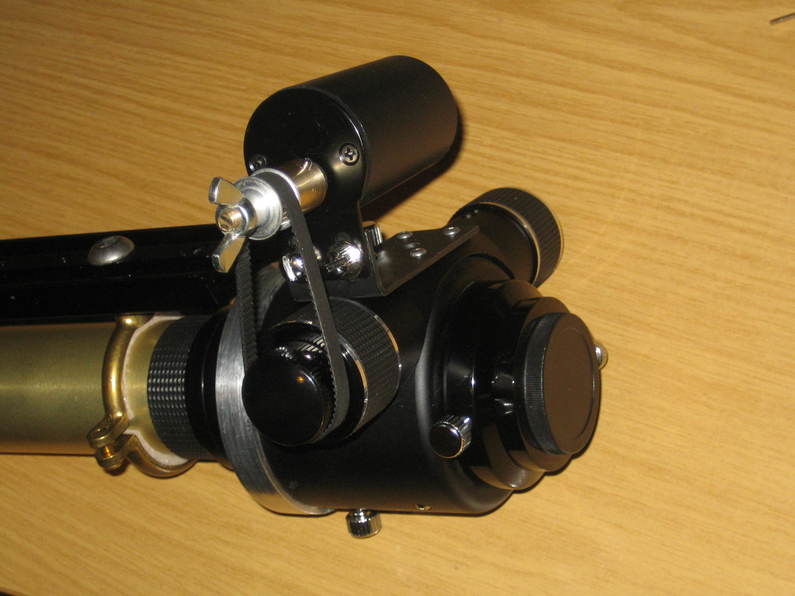
The grubscrew holds the brass extension onto the motor output shaft as normal. The grub screw from the timing pulley has been removed and it is free to spin on the extension shaft. With the wingnut done up the pulley is clamped in place and turns the fine focus knob when the motor turns. By releasing the wingnut half a turn or so the pulley spins freely again and allows the focuser to be used manually.
Part of the motivation for doing this now was as a test run for motorising the Revelation dual-speed R&P focuser I have on my C9.25 which is very similar but without the convenient mounting points for the motor bracket. I think I see a way to do that now though, so as soon as I can get some more brass I’ll get on with it. However, I’m also now having thoughts about motorising the etalon tuner on the PST, perhaps modding the motor drive handset to drive either motor by adding a selector switch, for completely “hands-free” imaging.