Having read a posting on Stargazer’s Lounge about converting the EQ3-2 to direct(-ish) drive on the DEC axis, I thought I’d have a go myself. My EQ3-2 mount is one of the older models with a “Sky Scan 2001” logo and finished in something resembling Hammerite black.
The manufacturer of these mounts has a reputation for using something more akin to glue than grease for lubricating the gears and one of the first recommendations for improving any of them is to split the mount, clean the grease off and regrease with something that more closely resembles a lubricant. A little apprehensive as I’d never seen one taken apart before, I took the mount over to the workshop and made a start.
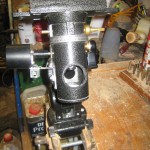 First job is to remove bar for the balance weights from the bottom of the mount and the cover for the top end of the polar scope. Through the hole you should just be able to see the bottom of a 17mm nyloc nut at the bottom end of the DEC spindle. That needs to be undone by turning the nut in the centre of the mount saddle (16mm, oddly).
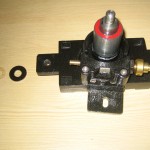 With the nut undone you need to fiddle it, the plastic washer and metal washer out of the inside of the mount. Having small fingers really helps here. Sadly I don’t. Then the entire saddle and DEC drive lifts off. Remember that for re-assembly the metal washer goes on first and the plastic washer goes between it and the nut. More on that later.
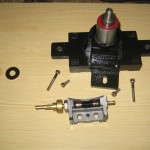 Next to come apart was the worm drive housing. This is held on by four allen bolts, two long ones that fit into the saddle from what is usually the bottom, and two short ones that fit horizontally (and have a grub screw between them for adjusting the tension between the DEC gear and the worm. With those out, the DEC housing just lifts off. You can see the full extent of the horrible black gunk used instead of a lubricant now.
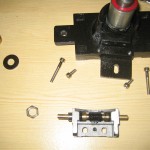 The worm drive will come out for cleaning properly. It’s held in at one end by a bush with an external thread. The bush screws into the worm gear housing and keeps the brass worm drive firmly located in the bush at the other end. The bush is locked in position with a lock nut that has to be undone first.
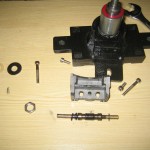 Once the lock nut is off it’s possible to remove the threaded bush. There are probably several ways to do this. The bush has a couple of slots cut into the top edge and I found a screwdriver that would fit one and turned it using that until it was loose enough to undo with my fingers. If you happened to have another nut that fits you could lock the two together at the end of the bush and use them to unscrew the bush. In theory it should then be possible to withdraw the brass worm gear, but I found I had to clean a lot of the black goop off before it would actually feed through the hole.
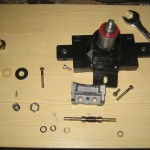 On the worm drive are a number of o-rings, washers and bushes that also need to be removed and cleaned. I thought the washers were black when I first took them off, but they’re actually clear plastic. Looking at this photo I’m sure there’s another bush that I’ve left in the housing at the right hand end. I’d not be surprised to find another o-ring behind it, either. I shan’t worry too much that I’ve missed those.
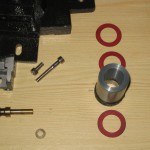 The final item to remove was the DEC bearing. This just lifts off. I found two red washers on the top (as it appears here, but the bottom in its normal orientation) and one at the other end. I then collected up all the icky black bits and took them off to clean them properly. I’m told that isopropyl alcohol or brake cleaner work well for this. Not much else seems to with the exception of towels, curtains, door handles and anything else you never wanted to get the stuff anywhere near.
Once cleaned up, reassembly is simply the reverse of disassembly, as it says in all the best workshop manuals, putting some decent grease onto the gears as you go. There really aren’t too many tricky bits though. The first is to get the worm drive retaining bush screwed in far enough so there is no lateral movement in the worm. It’s easier to get it roughly right and then get the housing mounted onto the saddle at which point it can be wiggled around to see if there’s any play. If you overdo it, the worm becomes hard to turn. The intention is to get everything to run as freely as possible whilst removing as much play as possible.
Next is getting the tension between the worm drive and the DEC axis gear correct. Once the housing is held in place with the long allen bolts, the short ones can be fitted. Try to get them so the housing first as square as possible. The game is to undo the grub screw and take up the slack squarely with the allen bolts without making the worm bind against the DEC gearing. Very small changes can make a big difference here. I found that an eighth of a turn on the allen bolts could make the difference between turning freely and binding.
Finally, putting the washers and nyloc nut back on the end of the DEC axis through the polar scope cut-out. If you have small fingers it might be easy. I found it simpler to turn the mount upside down meaning that the washers could be dropped over the threads and the nut held in place with pliers until the threads were engaged, avoiding dropping them all down inside the polar scope “tunnel”.
