
In the end I couldn’t find a single application that would do what I wanted, so I just decided to start cutting tracks and see where I ended up 🙂

And then spent a happy hour or two soldering in all the headers,

Finally adding all the string to join the various bits of track together.
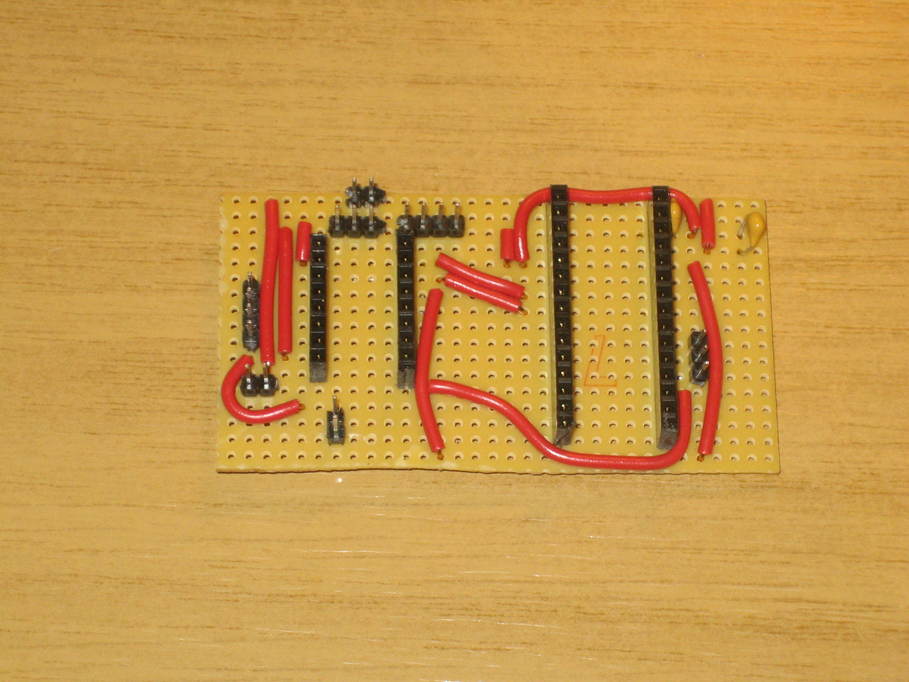
Oh, I put the two capacitors in for the voltage regulator too.
Next is a bit of testing to make sure I don’t have any bridged tracks where I don’t want them. There is actually one place where I deliberately bridged the tracks with a lump of solder. The DRV8825 “sleep” and “reset” pins are next to each other and both clamped to the 5V output of the Nano, so I just dragged a lump of solder across the tracks they use.
Once I’ve checked the soldering over there’s not a lot left to do — the resistor network for the pushbuttons, current-limiting resistor for the buzzer, two resistors and a diode for the supply voltage sensing, another couple of diodes, a capacitor and the voltage regulator and I think I’m done. I may need to break a few more tracks to fit all of those in, but that’s not a problem.