
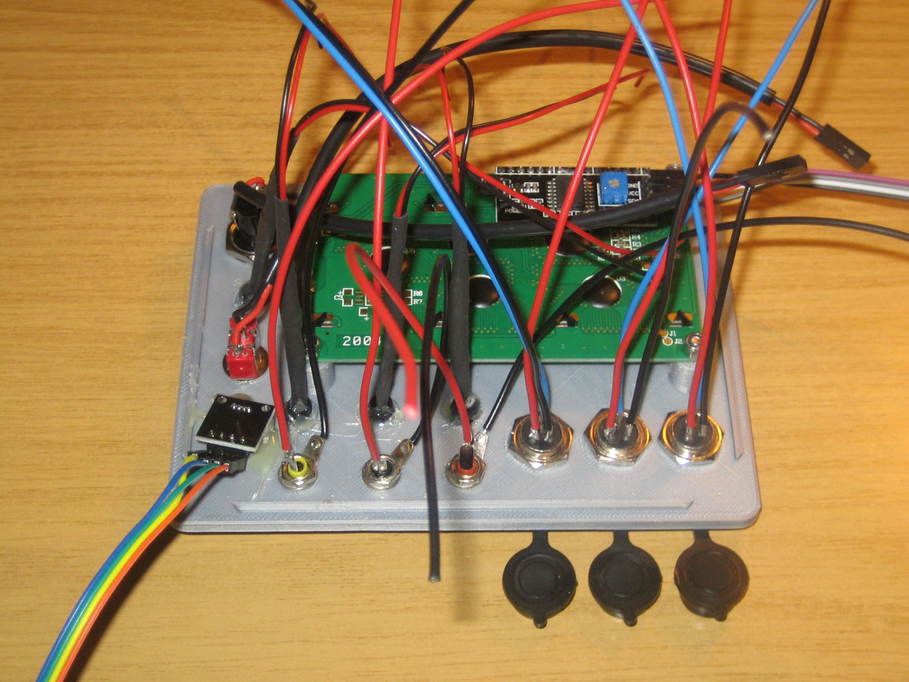
The lid, complete with all wiring.
That’s almost all the soldering done. I think there are just the temperature sensor plugs and possibly a power cable to make up (I think I’ve run out) that will require more soldering work.
There are a few little gotchas here: the pinouts of the RGB LED at the bottom left, and the display connector at the top right don’t match the pinouts of the connectors on the PCB, so I’ve had to swap the ends around to get the order correct. The carrier board for the RGB LED was also quite awkwardly made in this instance — the LED was soldered very close to the board which didn’t leave me much room for manoeuvre when connecting the lead so it wouldn’t foul the side of the case. It uses a 90 degree pin header and I ended up bending it with pliers to make it more like 45 degrees. I assume that’s “natural variation” in manufacturing QA, as the first one wasn’t that awkward.
And of course, don’t do what “a friend of mine” did, and connect up all the GX12 sockets with their nice little caps to keep out dirt and moisture with the caps up the wrong way, then have to undo them all and put them on again the right way around. I, err, He felt such a fool when he realised.
Now I need to make up all the pin header sockets on the other ends of all those LED, heater and temperature sensor wires.