In an earlier post I said I’d write up the build of my second dew controller, so if you’re not sure it’s for you and need to see how someone else did it, this is it. There are a few optional bits of the build and the instructions aren’t always clear what applies to which bit, so for clarity here I’m building the three-channel MOSFET-based system using a twenty row by four line LCD display with a DHT22 humidity sensor. I didn’t build in the Bluetooth interface and I also didn’t bother with the additional switches to force the heaters full on because generally I’ll be operating my kit remotely, even if it is only from the warm room. I’ll also be putting mine in a 3d-printed box that I’ve designed myself because I couldn’t find anything I really wanted off the shelf.
If you’re concerned about the level of expertise required, I am not and nor have I ever been an electronics engineer. I’m happy enough with a soldering iron that I know not to grab the hot end and I did do an AO Level (or whatever they were called) in Electronics in the mid-1980s, though most of that was theory and we rarely got to play with components, nor even design anything very complicated.
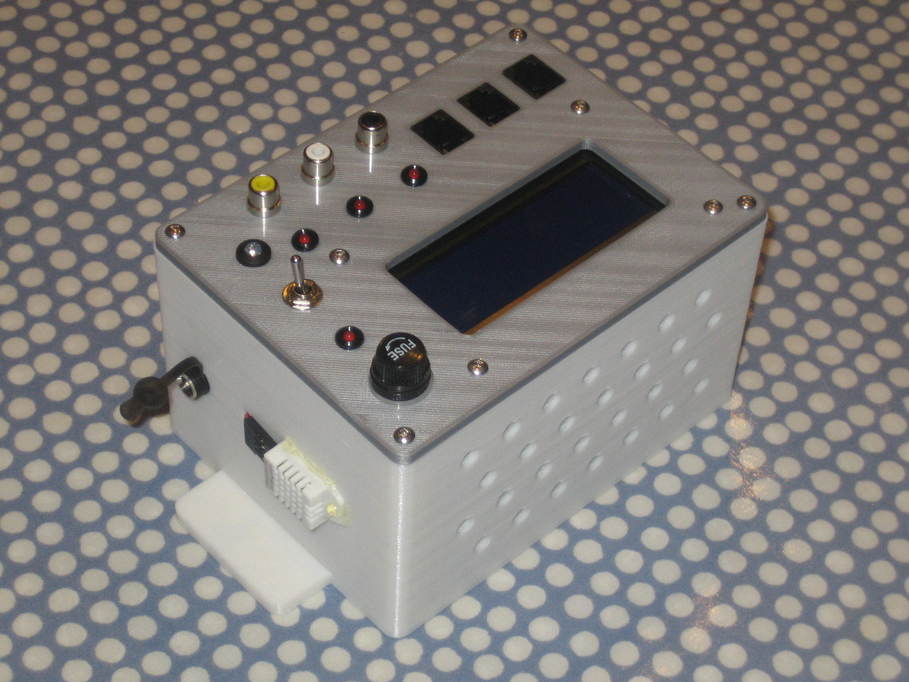
This is what my completed first build looks like (two-tone, because I ran out of white filament, though I quite like the look so I might do the rest that way deliberately.
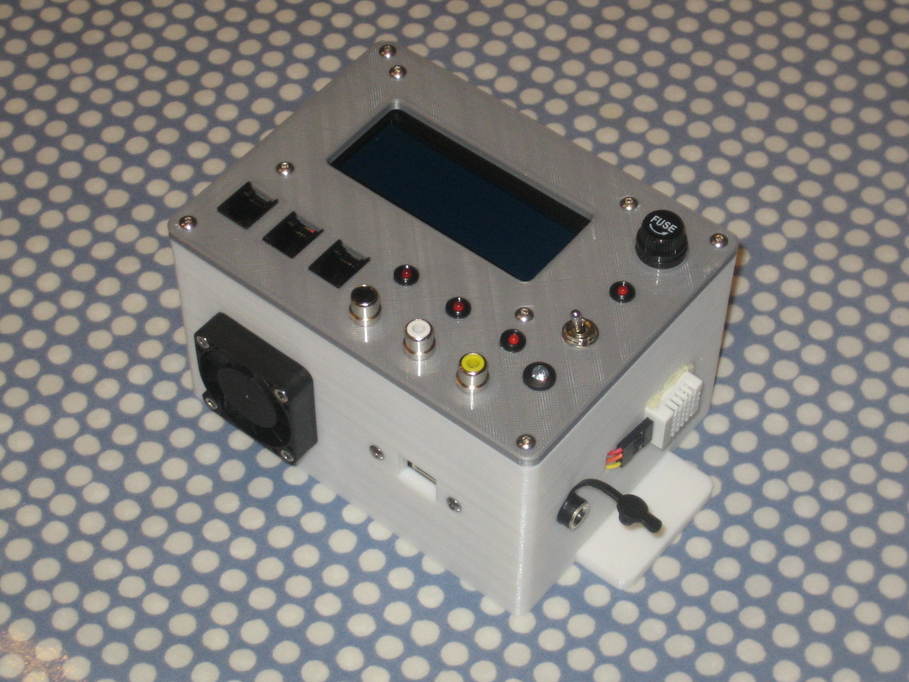
On the top are the three temperature sensor sockets, three dew heater sockets, three LED indicators for the headers, a fan speed indicator LED, on/off switch, power LED and fuse. The long side has a fan and the USB socket and the short side has the 12V supply socket and DHT22 humidity sensor. The other long side has ventilation holes in: