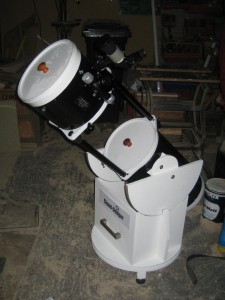
I’ve quoted the word ‘build’ because in some respects this turned out not to be. However, there’s a fair bit of woodwork involved, so I reckon it still counts…
Some months back I wrote that I had obtained a 10″ mirror set and focuser to use as the basis of a project to build my own dobsonian scope. Well, it languished under my desk for quite some time waiting for me to find time to sort a tube out to house it all. And waited… And waited…
Then the opportunity to acquire the tube only from a Skywatcher 250PX flextube came up. It was a little bit “second-hand”, having a few dings in the tube and so on, but was basically sound. In the knowledge that it would actually move the build on a fair bit I decided to purchase it and shortly thereafter it was sitting in my workshop.
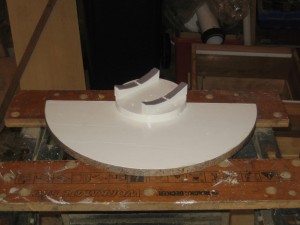
My plan had been to build a standard “small dob” design as outlined in the back of Berry and Kriege’s “The Dobsonian Telescope”, but the major problem with that was fitting the cradle to carry the bearings onto the tube. There just wasn’t any neat way to do it to allow the trusses to open and close. I didn’t have the bearing attachment fittings from the original tube, but eventually decided that making up something similar would be the most sensible way to attach the scope to the alt bearings. To match the outside diameter of the tube I measured the circumference, made up a paper template of the same size which I used to mark out some pieces of 12.5mm softwood and cut them out using a bandsaw. I also cut two 150mm diameter circles from the same timber to which I screwed and glued the curved sections in the correct positions to match the mounting holes in the tube. Finally those circles were screwed and glued to two 18mm ply semi-circles (the alt bearings) such that when the straight section of the bearing was horizontal, the tube was at 45 degrees. Once painted white I drilled out the mounting holes, lined the faces that would press against the tube with self-adhesive felt and glued a length of worktop edging trim to the running edge of the bearing using contact adhesive. That gave me two of these to support the scope on the rocker box:
Berry and Kriege recommend using bearings of 1.8 times the tube diameter, but I went for 1.8 times the mirror diameter instead.
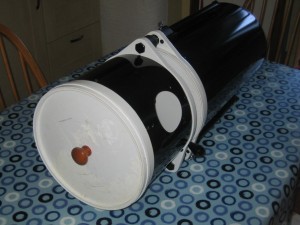
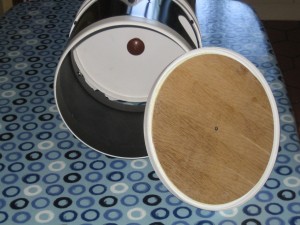
It was then possible to finish off the tube by fitting the mirrors and focuser, but I didn’t want the mirrors to get dirty or damaged and I didn’t have any caps for the open ends of the tube. Whilst casting my eyes around the workshop wondering what to do I noticed a couple of empty emulsion paint tubs. They looked a likely size. Sure enough, they fitted very neatly. I cleaned them up, cut a couple of discs of 3mm ply to fit inside the tube, glued the ply to the underside of the lids, fitted some scrap wooden knobs and ended up with two usable covers for the tube:
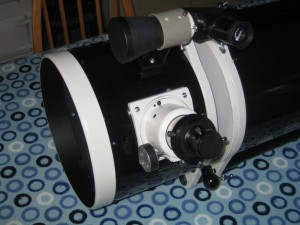
Those done, I fitted the primary, secondary and focuser using stainless allen bolts. I also fitted the binocular objective finder that I made a short while ago:
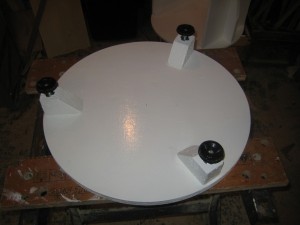
The next step was to build the ground board. For this I used a 500mm disc of 18mm ply. I wanted adjustable feet because there’s very little level ground around my house, so I cut some blocks, drilled out a 12mm channel down the middle of each and tapped in an M10 T-nut. These were glued and screwed to the ground board and some M10 adjustable feet (£2 for four from ebay) screwed in:
The channels allow room for the threads on the feet to move up and down without fouling the ground board.
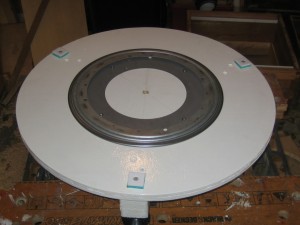
On top of the ground board I fitted a 300mm lazy susan bearing (£12, also from ebay) as the alt bearing and some 30mm square teflon pads for the outside of the rocker box bottom to rest on, shimmed to the same thickness as the lazy susan bearing using some scrap plastic from a broken box that many years ago held a child’s colouring set:
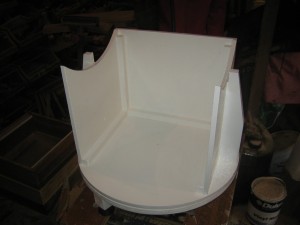
To construct the rocker box I fitted the alt bearings to the tube (more stainless allen bolts) and measured the distance between the outside edges of the bearings. That set the width for the rectangular front of the rocker box. For the sides B&K recommend they be the same width as the cradle, but I didn’t have a cradle, so I estimated what it would be had I had one and used that instead — basically the tube diameter plus 25mm. As luck would have it when I tried all the dimensions out on the ground board, it (only 🙂 just fitted. I’d used a home-made jig for my router to cut the bearings, so I adjusted it to give me a 3mm larger circle and cut the tops of the rocker box sides using that. To get the height correct I calculated the distance from the centre of rotation of the tube to the back of the bottom edge and added 75mm, then subtracted the bearing radius and 3mm to get the required height at the bottom of the curve on the rocker box sides. You’re following this so far? Good. There’ll be a test at the end 🙂 These three parts were cut from 12.5mm ply.
To finish the rocker box off, I cut another disk to match the ground board, this time from 12.5mm ply, some lengths of softwood to brace the joins and two side braces which extend about 25mm above the height of the sides and stop the bearings moving sideways:
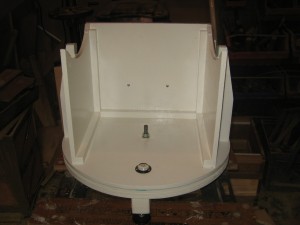
Finally I fitted some 40mm lengths of 3mm teflon sheet to the top edges of the sides using nails tapped below the surface of the teflon, and drilled the centre of both circular boards to take an M12 bolt. The bolt passes up through the bottom of the ground board and is fixed in position with a half nut. It then passes through the rocker box bottom and is held gently with a washer and nyloc nut. I also fitted a buikhead level and a carrying handle to the front:
Other than some of the non-essential parts, which is generally something I avoid, all that remained was to put it all together:
You may notice in that last image that the focuser has changed. A focuser from a Skywatcher MN190 came up and I decided to fit that instead. I’ll do a first light report separately and some notes on how it works out.

