My EQ3-2 mount came with a pair of motors installed for the RA and DEC axes. I’ve had no major issue with the RA motor, but backlash in the DEC axis was very bad. Up to now my experience of the DEC adjustment has been that it takes five to ten seconds to take up all the backlash and then the target can shoot off the screen before I can lift my finger off the controller button. I’ve already described how I stripped and cleaned up the DEC axis gearing itself. That done I was inspired by this SGL thread to convert the DEC axis to direct drive, losing a couple of gear wheels and a rubber clutch in the process.
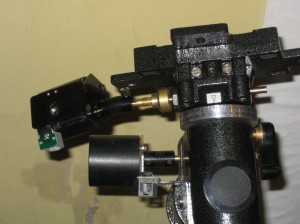
As part of my 127 Mak Motor Focuser project I had a Skywatcher motor focuser drive. It came with a springy plastic “universal joint” couplings that I wasn’t going to need so it got donated to the direct DEC drive project (see my note at the end for an alternative). I removed the gear from the end of the DEC gearbox output shaft and replaced it with the coupling. I also removed all the extra gubbins that goes on the end of the DEC worm shaft when the motor drive is installed as per the manufacturer’s instructions. My initial plan was to directly couple the drive to the shaft, but whilst that may be possible, to avoid fouling the mount body it means the motor has to be turned to what is a very awkward angle to mount to anything. In the end I reinstalled the brass extension that comes with the drive kit to give me more room to play with. It meant that the motor could be lined up with the mounting bracket at right angles to the original mounting lug and with enough room not to foul the mount as it turns. Here’s the motor connected up to the worm drive, but otherwise unsupported:
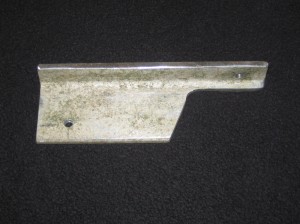
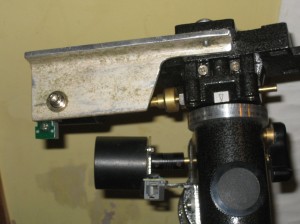
As luck would have it my father-in-law had just used a length of ~5mm thick 90 degree section aluminium and left the scrap on his workbench, so I found myself with an ideal piece to make the mounting bracket for the motor. I cut off some of the excess width on what would become the top (I used that offcut in the focuser mod in the end) and enough of the side to leave easy access to the DEC worm tensioning screws. In one end I drilled a 6mm hole to allow the original mounting screw to be used with the motor mounting bracket (though it needs a couple of washers as spacers) and in the top at the other end I drilled and tapped an M6 thread to allow a second M6 bolt to fix the bracket to the mount:
Final indoor testing has been done this evening and everything seems to work well. Now I just need to give the bracket a coat of Hammerite black to match the mount. Too cold for doing that at the moment though. Outdoor testing will happen as soon as we next get clear skies.
The final step to improve the DEC response is to get the gearbox backlash improved if possible. I’m waiting for some isopropyl alcohol to arrive so I can use it to clean up the horrible grease that’s all over the gears before I do that.
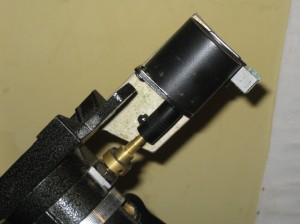
Finally, some photos of the “front” and “back” views of everything assembled.
(The photos show my DEC power connector in a different place from normal because at some point in the past the section of PCB has snapped and a repair was required.)
In the event that you don’t have a handy spare connector for the drive shafts, it looks like Technobots might be a good source. Be aware that the motor drive output and worm drive extension may well not be the same diameter. Mine were 5mm and 6mm respectively.


