In those years where we have a proper summer (not since about 2006 now), I put “waste” beeswax and old combs into my solar extractor to melt down the wax. In 2011 we didn’t really get that much decent wax-melting weather though, so I ended the year with about fifty frames of comb I wanted to melt down. Some bee equipment vendors sell steam-powered extractors, but want far more beer tokens than I am prepared to pay. Hunting around the interwebs I found a few ideas and here’s what I ended up with. It uses an old steam wallpaper stripper to make the steam. The “head” of the stripper was removable, so I could use just the heater unit and the flexible hose.
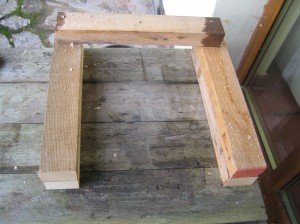 I started with an old “bench” — actually a table that I believe my dad built for putting motorcycle engines on whilst he was working on them. On that I built a “Jenga”-style base of timbers about 50cm long so everything on top would be tilted forward.
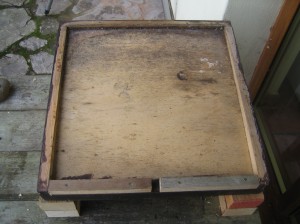 I have a number of old solid floors that I no longer use and was willing to sacrifice to the project, so one of those went on next. Where the entrance block would normally go I screwed two blocks of wood to leave a gap about 20mm wide in the middle of that edge of the floor.
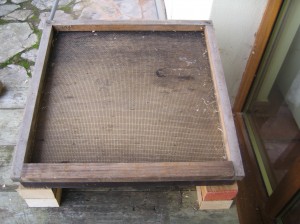 On top of the solid floor goes a mesh floor. This one had its entire front edge open for an entrance block, so I closed the entire length with another block of wood. This floor stops rubbish from falling onto the solid floor and blocking up the hole (that the molten wax will eventually run from).
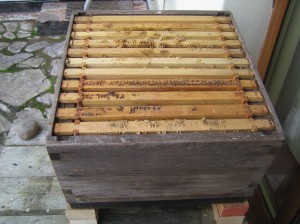 On top of the mesh floor goes the box of frames to be melted down. I was prepared to sacrifice this brood box because it doesn’t have space for frame runners and was in need of some repair work, but actually it doesn’t seem to have come to any harm despite being repeatedly filled with steam.
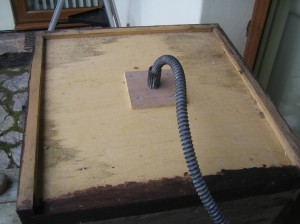
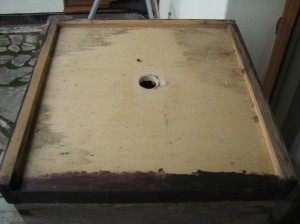 I needed a “lid”, and a second solid floor did the job. I cut a small hole in the top for feeding the steam in. I can’t recall the exact diameter of the hole, but I believe it’s around 40mm to 50mm.
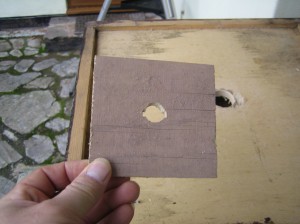 The end of the wallpaper stripper hose had two lugs to lock it into the head. To allow the same mechanism to work for my melter I cut a small piece of ply to take the hose with some cut-outs for the lugs. The hose can thus be pushed through ply and turned to hold it in place.
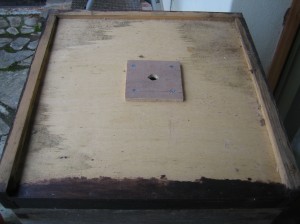 There’s the hose “socket” fixed in place. The hole in the floor is large enough that the lugs on the hose won’t foul.
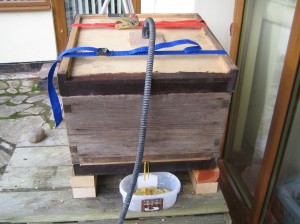
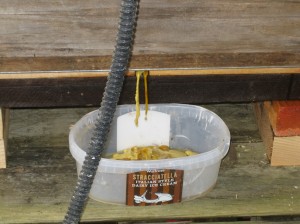 Finally, a couple of photos of the extractor in action. To help seal the box so steam can’t escape from the joins I use a couple of ratchet straps to pull it together firmly. I fill up the stripper reservoir and leave it to run for about half an hour, which is usually enough to melt all of the wax from the combs.
Once the wax is melted I allow the box to cool and remove the lid. The frames clean up fairly easily and should be sterile for re-use if necessary (old frames I don’t want get used as kindling for our wood-burner). Even propolis scraps off without too much trouble. Extracted brood frames tend to collapse leaving blackened cocoons on the mesh floor. I remove those and put them on the compost heap.
This autumn I melted down my entire pile of waste wax and old frames, ending up with about 6kg of wax, some of which I’ll probably exchange for foundation and some I’ll make into candles.
The only real negative side of the extractor is that wasps and bees find it irresistable. It’s probably a process that’s best saved for the winter months, or done somewhere well out of the way of other people.

Thanks for the model! We have here, in Chile, Central Valley, many many solar hours each year, (from november 23 -2014- until today, jun 30th, just 3 weeks cloudly. The other day by day: sunny a lot. Every days is for a picnics!!
We are going to be an experiment in our own apiarius.
Thanks a lot.