
Like almost everything in my life, this has taken a lot longer than I was hoping, mostly because I ran out of steam a bit, partly thanks to the weather being so poor, but also because it took some time to decide how I was going to put it all together. However, recently I finally finished construction of a dew controller built to plans originally put together by Robert Brown and am now in a position to start testing. It’s all in a 3d-printed box because I couldn’t find anything with a design I liked in a suitable size, though in fact the box had to go through a few iterations because there’s an awful lot of wiring and getting something that wasn’t too big that I could still get my fingers inside to connect everything up turned out to be a bit of a challenge.
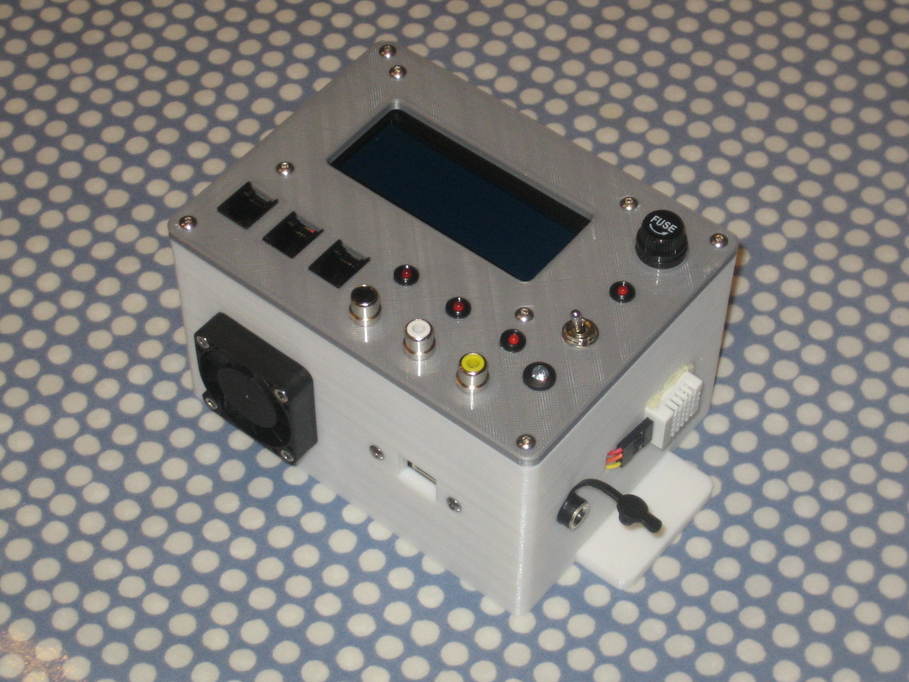
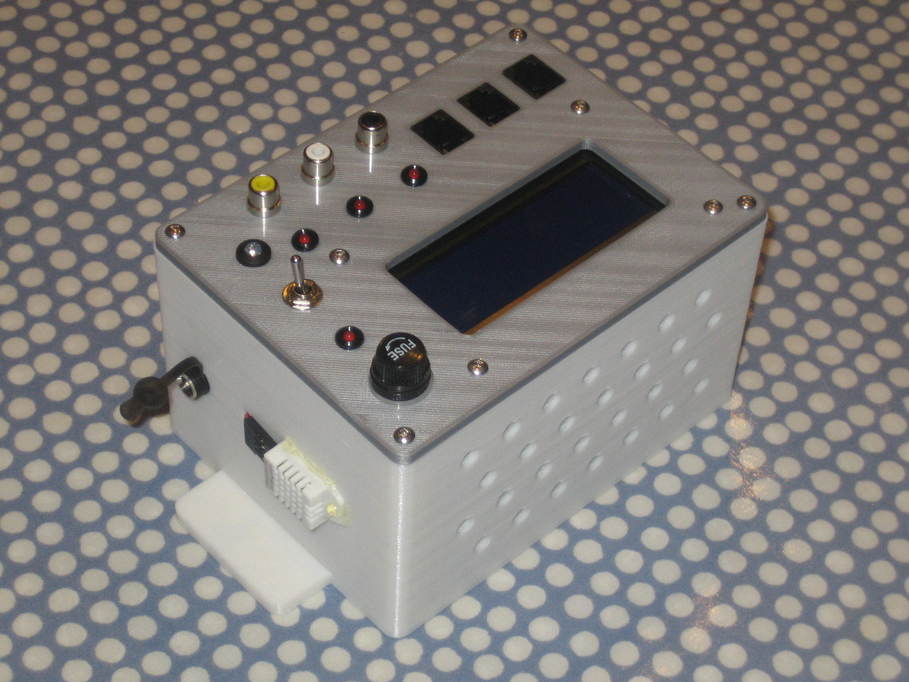
Initial thoughts now I’m nearing the end for this first one are that I’m really quite impressed. It’s not a hard build and looks like it should do the job well. Probably the most tricky part is fitting it all in a case of a reasonable size. There are eighteen components that don’t go on the PCB in mine, and I even left out the “give it max welly” switches for the heater strips. That’s an awful lot of wires and means there’s a bit of a balance to find between the placement of all the plugs and sockets and the sizes of the case needed to fit them in. Putting most of them on the top of the case makes for much easier fitting in a smaller case, particularly for someone like me who doesn’t possess the most delicate of digits, but it does mean wires end up spewing out of the top of the case once everything is connected.
I’m not that happy with the LED bezels. I bought from several different Amazon/Ebay vendors and they’re really all pretty skanky. Whilst I did use them in the end, I also applied a bit of hot-melt glue to the inside to keep them in place properly. That’s no fault of the controller design though, just cheaply-manufactured plastic tat.
There are probably three awkward bits. The first is down to my decision to fit pin headers for all the off-board components. The pin headers are nice and easy to fit, but then I ended up making a loads of connectors to go on them, crimping the sockets onto individual wires. That was exceptionally tedious.
The second is down to the use of 6P4C/RJ11 connectors for the temperature sensors. This isn’t of itself a bad idea because lots of 1-wire kit uses RJ11 or RJ45 plugs which means the sensors can be used elsewhere if the “standard” pinout is retained. The problem really comes down to not being able to find any reasonably-priced way to connect wires to the sockets. It’s possible to buy little break-out boards for the sockets with solder pads to connect wires onto, but they’re over £6 each and I wanted a total of nine for the three controllers I intend to build which ramps up the cost a bit. There are some available with screw terminals, but they’re huge. At one point I did seriously consider getting the gear to make my own PCBs and do them myself. It would probably pay back when it comes to making the PCBs for the focuser units that I intend to build once the dew controllers are done. In the end though I just soldered the wires direct to the pins of the RJ11 sockets and sleeved them with heatshink. Not particularly neat given the pin spacing and the fact that my eyesight isn’t quite what it used to be.
The RJ11 sockets are actually quite awkward to fix in place in the box too. Because mine was 3d printed I ended up making the openings very close to an interference fit and then getting out the hot-melt again 🙂
The final thing is that some of the diode leads don’t fit the standard hole size in the PCB. I bodged it for this build, but for the next one I might well take leads off the board to a terminal block and fit the diodes there.
The only teensy-weensy little criticism I might possibly have of the project is that the documentation is a bit haphazard and I’m not sure all of it is in sync with the different versions of the design. Patience gets you there though. It’s not a huge deal.
Now I have a better feel for what I’m doing I intend to record the next build and do a step-by-step write-up to help anyone else who wants to give it a go. I’m sure anyone who can wield a soldering iron accurately (not a lot different from being able to colour in between the lines, really) could manage it.