
Last week someone asked about a guide to stacking planetary images using AutoStakkert!2 (hereinafter known as AS!2) and I said I’d write something up. A few days later than I imagined, I’ve got around to it. This isn’t meant to be an exhaustive explanation of how to go about stacking planetary images. It’s more of a place to start from. I’ve ignored many of the options that you can get by without at first and glossed over a few things that you can pick up once you get into the swing of processing.
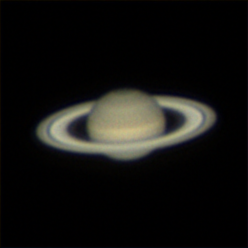
The sample I’m using is one of my own, taken using a 127 Mak on an EQ3-2 with the dual-motor add-on. I used a 2x barlow with my ASI120MC camera to capture about 3000 frames over five minutes which is well within the limits imposed by Saturn’s rotation. As long as you have an AVI file saved using a sensible (ie. non-lossy) codec however, you should be fine and the processing will be pretty much the same. It is possible to use sequences of single images, too. I’ve just never tried that for planetary imaging.
The first thing I do is preprocess the AVI using PIPP. This isn’t strictly necessary, but because the tracking on my mount isn’t that great I can’t capture data from just a small area of the camera sensor and there’s usually a fair bit of empty space around the image. PIPP allows me to crop this off and recentres the image to make the stacking faster and easier. I just load the AVI and check the “Planetary” option to set appropriate defaults:

Then I set the output frame size. As you can see above I had a 640×480 frame in the AVI. In the Processing Options tab I set the output size to be 250×250:
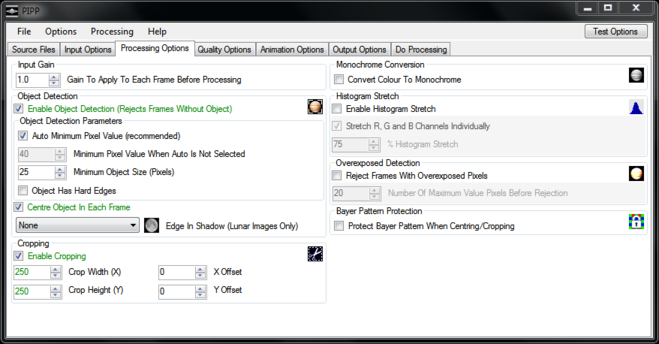
Unless you know why you want to change them, I’d leave all the other options along for now. Hit “Test Options” to get a window to show what the output should look like:
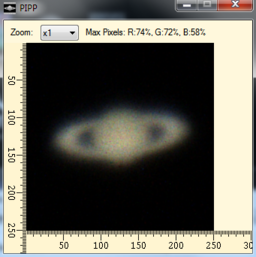
There’s clearly going to be enough room around the image, so I’m happy with that. If you’ve chosen too small a size you can go back and change it. This also gives an idea of the quality of my input data. Once everything looks right, go to the “Do Processing” tab and click “Start Processing”. This may take a while…
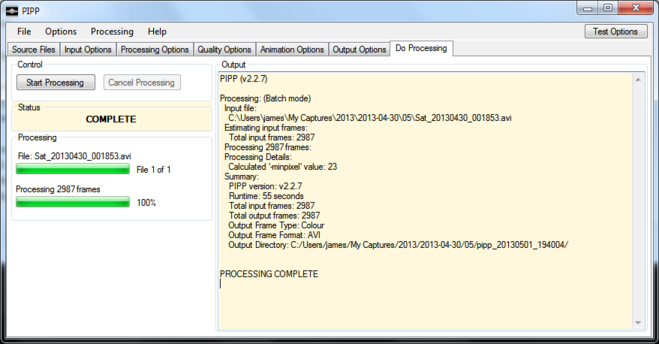
Once that’s done you’re finished with PIPP. It saves its output in a new folder beneath the one you loaded the AVI from. The location is given in the output in the window on the right.
Now start AS!2.
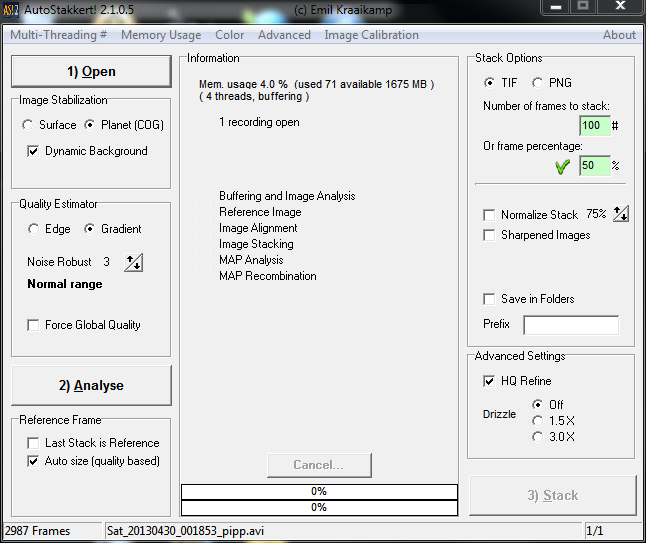
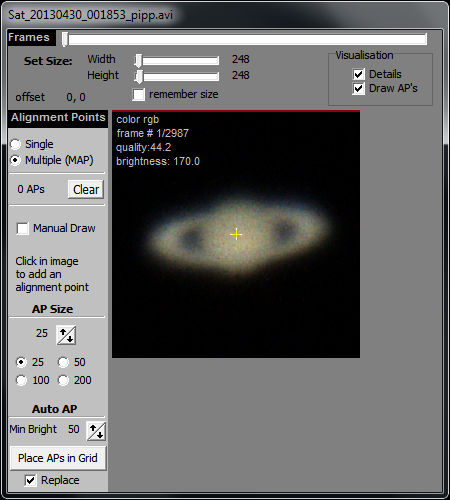
Click “1) Open” and open the AVI file written by PIPP. It will display the first frame in a new window:
Click “2) Analyze” and AS!2 will scan the images to decide how good they are, producing a graph in the first window:
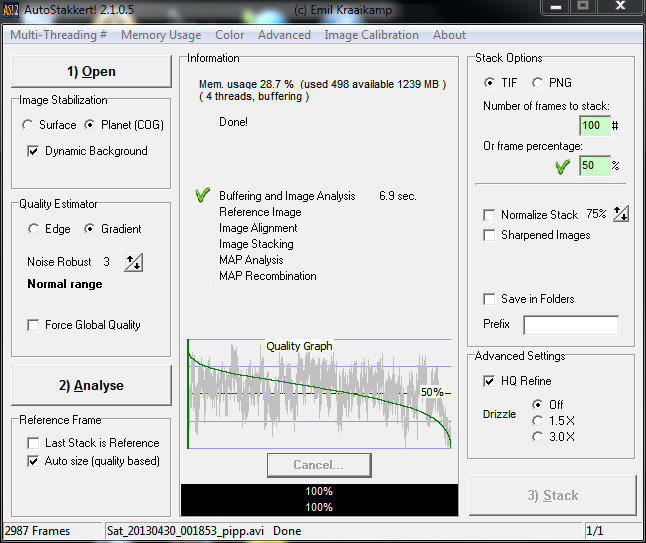
The grey lines are the quality of each frame in order. The green one is the quality level with the frames re-ordered by quality. At this point you can decide how many frames to stack in the “Stack Options” box at the top right. With this sort of graph I’d probably leave it somewhere near 50%. If you have lots of poor frames or lots of very good frames you might adjust that to try to use as many good frames as possible whilst avoiding the bad ones. Leave the other options for the time being.
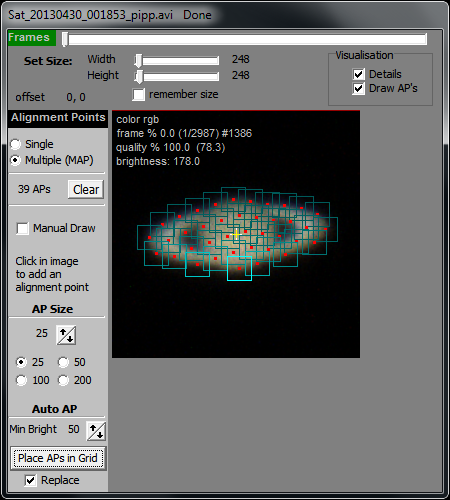
Now go back to the other window with the capture frame displayed. You need to set the number and size of the boxes used for stacking. There’s a lot said about box sizes and placement, but to get started and for an image of this sort of size I’d choose a box size of 25 and let it place the boxes automatically by clicking “Place APs in Grid”. It may be possible to do a better job than this, but you can always come back for a reprocess on those rare cloudy nights.
Then go back to the first window and click “3) Stack”. AS!2 will spend a while processing and eventually tell you it has done 100%:
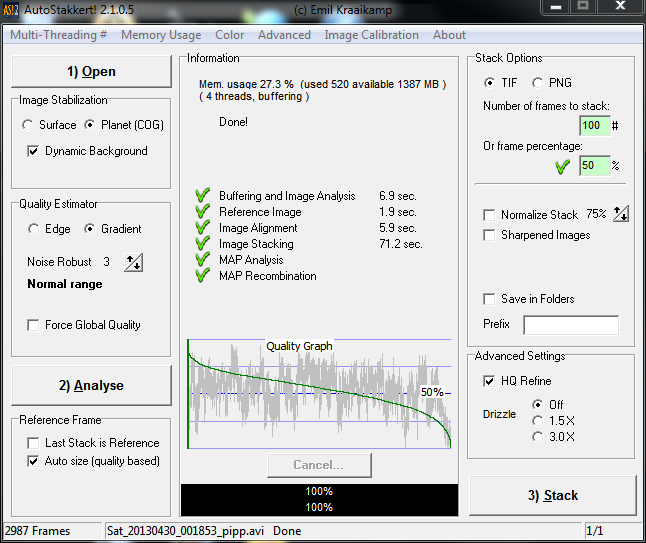
In the folder where PIPP placed the AVI file there should now be a new TIFF file with a name starting “AS…”. That’s your stacked image, and you’re done with AS!2.
The final stage I do with Registax v6. I click “select” and load the TIFF file. You’ll see Registax drops you straight into the wavelets section
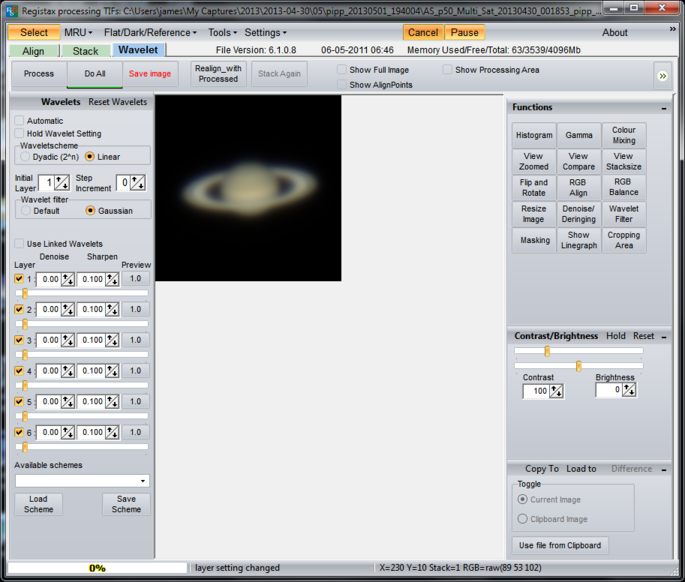
The first thing I do is sort the wavelets out. This is a reasonable image for me, so I got really quite aggressive with the wavelets:
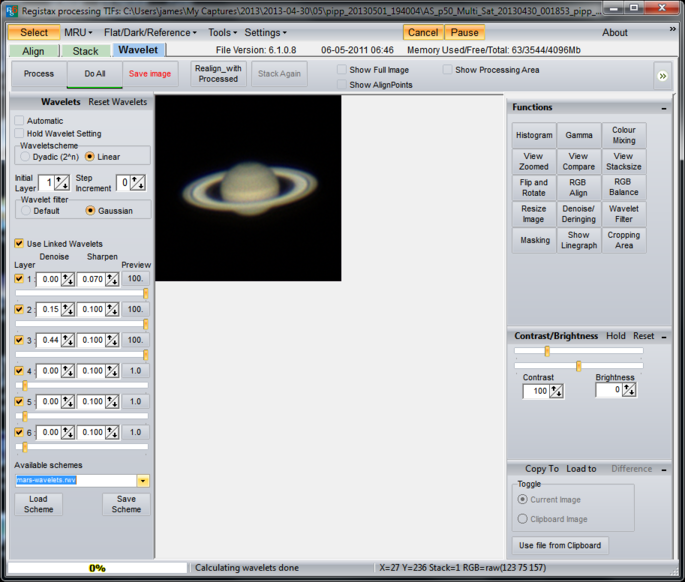
If you look at the image now you’ll see that there’s a slight red/yellow tinge to the front of the rings, and they’re slightly blue at the back. It’s hard to see, but it is there. Many planetary images will be like this if they’ve been captured in colour. In fact it’s quite rare in my experience for it not to be present. It’s due to the atmosphere diffracting the different colours of light by different amounts, shifting blue and red away from each other. Fortunately Registax has a tool to help with this. Click on “RGB Align” in the Functions section. A dialogue box will appear with a green box over the image. Stretch the green box until it surrounds the image with some to spare and then hit the “Estimate” button.
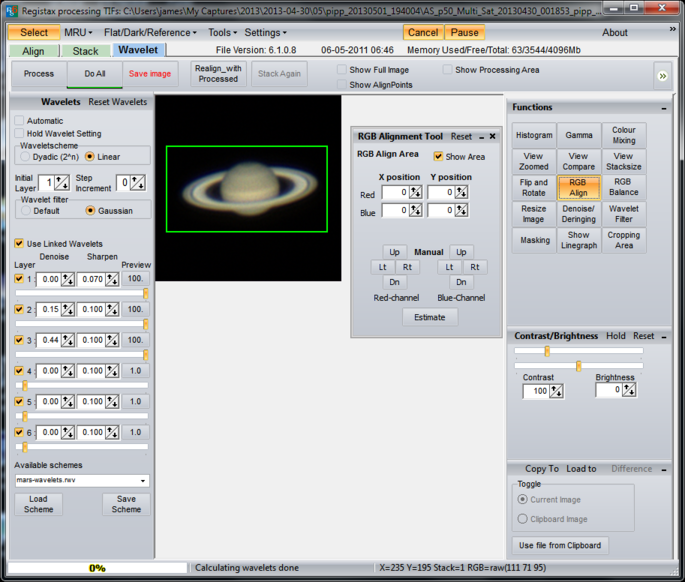
Registax may not get this perfectly right and it may be necessary to tweak the colour shifts manually. See what you think when it’s done. You’ll also find that some of the sharpness may have disappeared from your image. Don’t worry about that for the moment.
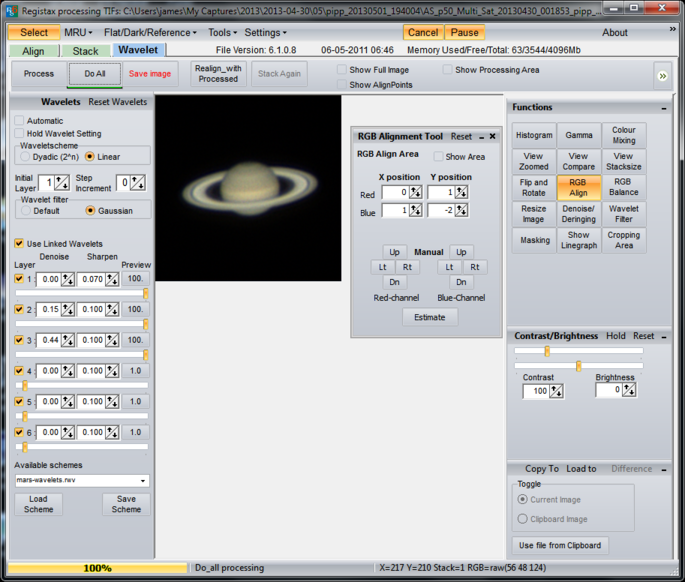
Registax has lots of other things you might play with in the Functions section, but for this image I’m mostly happy as it is. It may be worth looking at the Histogram graph and stretching the histogram if the dynamic range of the image is fairly compressed. Hit “Do All” which should apply all the transforms to your image and return the sharpness from the wavelets and then save the finished image:
If you have GIMP, Photoshop or some other image manipulation package you can now do your final tweaks.