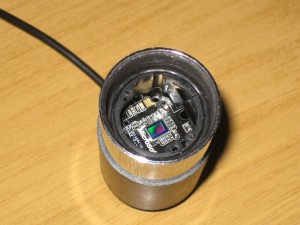
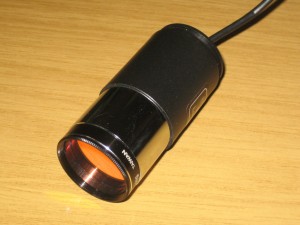
Thanks to the cloud rolling in rather early last night I decided to do the conversion of my Lifecam Cinema for astro use. I was intended to fit it into a Billetparts adapter, but they’re out of stock and I decided I couldn’t wait, so instead I’ve used one of the 25mm eyepieces that Skywatcher ship with so many of their scopes. Pulling off the eyecup and unscrewing the inner lens retainer was easy enough, all the lenses and spacers dropped out and I was left with a neat little package to fit the modded camera into.
For doing the mod I followed Gary Honis’s instructions, though with a few changes:
- Once the retaining circlip for the USB cable has been removed, it makes life easier if the entire cable is removed at this point. The ground clip is easy to ease off the casing using a small screwdriver and the USB plug can be gently levered out of the socket the same way. It has a lip on the side, so just put a small screwdriver under the lip and gently ease it out of the socket
- Once the microphone button has been removed, ignore the instructions to remove the two screws deep inside the casing. They’re a real pain to reach, almost invisible (mine were even painted black) and in fact they don’t actually hold the mount to the casing at all. I did the entire mod without touching them. Once you’ve removed the button and USB cable, skip straight to working on the front end of the camera.
- When you get to the stage of removing the long screw deep inside the camera, the entire mount will drop off in one piece.
- When it comes to removing the lens assembly, undo the two screws that hold it on first. Then apply the soldering iron to the solder pads. The lens is only surface-mounted and will just drop off.
- There’s an oval retaining clip around the hole for the microphone. I removed that when reassembling the camera as it was bound to fall out and or get broken at some point.
Once reassembled, I refitted the backplate to my camera and an O-ring over the front end of the camera body and slid it back into the eyepiece housing. The backplate fixes the rear of the camera body in place and the O-ring holds the front, so it can’t move about at all. To keep the sensor free of dust I fitted an IR filter into the original threads in the end of the eyepiece.
Thanks to Gary for doing the hard work in the first place. I’ve tested the camera and it responds to light, so I now look forward to using it as soon as the sky clears.


